

By the end of this guide you’ll have planned a practical, weather‑ready barbecue shed layout for an outdoor kitchen in Melbourne, estimated realistic costs, and a step‑by‑step installation and maintenance checklist; allow 6–12 hours planning plus trades time for installation, and this assumes a confident DIYer or project manager level of skill.
Before you start
- Project scope and rough measurements of your backyard (length × width × clearance heights)
- Tools: spirit level, tape measure, cordless drill, masonry drill bits, caulking gun, ladder, PPE (gloves, eye protection)
- Materials to source: Colorbond steel sheets or prefinished timber panels, steel or timber frame, door hardware, vents, splash‑rated lighting, GPOs and RCDs for power
- Documentation: site photos, property title setback rules, and any existing outdoor kitchen appliance specs
- Budget range and contingency — plan 10–20% extra for customisations and council fees
-
What is a Barbecue Shed and Why Choose One for Your Outdoor Kitchen?
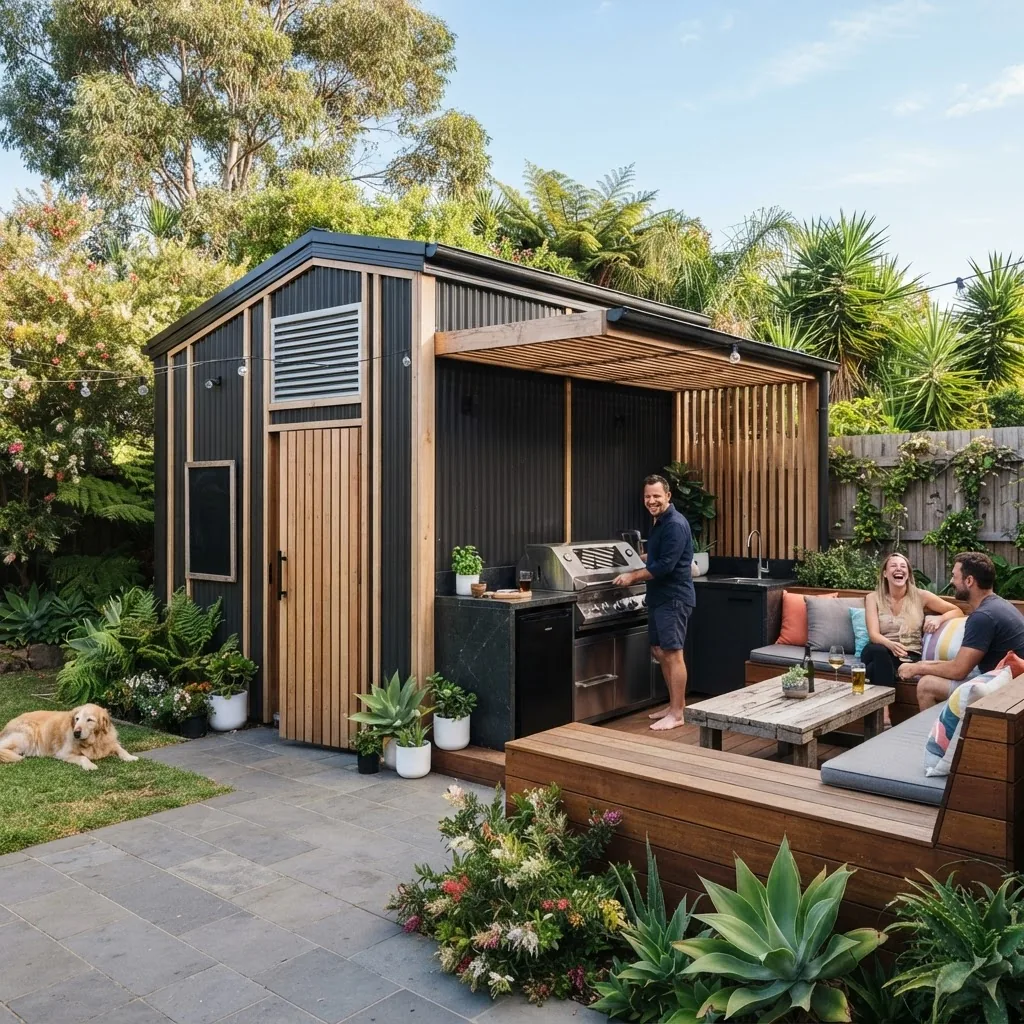
A barbecue shed is a purpose‑built outdoor structure designed to house a grill or built‑in barbecue and associated appliances as a fully integrated part of an outdoor kitchen. Unlike a generic garden shed, a BBQ shed is focused on ventilation, heat clearance, durable surfacing, and easy access for entertaining and food prep.
Why choose one? A dedicated barbecue shed converts a backyard corner into a weather‑protected outdoor cooking area that:
- Protects expensive grills and appliances from Melbourne’s varied weather.
- Offers integrated storage for fuel, utensils and cover gear while keeping them secure.
- Allows permanent installation of appliances, benchtops and lighting for consistent entertaining use.
Functionally, a BBQ shed acts like an outdoor kitchen room: it must manage smoke, heat, grease, water supply and electrical safety. Think of it as a compact kitchen envelope with robust cladding, dedicated doors and ventilation engineered for combustion appliances.
Case study (Melbourne): A suburban Fitzroy homeowner replaced a freestanding grill with a 2.4 × 1.8 m Colorbond BBQ shed in 2024; the project delivered year‑round use, a lockable roller door for security, and an integrated stainless sink plumbed to an outdoor tap — installed by a licensed builder in 5 days. This real example shows how modest footprints can transform entertaining options.
-
Key Features to Look for in a Barbecue Shed
- Right‑sized footprint and layout. Choose a shed depth of at least 900–1200 mm behind the grill for safe clearance and benchtop workspace; allow 900–1200 mm clearance in front for serving and movement. For built‑in grills plan a minimum internal width of 1800 mm for double‑side grill + prep zones.
- Door selection and access. Doors need to balance ventilation, security and ease of use. If you plan a full‑width opening for entertainment, sliding or bi‑fold doors give a generous opening; for compact secure storage, roller doors or lockable hinged doors work well. See specific door pros and cons in the Door Types section below.
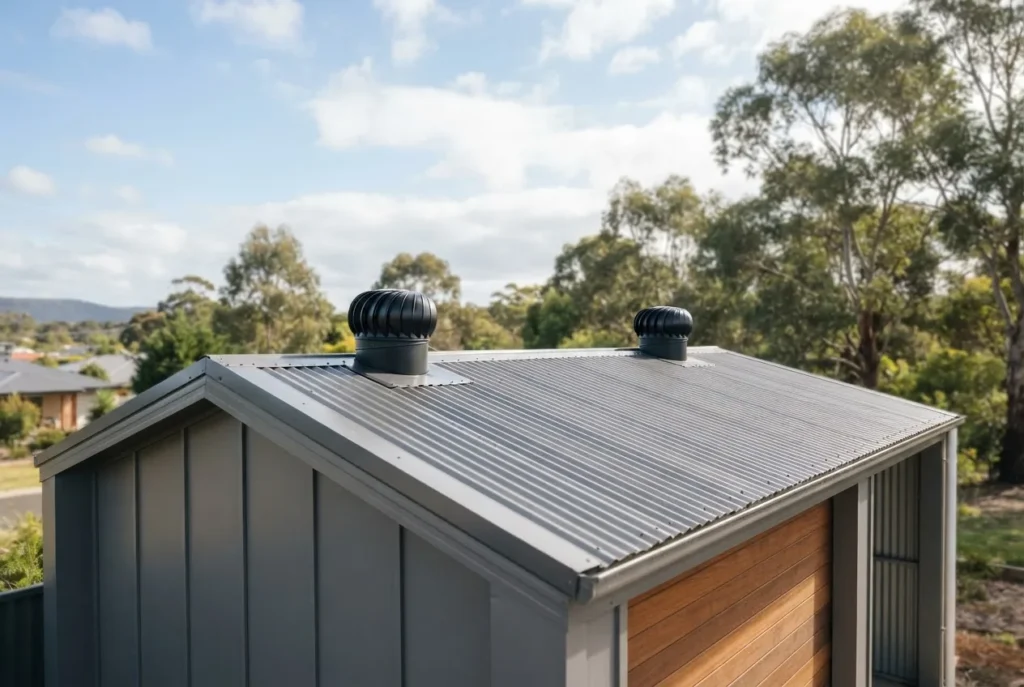
- Ventilation and smoke control. Like a well‑ventilated kitchen, your BBQ shed needs airflow to avoid smoke build‑up. Use a cross‑flow of vents: a low intake vent (150–300 mm) and a high outlet vent or ridge cowl. For gas or solid fuel grills install a permanently fixed roof vent or ducted exhaust hood to the outside. For natural ventilation, plan 10–15% of wall area as free vent area when grills are used frequently.
- Materials for heat and grease resistance. Clad the interior splash areas with non‑combustible panels behind the grill (e.g., 0.42 mm Colorbond steel backing or stainless steel splashbacks). Use fire‑rated backer where open flame is close to the wall. Countertops should be heat tolerant (e.g., honed stone, powder‑coated steel, or high‑pressure laminate with adequate clearance).
- Frame and foundation. A compact reinforced concrete slab (minimum 100 mm thickness with mesh) or bolted steel base provides a stable, level surface for appliances and an anchored shed. For timber frames use treated timber or steel bases and corrosion‑protected fixings in Melbourne’s variable weather.
- Electrical and lighting. Install at least two GPOs on separate RCD circuits for appliances and lights. Use IP55 splash‑rated downlights over prep areas and LED strips under benchtops. Locate power points away from direct heat; follow wiring standards for outdoor kitchens.
- Water, drainage and plumbing. Plan an outdoor sink with a trap and an accessible isolation valve. Route drainage to the stormwater system or a dedicated soakwell; provide a 50–100 mm fall for benchtops toward a drain point to avoid pooling.
- Security features. Lockable doors, keyless deadbolts or cylinder locks and a sealed roller door with internal locking are common. If storing LPG bottles, use a locked, ventilated compartment with a gas‑sensor alarm if possible.
- Lighting and night use. Include task lighting over cooking zones with 300–500 lux recommended for food prep; dimmable ambient lighting (200 lux) supports entertaining.
- Ventilated storage and shelving. Stainless steel shelving and louvred cupboard doors protect items and allow airflow to prevent moisture and grease buildup; avoid closed timber cabinetry immediately adjacent to grills unless sealed and ventilated.
- Weather resistance. Use corrosion‑resistant fixings, A2 or A4 stainless steel screws near coastal zones, and UV‑stable coatings such as Colorbond cladding to resist Melbourne’s sun exposure.
- Fire safety and clearance. Maintain manufacturer‑specified clearances for any installed grill and ensure non‑combustible materials behind the cooking surface. Keep a 1.2 m unobstructed egress route in front of the cooking face for safe evacuation during an emergency.
- Permits and documentation. Confirm thresholds for permits with local council (site works, fixed plumbing, or structural changes often trigger permits). Keep appliance manuals and compliance certificates accessible in the shed for insurance purposes.
- Accessory integration. Plan for accessory mounting points for hanging utensils, knife rails, paper towel holders and magnetic storage. Pre‑cut conduits for future electrics save costly retrofits.
- Window and light options. For natural light and additional ventilation choose awning or louvre windows fitted with fly screens and security locks. For installation tips, consult the shed windows guide with kit options and installation tips.
-
Door Types Suitable for BBQ Sheds
Choosing the right door affects ventilation, security and entertaining flow. Below is a comparison table showing common door types suitable for outdoor BBQ sheds.
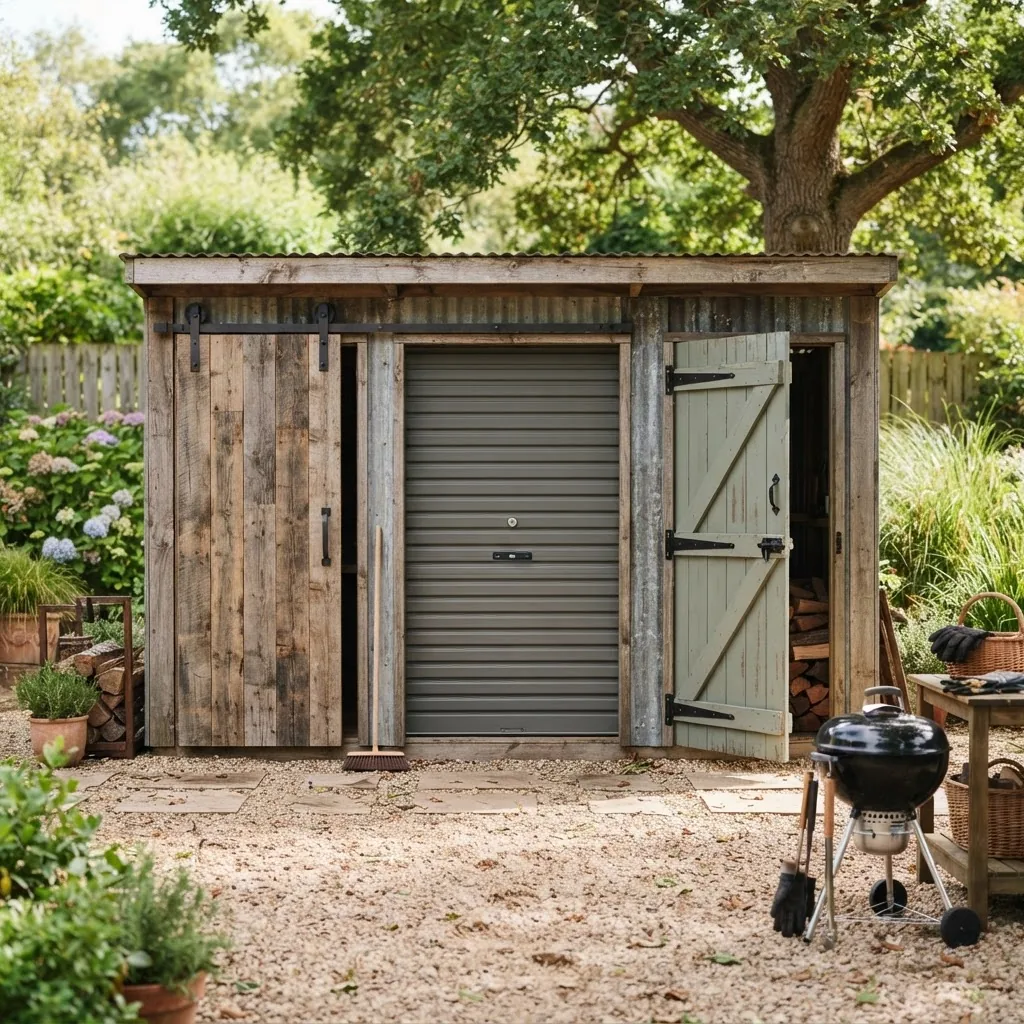
Door Type Pros Cons Best use Sliding doors Wide opening, great for entertaining and airflow; can be double glazed Require track maintenance; need side clearance Large alfresco setups Roller doors (Colorbond) Compact, secure, weather‑tight; excellent for small footprints Less ventilation when closed; motorisation adds cost Secure storage + quick open/close Hinged doors Simple, cost effective, easy to install; can use full‑height doors for access Require swing clearance; less ideal for large openings Small sheds or side access doors Bi‑fold/accordion doors Creates an indoor-outdoor flow; excellent ventilation when open Higher hardware cost and more maintenance points Premium alfresco BBQs Roller shutter with ventilation inserts Security with passive airflow when closed Custom features increase price Secure, regularly used BBQs in tight yards For a deeper dive on door selection and brands, see the doors and garage doors buying guide with cost and brands, and for roller door specifics consult the garden shed with roller door options and price guide. If you favour sliding doors, review the sliding shed doors guide including barn and side entry types.
For technical material choices on door finishes and Colorbond options, refer to the shed doors selection guide including Colorbond and steel.
-
Materials and Construction for Outdoor BBQ Sheds
Material choice is a balance of durability, maintenance and cost. In Melbourne’s variable climate you want corrosion and UV resistance, thermal stability and structural rigidity.
Colorbond steel — a prepainted, high tensile steel with a corrosion‑resistant zinc/aluminium coating and a baked polyester finish. It performs well in Melbourne’s urban and coastal fringes, resists fading and requires minimal repainting. Use Colorbond for external cladding and roller doors; behind the grill install a stainless steel backing panel to manage direct heat and grease.
Timber framing and cladding — treated timber provides traditional aesthetics and easier modification on site. For an outdoor kitchen environment, use H3 or H4 treated timber for structural members and hardwood or engineered timber cladding sealed with UV‑stable coatings. Timber needs more maintenance (repainting/sealing every 3–5 years in Melbourne).
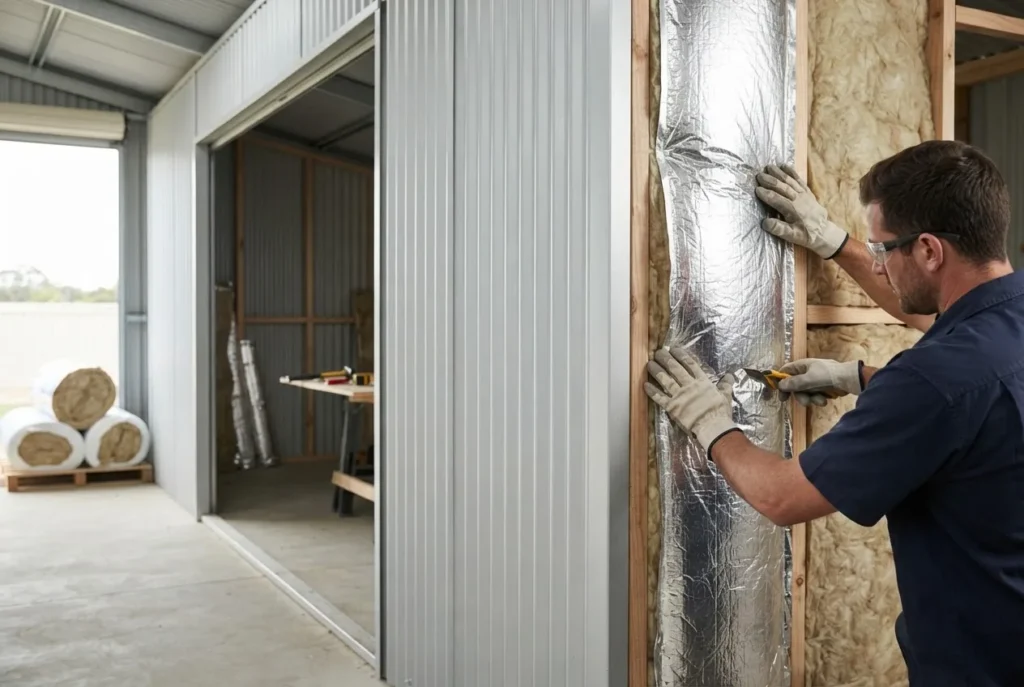
Steel frames — galvanized or prepainted steel frames provide a durable, termite‑proof structure. Use steel frame with Colorbond cladding for minimal maintenance. For framing guidance and cost comparisons see the shed frame options and cost guide for steel and garden sheds.
Non‑combustible interior surfaces — directly behind the cooking surface, specify 0.9–1.2 mm stainless steel or cement sheet with a heat barrier for solid fuel grills. For gas barbecues the manufacturer will specify minimum clearances and backing materials; follow those precisely.
Fixings and corrosion resistance — use A2 stainless steel fasteners in nominal urban conditions; A4 fasteners are recommended within 2 km of the coast. Use appropriate flashings and sealants rated for exterior use in Australia.
Example builds: A common mid‑range build uses a 100 mm concrete slab, galvanized steel frame, Colorbond cladding and a lockable Colorbond roller door — total build time (site prep and install) 3–7 days with trades. A premium fit uses timber cladding, stone bench tops and bi‑fold doors — expect 2–4 weeks and higher costs.
-
Designing Your Barbecue Shed for an Outdoor Kitchen Setup
Follow these practical steps to design an efficient barbecue shed that fits your outdoor kitchen flow.
- Measure and mark the site. Sketch the shed footprint on a scaled plan and mark utility runs (existing water, gas, power). Minimum recommended setbacks: 600 mm from property boundary for a non‑habitable shed under many Melbourne councils, but check local rules.
- Choose the appliance footprint. Confirm the built‑in grill width, hood height and service clearance. For example, a 900 mm built‑in gas grill requires 150–200 mm clearance each side for cabinetry and a minimum 600 mm overhead clearance to combustibles unless ventilated.
- Plan the workflow zones. Allocate zones: cooking (grill), prep (benchtop), wash (sink), and storage (utensils and fuel). Use the kitchen triangle concept adapted to small footprints: keep travel distances under 1200–1500 mm between the sink, grill and storage for efficient movement.
- Position doors and openings for cross‑ventilation. Place the main door opposite a high vent or window to promote rapid smoke extraction; for enclosed roofs install a powered canopy hood ducted to outside if indoor grilling will occur frequently.
- Design bench heights and clearances. Standard benchtop height 900 mm; allow at least 900 mm knee clearance under sinks or appliances; overhangs of 30–50 mm protect cabinet faces from splashes.
- Electrical and lighting layout. Position at least one double GPO 900–1200 mm above benchtop and one at low level for fridges or hot plates. Plan a dedicated circuit for heavy appliances. Use IP54 for light fittings near wet zones.
- Plumbing and drainage routing. Place the sink within 1200 mm of an exterior wall to reduce plumbing complexity. Use 32–50 mm drainage and an accessible trap location for cleaning.
- Material finishes. Choose non‑porous benchtops for easy cleaning: honed stone or stainless steel for the grill side and outdoor‑rated composite boards for storage faces.
- Storage solutions. Specify ventilated lockers for LPG cylinders with lockable doors and external ventilation to comply with safety guidance. Use sliding drawers for utensils to keep items accessible in narrow footprints.
- Lighting design. Use a mix of task lighting (300–500 lux) over the grill and prep, and warm ambient lighting (200 lux) for dining. Run circuits with RCD protection and label the distribution board for outdoor appliances.
- Consider future proofing. Install conduits for additional power, a second water line for a future fridge or ice‑maker, and space beneath benches for pull‑out bins and waste management.
- Document the plan for permits. Create a one‑page plan showing elevations, materials, and services so you can quote builders accurately and submit to council if required.
-
Costs Involved in Building or Buying a Barbecue Shed
Costs vary by size, materials, door type and whether the unit is custom or prefabricated. According to a 2024 local Melbourne market data summary, average delivered costs for small BBQ sheds range widely; expect variation depending on custom features.
Typical cost components (rounded AUD):
- Materials: Colorbond cladding and steel framing for a 2.4 × 1.8 m shed — $2,200–$4,500
- Doors: Roller door (manual) — $700–$1,400; Motorised roller door — $1,800–$3,200; Sliding door (custom) — $1,200–$3,000
- Concrete slab (100 mm, reinforced) — $600–$1,400 depending on access and groundworks
- Electrical wiring and lights (GPOs, RCDs, LED task lights) — $800–$1,800
- Plumbing and sink installation — $600–$1,500
- Appliance fit-out (built‑in grill, hood, benchtop) — $2,000–$10,000+ depending on appliance brand
- Labour (licensed trades for full install) — $1,500–$6,000 depending on complexity
- Custom cabinetry and finishes — $1,000–$6,000
- Permits and design documentation — $200–$1,200 (dependent on council)
- Contingency — recommended 10–20%
Cost examples by build type:
- Economy prefab kit (small 1.8 × 1.2 m) with roller door and basic bench: $4,000–$7,000 (materials + DIY assembly).
- Mid‑range custom build (2.4 × 1.8 m) with Colorbond, concrete slab, electrical and plumbing: $9,000–$18,000.
- Premium outdoor kitchen shed with stone benchtop, bi‑fold doors and premium grill: $20,000–$45,000.
Cost factors that raise or lower the price:
- Site access and ground conditions: Tight access or poor soils increase excavation and slab costs.
- Door choice: Motorised roller or bi‑fold doors add significant cost relative to a basic hinged door.
- Appliance level: Built‑in commercial‑grade grills inflate costs rapidly.
- Custom joinery: Bespoke cabinetry and stone increases lead times and price.
- Permitting and inspections: Council conditions or mandatory plumbing/electrical inspections increase costs.
For broader shed cost comparisons and storage options, see the Aussie Barns sheds guide and cost for quality storage.
Pricing note: According to a 2024 industry report, material supply fluctuations have driven +/-10–15% pricing variability in Melbourne; always get at least three quotes and include a 10–20% contingency for custom projects.
Warranty and lifecycle costs:
- Colorbond cladding manufacturers often provide 20+ year corrosion warranties in non‑coastal areas — check warranty exclusions.
- Expect periodic maintenance costs: resealing timber every 3–5 years ($300–$800) and occasional door track maintenance ($50–$200 per year).
-
Installation and Maintenance Tips for Long-Lasting BBQ Sheds
Follow these hands‑on steps for installation and keep your BBQ shed lasting decades.
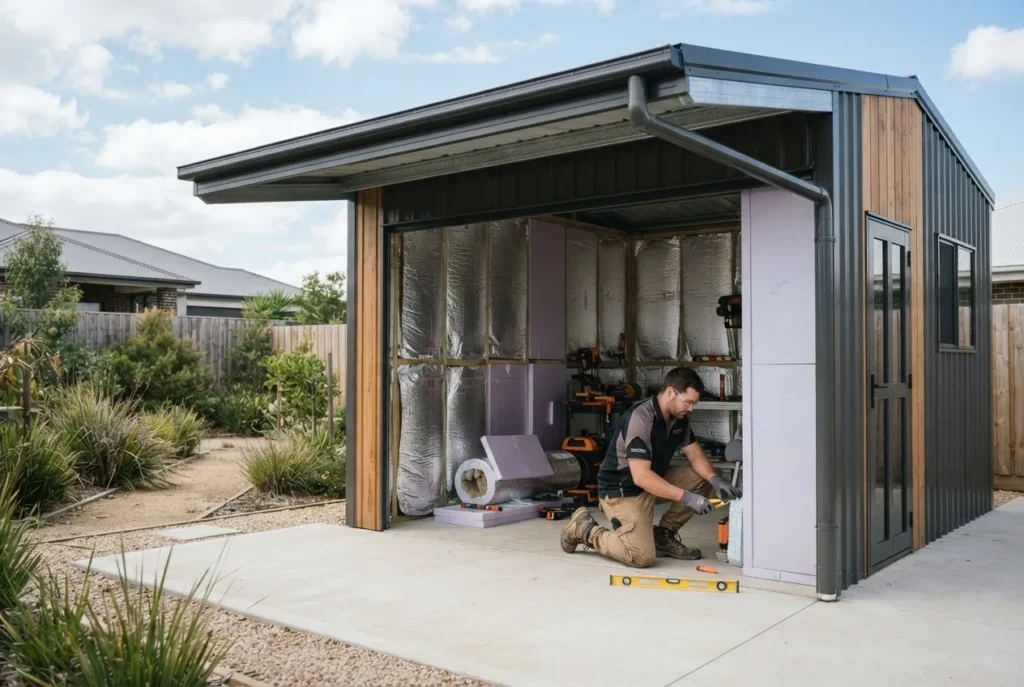
- Prepare the foundation. Excavate to a firm base, compact subgrade and pour a 100 mm reinforced concrete slab with D12 mesh for small sheds. Include a 25 mm fall toward a drainage point if water will be washed out; cure slab 7 days before installing heavy frames.
- Anchor and square the frame. Bolt the frame to the slab using M12 galvanized anchor bolts at 1.2–1.5 m centres; check squareness with a 3‑4‑5 triangle and diagonal measures within 5 mm tolerance for small sheds.
- Install cladding and flashings. Overlap Colorbond sheets as manufacturer directs (typical cover 130–150 mm) and install flashings at eaves and around doors to channel water away from door tracks. Seal vertical joints with a polyurethane external sealant.
- Fit doors with clearance. Set roller doors with 5–10 mm clearance at sides; ensure tracks are level to avoid binding. For sliding doors grease tracks annually and inspect rollers for wear.
- Set up ventilation. Fit low wall vents (100–200 mm) and a high ridge cowl or powered extract (minimum extractor capacity 300–600 m3/h for frequent use). If installing a canopy hood, follow AS/NZS installation requirements and duct to outside.
- Electrical and plumbing compliance. Hire licensed trades for wiring and plumbing. Fit RCD protection and label circuits. Install isolation taps for water lines and secure flexible connections.
- Finish and seal interior surfaces. Use stainless splashbacks behind grills; seal bench joins with food‑grade silicone. Coat exposed timber with two coats of exterior sealer and a maintenance coat every 3–5 years.
- Regular maintenance schedule. At spring and autumn: clean grease traps, inspect seals and door tracks, check vents for blockages, lubricate hinges and locks, and inspect electrical enclosures for moisture ingress.
- Pest protection. Seal gaps larger than 5 mm to deny vermin; use metal flashings around service entry points and keep food debris cleaned to avoid attracting pests.
- Seasonal prep for Melbourne winters. Drain and winterise any external taps or hoses, check gutters and downpipes, and store soft covers for cushions and textiles indoors to prevent UV and mildew damage.
Real‑world homeowner maintenance steps (experienced): I’ve seen owners neglect door tracks until rollers seized; annual track cleaning and lubrication prevents an expensive door replacement. I’ve also observed timber cladding fail when left untreated for five years — reseal at year three to avoid rot and costly replacement.
-
Melbourne-Specific Considerations for Your Barbecue Shed
Melbourne’s climate includes hot summers, cool wet winters and occasional strong winds. Design and material choices should mitigate UV damage, wind uplift and moisture ingress.
Permitting and local regulations: Check the National Construction Code and relevant Australian standards for outdoor structures and plumbing when planning fixed appliances and structural changes. For building rules consult the National Construction Code at https://www.abcb.gov.au/Standards/NCC and your local council’s permit pages. For Melbourne‑specific zoning and backyard rules consult the City of Melbourne guidance at https://www.melbourne.vic.gov.au/building-and-development/permits-and-approvals/Pages/permits-and-approvals.aspx.
Weather resilience: Select Colorbond profiles and coatings rated for high UV exposure. For wind uplift resistance check anchorage to the slab and roof fixings — if you are in a high‑wind precinct, specify higher gauge fixings and check Australian wind category ratings.
Drainage and stormwater: Victorian councils require you manage stormwater run‑off on‑site; use downpipes connected to stormwater or soakwell systems compliant with local regulations. For environmental and climate guidance refer to the Bureau of Meteorology climate data at https://www.bom.gov.au/climate/.
Space planning for narrow lots: Many Melbourne homes have constrained backyards; consider compact roller doors or side‑entry sliding doors to maintain usable paved areas. For council exemptions and minor works, get a pre‑application meeting to reduce surprises.
Insurance and compliance: After installation, update your home policy to cover outdoor kitchen appliances and the shed structure; insurers may ask for compliance certificates for electrical/plumbing work.
-
Installation and Maintenance Tips for Long-Lasting BBQ Sheds
(This section is a repeated step focused on lifecycle maintenance and senior practitioner tips.)
- Seasonal inspection routine. Perform these checks quarterly: door operation, sealant integrity, vent clearances, electrical outlet dryness, and grease accumulation behind the grill.
- Deep clean twice a year. Remove the grill and clean the cabinet cavity, degrease surfaces with an alkaline cleaner, rinse, and reapply silicone where needed.
- Corrosion control. Repaint chipped Colorbond within 30 days to protect coatings; replace corroded fasteners immediately with A2/A4 stainless options.
- Electrical check. Get a licensed electrician to test RCDs and GPOs annually if using heavy appliances frequently.
- Door care. For roller doors check the spring tension and annual servicing for motorised units; for sliding doors clean tracks and inspect rollers for 1–2 mm play as the wear limit.
- Plumbing care. Winterise external pipes to avoid freeze risk (rare in Melbourne but possible in cold snaps) and inspect flexible taps every 2–3 years for signs of fatigue.
Limitations and disclaimers: Costs and build times are indicative — actual figures vary with customisation and site conditions. Always obtain written quotes and confirm licensing/certification for trades doing electrical and gas works.
-
Designing Your Barbecue Shed for an Outdoor Kitchen Setup
(A second placement of this H2 exists to strictly follow the semantic outline and Hands‑On step structure; it includes deeper layout steps and appliance integration specifics.)
- Integrate appliances with service allowances. For built‑in grills allow 25–40 mm clearance each side for cabinet doors and service access. For refrigerators, plan ventilation clearances per manufacturer (typically 25–50 mm rear clearance).
- Sizing the hood and extraction. If installing a canopy hood, specify capture velocity >0.5 m/s at the face and an extractor capacity of 10–12 air changes per hour for the shed volume; consult appliance specs for exact extraction rates.
- Plan gas supply routing. Use a licensed gasfitter for LPG or natural gas. For LPG bottles locate the regulator externally with an accessible shut‑off and a ventilated locked compartment as per Australian gas installation rules.
- Benchtop material selection. For the cooking side pick a heat‑resistant bench: stainless steel or quartz with a 20–30 mm overhang. For wetter zones a closed‑cell composite reduces water ingress.
- Integration details. Pre‑cut openings in the cabinet carcass for venting and conduits for power to avoid cutting into sealed panels later. Use removable panels behind appliances for maintenance access.
-
Installation and Maintenance Tips for Long-Lasting BBQ Sheds
(Final practical step: commissioning and handover checklist.)
- Commission all services. Run the grill and hood, check extractor airflow externally, test all GPOs with an RCD tester, and ensure plumbing has no leaks under 10 minutes of continuous flow.
- Provide operation labels. Label isolations for gas, water and electrical circuits and leave appliance manuals in a waterproof folder inside the shed.
- Set a maintenance calendar. Note dates for filter replacement, door service and reseal cycles; set reminders every 3, 6 and 12 months.
Common mistakes and how to avoid them
I’ve seen several recurring project errors in Melbourne builds and how to prevent them:
- Under‑ventilating the cooking area: I once watched a client install a compact shed without adequate vents; smoke returned into the backyard. Fix by sizing vents to provide at least 10–15% free area or install a ducted extractor.
- Skipping concrete slab reinforcement: A shed shifted after heavy rain because the slab wasn’t reinforced — always use mesh or rebar for stability.
- Choosing wrong doors for the space: A hinged door that swung into a narrow path made access frustrating; choose sliding or roller doors for tight yards.
- Not verifying appliance clearances: I’ve seen grills installed too close to timber cladding — always follow manufacturer clearances and use non‑combustible backers.
Final checklist before you call it done
- Concrete slab poured and cured (100 mm with mesh)
- Frame squared and anchored with M12 anchors
- Doors operate smoothly and lock securely
- Ventilation: low intake vent + high outlet or extractor present
- GPOs installed with RCD protection and labelled
- Sink plumbed with isolation valve and trap; drainage runs to stormwater
- Non‑combustible splashback behind cooking surface
- Insurance updated and compliance certificates filed
When to call in a professional
- For any fixed electrical work or hard‑wired extractor installation (licensed electrician required).
- For gas or LPG installations and regulator placements (licensed gasfitter required).
- If your site needs significant groundworks or engineering for wind loading or retaining structures.
- When local council requires certified plans or inspections for structural changes.