

By the end of this hands-on guide you’ll have a clear plan, realistic Melbourne cost ranges, a step-by-step build and fit‑out checklist, and practical loft storage layouts for a 2 story shed. Expect to plan and purchase in 1–3 weeks and a typical professional build to take 2–6 weeks; skill level assumed: confident DIYer or homeowner managing trades.
What is a 2 Story Shed? Overview and Benefits
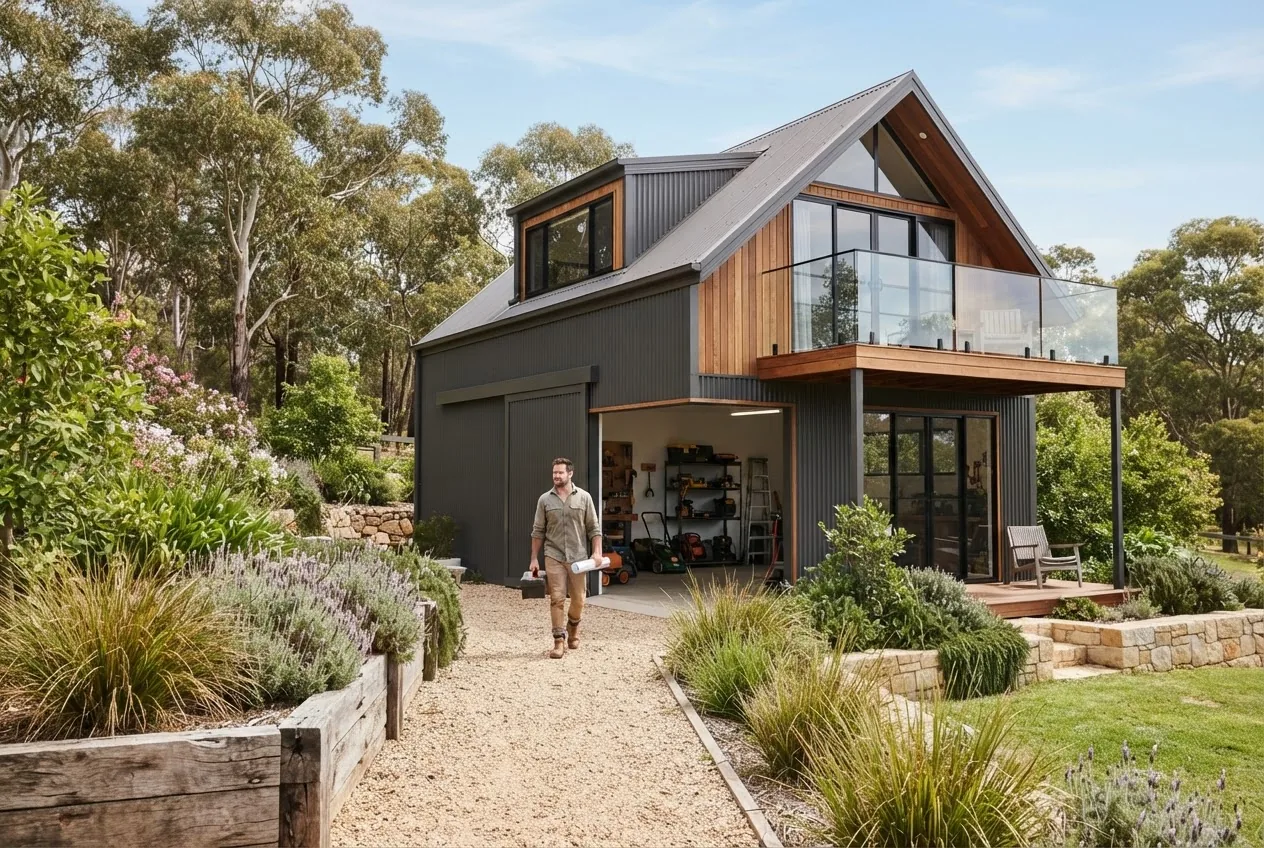
A 2 story shed (also called a two storey shed) is a vertical storage solution with a ground floor for bulky items and a mezzanine or loft above for long‑term storage, workshop space or an office. Compared to single‑storey sheds, two storey designs multiply useful floor area without expanding your footprint — particularly useful on narrow Melbourne suburban blocks where land value and setbacks limit ground coverage.
You can learn broader sizing principles on the shed sizes and cost guide for standard storage dimensions.
- Save footprint: Double your storage by building vertically (mezzanine area typically 30–80% of ground footprint).
- Flexible use: Ground floor for machinery or vehicle access, loft for seasonal or delicate items.
- Organised storage: Zoned storage—heavy, frequently used tools below; lightweight, infrequently used boxes in the loft.
- Higher resale and property value: A well‑built two storey garden building can add utility and appeal to buyers seeking workshop or studio options.
- Cost efficiency per square metre: Building upward can be cheaper per usable square metre than increasing slab area and complying with wider site works.
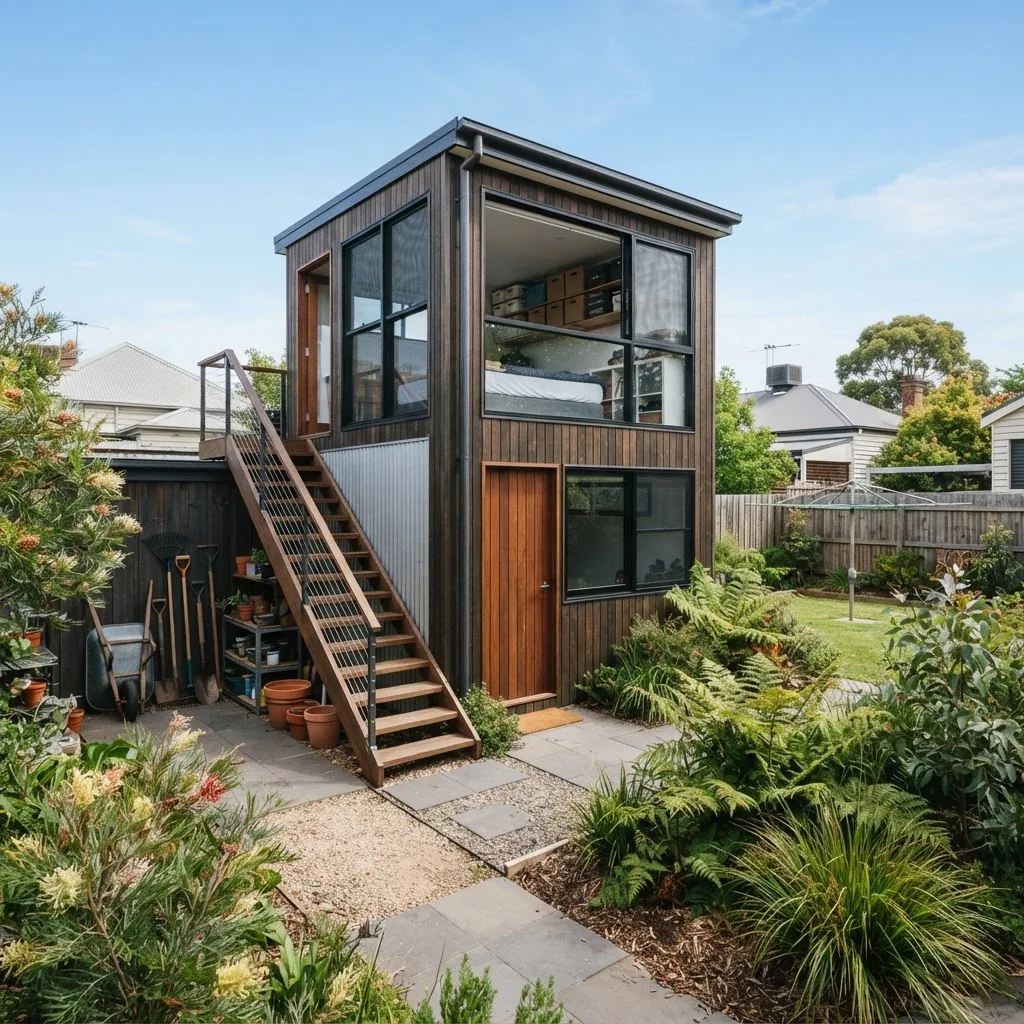
Transitioning from the overview, the next section walks through the design decisions that make loft storage functional, safe and compliant in Melbourne.
Key Design Considerations for a 2 Story Shed with Loft Storage
Designing a two storey garden building requires balancing layout, structure, access and local rules. Below are the core considerations in the order I use when planning a project.
- Confirm permitted envelope and setbacks: Check your local council for maximum building height and side/rear setbacks before sizing your loft. In Melbourne suburbs, typical maximum outbuilding height without planning is 3.6–4.0m, but this varies by municipality. Early confirmation avoids redesign costs.
- Decide your primary use: Will the loft be for lightweight storage (boxes, sports gear), a studio (requires higher load and insulation), or living/workspace (requires compliance to habitable standards)? This choice dictates structural load capacity and finishes.
- Determine load capacity needs: Mezzanine floors are rated by load per m². For standard storage allow 1.5–2.0 kPa (150–200 kg/m²) for light storage, 3.0–5.0 kPa for workshop or walkable lofts. Specify loading when you order structural members.
- Choose your foundation type: Options include concrete slab (standard for two storey), reinforced strip footing, or screw piles where access is limited. For two storey sheds I recommend a minimum 100mm thick slab with M20 concrete and SL72 mesh, or engineer‑specified footings where loads concentrate under posts.
- Frame selection and bracing: Steel portal frames are common for larger two storey sheds for strength and slimmer profiles; timber framing can be used for smaller sheds and provides easier internal fit‑out options. Include cross‑bracing or shear walls to resist racking from wind or seismic loads per AS/NZS requirements.
- Ceiling height and mezzanine clearance: Provide at least 2.0–2.2m headroom in the loft usable area and 2.4m on the ground floor if you plan vehicle access. Sloping roofs must be accounted for—use a centrally placed mezzanine or limit loft to the higher side.
- Access planning — stairs vs ladder: Fixed stairs (width 700–900mm, riser 180mm, tread 250mm) provide safe, frequent access; loft ladders suit occasional retrieval. Consider a landing at the top if heavy items are moved.
- Ventilation and insulation: Insulate the loft floor and walls if storing temperature‑sensitive items; provide ridge and eave vents or mechanical extraction where condensation risk exists. Roof insulation R‑values depend on intended use — for workshop or habitable loft aim for R3.0–R4.0.
- Roofing options and waterproofing: Choose a roofing system compatible with Melbourne weather: colorbond steel with sealed penetrations and corrosion‑resistant flashings are common. Pitch affects usable loft space and requires guttering sized for local rainfall intensities.
- Access for trades and deliveries: Plan access gates and clearances for cranes, trucks or panel delivery to site — narrow suburban lanes in Melbourne can increase delivery costs if special lifting equipment is used.
- Electrical and lighting planning: Early planning for circuit capacity and lighting reduces retrofit costs. For lofts, include LED task lighting, motion sensors and at least one dedicated circuit for power tools or heaters if required.
- Storage zoning and weight distribution: Keep heavy storage near structural supports or directly over ground floor columns; use the loft for lightweight or medium-weight items unless your structural design specifies higher loads.
- Fire and egress considerations: Two storey outbuildings used as workshops or studios might trigger additional fire separation or egress requirements — check local building regulations.
- Budgeting for wet works and finishes: Allow 10–20% contingency for site surprises such as poor soil, additional drainage or termite treatments in Melbourne’s older suburbs.
For principles that scale down to small footprints, review efficient small shed ideas like efficient 10m2 shed layouts.
Loft Storage Layout and Optimisation
A mezzanine (another term for loft or mezzanine floor) converts vertical volume into organised storage. Start by defining the items you’ll store — bicycles, boxed seasonal stock, or long items like timber — and group them by weight and frequency of access. Typical layouts:
- Light boxed storage: Use 400–600mm deep shelving along the loft perimeter. Leave a 900–1200mm central access corridor for comfortable movement and handling.
- Bulky but light items (e.g., holiday gear): Use modular plastic bins stacked on open shelving rated to 200–300 kg per shelf bay; fasten shelving to mezzanine uprights.
- Long items and timber: Provide long‑span cantilever storage along one side with clearance to lower floor operations. Include stop blocks to prevent slippage.
Load capacity planning example: if you expect to store 40 boxes at 15 kg each across a 6 m² mezzanine, that’s 600 kg total or 100 kg/m². Specify a conservative design of 2.0 kPa (200 kg/m²) to allow for redistribution and walking loads.
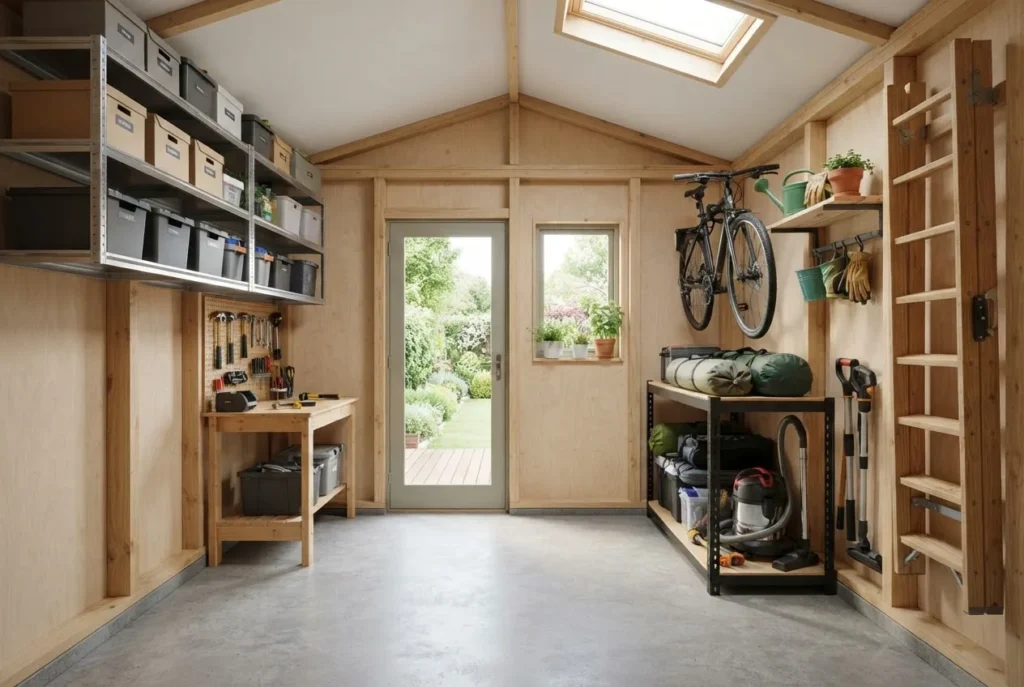
Practical fit‑out examples: install 900mm deep shelving at the perimeter, reserve a 1.0–1.2m wide walkway, mount a fold‑down workbench on the gable end, and provide edge guards or a 1.0m high balustrade meeting Australian guardrail safety guidelines if the loft edge is open.
Choosing Materials and Roofing for Durability
Material choice determines long‑term maintenance, cost and how straightforward fit‑outs will be. The table below compares common choices for two storey sheds in Melbourne.
| Material | Pros | Cons |
|---|---|---|
| Galvanised Steel Frame | High strength-to-weight, slim columns, fast erection, low termite risk. | Requires thermal bridging mitigation, skilled welding for custom penetrations, can be noisy in rain. |
| Timber Frame (treated) | Easier on-site modifications, better thermal performance, familiar carpentry detailing. | Heavier structural members for the same span; needs termite protection and regular maintenance. |
| Cladding: Colorbond Steel | Australian-made options, durable, wide colour range, low maintenance. | Heat conduction—requires insulation beneath; edges must be sealed to prevent water ingress. |
| Cladding: Timber Weatherboard | Aesthetic warmth, easy to repair and match, good for integrated garden look. | Higher maintenance and need for termite protection and painting every 5–8 years. |
| Roofing: Colorbond | Lightweight, durable, good warranty options in Australia. | Requires correct flashings and sealants to avoid leaks in heavy downpours. |
| Roofing: Corrugated Metal | Cost-effective, easy to replace, strong in high winds. | More noise in rain and may require purlin spacing adjustments for mezzanine heights. |
Choose steel framing for larger spans and timber where fine woodworking, insulation or aesthetics are priorities. For Melbourne’s variable climate, always specify Colorbond or similar with an underlay vapour barrier and at least 75mm ceiling insulation in the loft.
Transition: with design choices and materials selected, you’ll need a clear Melbourne cost estimate next to budget effectively.
Cost Guide for Building a 2 Story Shed in Melbourne
Costs vary by size, materials, access and council requirements. Below I break down typical ranges for Melbourne (labour and materials), include comparisons to other sizes, and list local supplier examples and approximate quotes as of 2024.
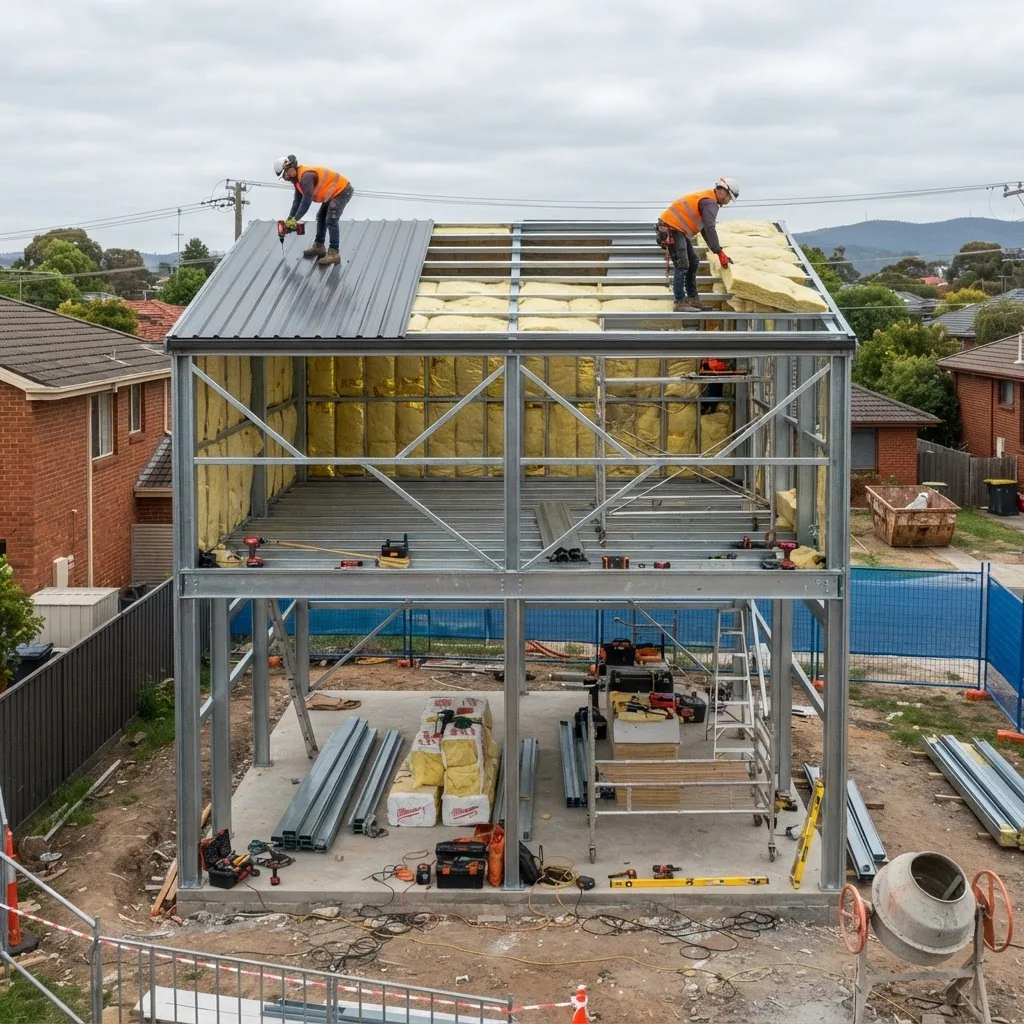
As of 2024, material cost inflation has stabilised but remains ~8–12% above 2021 levels for steel products, according to a 2024 industry report. Labour rates in Melbourne typically start at $65–$95/hr for qualified carpenters and $85–$120/hr for licensed builders depending on project complexity.
Typical cost breakdown (ballpark ranges for a 6m x 6m two storey shed with 30% mezzanine):
| Cost Item | Range (AUD) | Notes |
|---|---|---|
| Site prep & foundation (slab + footings) | $5,000 – $12,000 | Soil condition, retaining walls or rock removal increase cost. |
| Frame & structural steel or timber | $6,000 – $18,000 | Steel portal frames at top end; timber cheaper for small builds. |
| Cladding & roofing (Colorbond) | $4,000 – $9,000 | Profile, flashings and guttering affect price. |
| Mezzanine (floor, balustrade, stairs) | $3,500 – $10,000 | Price depends on timber vs steel joists, stair type and finishes. |
| Electrical, lighting, outlets | $1,200 – $4,500 | Includes circuit installation and LED fixtures. |
| Insulation & ventilation | $800 – $3,000 | Depends on R-value and mechanical ventilation needs. |
| Doors, windows and hardware | $1,000 – $4,000 | Roller doors, entry doors, skylights change price. |
| Permits, engineering and inspections | $600 – $4,000 | Council fees and engineering vary by municipality. |
| Labour and trade coordination | $6,000 – $20,000 | Builder-managed projects include coordination and warranties. |
| Contingency (recommended) | 10–20% of project | Allow for site surprises, change orders or upgrades. |
Total estimated cost (6×6 two storey example): roughly $28,000 – $80,000 depending on choices. For larger or custom projects, multi‑bay steel sheds escalate accordingly.
For readers comparing sizes, see smaller and larger references: 10×10 storage shed options and costs, 10×20 garden shed pricing, and multi-bay shed costs.
Melbourne supplier examples and indicative quotes (2024): Stratco prefabricated frames from $6,000 for small two storey kits; custom steel portal frames from local fabricators $8,000–$18,000; carpentry labour rates averaging $75–$95/hr in metro Melbourne (According to a 2024 industry report). Always ask suppliers for itemised quotes including delivery and crane costs where needed.
Transition: after budgeting, the next section walks through an exact fit‑out sequence to make your loft storage efficient and safe.
Step-by-Step Shed Fit Out Ideas for Loft Storage Efficiency
This section is presented as a hands‑on sequence you can follow once your shell is up—practical steps for an organised, safe loft.
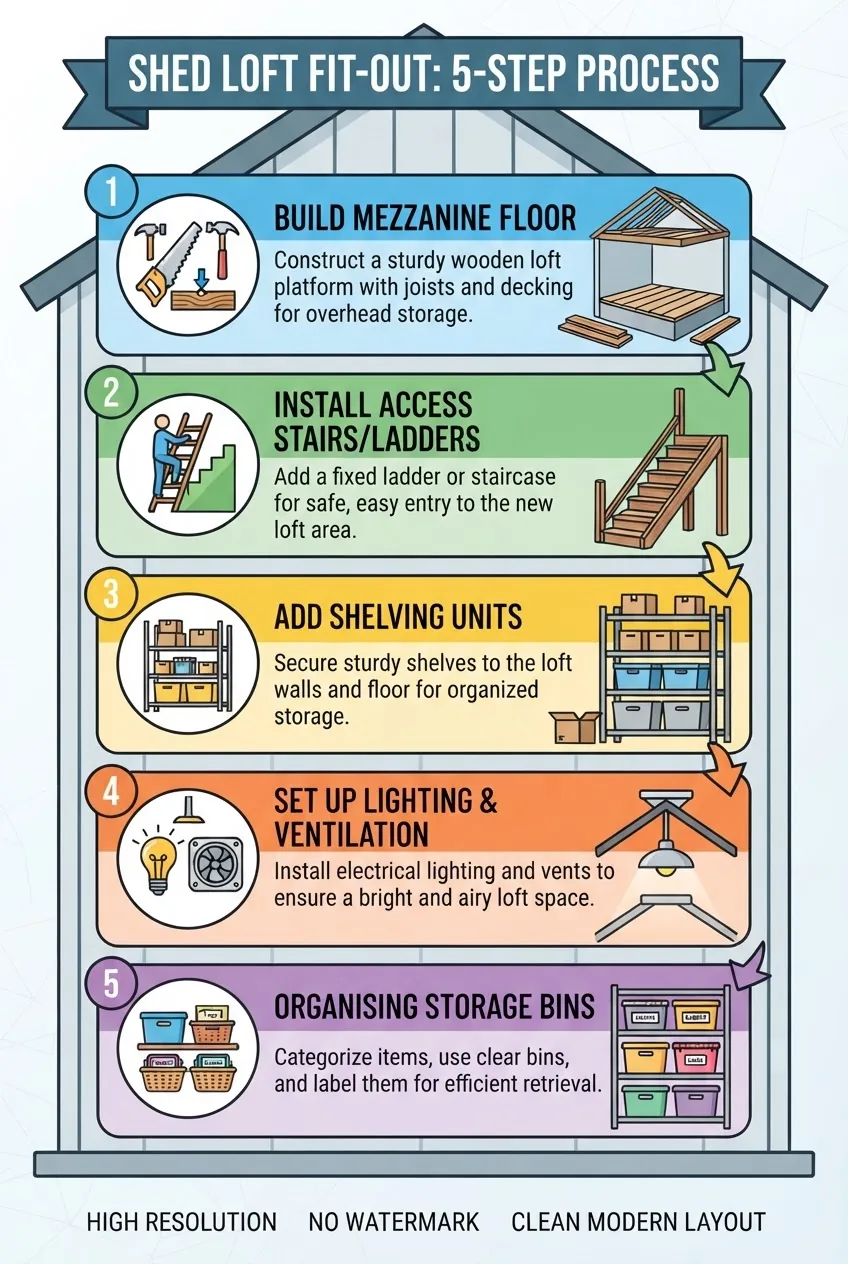
- Install a certified mezzanine floor: Use engineered joists spaced per engineer’s drawings (typically 450–600mm centres for timber joists or purlin spacing for steel). Fix joists to stanchions with galvanised brackets and use 17–19mm structural ply or 90–140mm timber decking for the walking surface. If you expect >2 kPa loading, specify deeper members or steel beams.
- Fit safe, comfortable stairs: Fit a fixed staircase with a minimum width of 750mm, maximum riser 190mm and tread 240–300mm. Anchor the base to slab with M12 anchor bolts and the top to the mezzanine ledger with structural connectors. Include a handrail and 1.0m high balustrade on the loft edge with vertical infill or 100mm maximum gap to comply with guard rail intent.
- Install perimeter balustrade and edge protection: Use 1.0m high balustrade with a top rail at 1.0m and a mid‑rail; fix balustrade posts at 1200mm centres back to the mezzanine joists with through-bolts. Add toe‑boards of 75–100mm to prevent dropped items.
- Plan and install shelving systems: Use 300–600mm deep industrial shelving for boxes, rated to 200–400 kg per bay. Anchor shelving to mezzanine floor and, where possible, to vertical studs or steel members. For frequent access, keep shelf heights below 1.8m from the loft floor to maintain visibility and balance.
- Design zones for storage efficiency: Create three zones: A (frequently used) nearest the stairs, B (seasonal, moderate weight) mid‑bay, C (long‑term, lightweight) at the far end. Label boxes and keep an inventory spreadsheet referencing bay numbers for quick retrieval.
- Add electricals and lighting: Install LED strip lighting across the loft with a lux target of 200–300 lux for general storage and 300–500 lux for workbench areas. Include at least two double power outlets and a dedicated RCD safety switch on the circuit. Use motion sensors for energy efficiency.
- Ventilate and control condensation: Fit eave and ridge vents, and where condensation risk is high install a low‑flow exhaust fan (e.g., 100–200 L/s) on a timer. Insulate the loft floor and roof with at least R2.5–R3.0 in non-habitable sheds; for habitable lofts target R3.5–R4.0.
- Secure stored items: Provide tie‑down points for long items and lockable cabinets for chemicals and paints in compliance with storage safety—segregate flammables and corrosives per manufacturer’s instructions.
- Label and inventory: Use a consistent labelling system (bay: shelf: box) and keep a cloud photo inventory so you can find gear without climbing the stairs every time.
- Install access aids for heavy items: For regular heavy lifts, consider a small hand winch or light electric hoist fixed to mezzanine beams, rated to the expected loads (e.g., 250–500 kg) and installed per manufacturer instructions with secondary safety catches.
- Finish with flooring and edge treatments: If you expect pedestrian traffic, add non‑slip floor coatings or anti‑slip tape on treads and mezzanine access points.
- Test and document load limits: Once fit‑out is complete, conduct a basic load test (simulated by distributed weights up to design load in controlled manner) and record the maximum recommended loading in the loft as a visible plaque near the stair.
- Reference additional fit‑out examples: For practical shelving and layout inspiration see storage shed fit out ideas and for roller door and access features review storage shed design features.
Transition: after fitting out, compare whether two storey is still the best move for your storage needs or if a single storey suits better.
Comparing 2 Story Shed vs Single Story Shed for Storage Needs
Choosing between two storey and single storey comes down to site constraints, budget, load requirements and desired use. Below are pros and cons and a short comparison table.
- 2 Story Shed Pros: Greater usable floor area per m² of land, separation of uses, better for narrow lots, potential higher resale value.
- 2 Story Shed Cons: Higher complexity and engineering, potentially higher foundation costs, more stringent compliance in some councils.
- Single Story Pros: Simpler build, lower foundations and easier access for vehicles and large equipment, typically cheaper per linear metre for cladding and roofing.
- Single Story Cons: Requires more land for equivalent floor area, may not be feasible on small suburban lots.
| Factor | Two Storey | Single Storey |
|---|---|---|
| Space utilisation | High — doubles usable area vertically | Low — requires larger footprint |
| Build complexity | Higher — needs mezzanine engineering | Lower — simpler framing |
| Cost per usable m² | Often lower when maximising limited land | Lower for simple, small sheds |
| Maintenance | More inspections, stair and balustrade upkeep | Simpler maintenance |
| Resale value | Potentially higher if built to a usable standard | Depends on size and quality |
If you’re comparing specific sizes and how price scales, see alternative size references such as shed size and pricing considerations and small footprint comparisons like small garden shed layouts.
Transition: regardless of choice, compliance with Melbourne rules is non‑negotiable — read the checklist next.
Permits, Regulations and Building Codes for 2 Story Sheds in Melbourne
Melbourne’s local councils and state building regulations set the rules for outbuildings. Follow this checklist and read the explanatory notes to avoid costly non‑compliance.
- Check local council planning rules: Some outbuildings under a certain footprint or height are permitted without planning permit; others may need development approval. Contact your local Melbourne council building and planning department early. Melbourne council building and planning
- Obtain building permits: Most two storey sheds require a building permit lodged with a private building surveyor or council.
- Engineering certification: Provide structural drawings signed by a registered structural engineer for mezzanines, roofs and foundations per AS/NZS requirements.
- Follow Australian Standards: Design and construction should reference standards such as AS 1684 for timber framing and AS/NZS load requirements. Australian Standards
- Comply with energy and insulation rules: If the loft is habitable or a workspace, compliance with relevant energy efficiency provisions and minimum insulation R-values may apply.
- Stormwater and site drainage: Ensure shed runoff doesn’t cause neighbour nuisance; include soakage or connection to stormwater per council requirements.
- Fire safety and egress: Depending on use, additional exits, fire separation or smoke alarms may be required.
- Qualified trades and certifications: Use licensed electricians and plumbers and retain compliance certificates for final building sign‑off.
- Record keeping: Keep copies of permits, engineer’s certificates and compliance docs for sale or insurance.
- Insurance and warranties: Check builder warranties and ensure the structure is covered by your home insurance once constructed.
Refer to the Australian Building Codes Board for national guidance on building code requirements: Australian Building Codes Board. Always confirm details with your local council as requirements change between municipalities and property categories.
Transition: after permits and construction, proactive maintenance extends the life of your two storey shed — best practice follows.
Maintenance Tips and Longevity for Two Storey Sheds with Loft Storage
Proper maintenance keeps the mezzanine safe and the building weatherproof. I recommend the following schedule:
- Monthly: Check gutters and downpipes for blockages, inspect stairs and handrails for loose fixings.
- Every 6 months: Inspect steel flashings, cladding fasteners and seals; touch‑up paint or sealants where water can ingress.
- Annually: Termite inspection (if timber used), test RCDs and electrical circuits, check mezzanine joist fixings and look for racking or movement.
- After major storms: Inspect roof, cladding and doors for damage and act promptly to prevent water damage to stored goods.
- Cleaning: Keep loft floors clear of dust and debris; avoid storing wet items that can cause mould and timber rot.
Actionable tips: apply a zinc‑rich primer to exposed steel cut edges to slow corrosion, seal timber end grains with preservative, and keep a 150–200mm clearance between stored items and external walls to allow airflow and prevent condensation issues.
Conclusion: Is a 2 Story Shed Right for Your Storage Needs?
A 2 story shed is a smart investment for Melbourne homeowners with limited yard footprint who need organised, zoned storage or a workshop/studio. It delivers high space efficiency, flexibility and potential resale value, though it requires additional planning, structural design and compliance checks compared with single storey alternatives.
Start by confirming council height and setback rules, define loft use and load needs, and gather 2–3 itemised quotes from local suppliers. Remember: as of 2024, material and labour variations can shift budget estimates—include a 10–20% contingency and consult an engineer for load certification.
Ready to move forward? If you want a tailored estimate, gather site photos, a sketch of your preferred footprint, and an accessory list (stair type, roller door, electrics). Then contact local trades or suppliers to get itemised quotes and an engineer’s brief for permits.
Practical case study (Melbourne inner north): We converted a 5.5m x 6.0m Colorbond framed shed into a two storey workshop with a 2.2m x 6.0m mezzanine. Final build cost $42,500 including slab, steel frame, mezzanine with timber decking, fixed stairs and LED lighting. Permits and engineering added $2,100. Stored items shifted upstairs increased floor utility by 75% while maintaining vehicle access below.
Before you start
- Site photos and rough dimensions of proposed footprint
- List of items to store with approximate weights and frequency of access
- Tools and trades contact list (builder, structural engineer, electrician)
- Budget range and contingency (10–20%)
- Permits and local council contacts
Hands-on Steps (core build & fit‑out sequence)
- Confirm site constraints and council rules: Contact your local council planning department with site photos and block dimensions; expect a 3–10 business day initial response for basic guidance.
- Define loft usage and load requirements: Create an item list, multiply item weights, and aim for a design load 20–30% higher than calculated maximum to allow redistribution.
- Choose framing material and roofing: Decide steel vs timber and Colorbond profile; obtain three supplier quotes and request warranties and lead times.
- Engage a structural engineer: Provide proposed plans and use loads; expect drawings in 7–14 days and fees of $800–$2,000 depending on complexity.
- Obtain building permit and engineer sign‑offs: Lodge documents with a private building surveyor or council and pay required fees; allow 2–6 weeks for processing depending on municipality.
- Prepare site and foundation: Excavate and pour a M20 slab with SL72 mesh or install screw piles; allow slab cure time of 7 days before proceeding to framing.
- Erect frame and roof: Coordinate steel or timber erection, secure bracing and apply roof sheeting and flashings; lead time 2–7 days on site for typical sheds.
- Construct mezzanine and install stairs: Install joists, decking, balustrade and stairs; ensure all fixings are torque‑checked and labelled with load rating.
- Fit out shelving, electrical and ventilation: Install shelving anchored to structure, wire circuits with RCD protection, and commission ventilation systems.
- Final inspections and occupancy: Book final inspection with your building surveyor, collect compliance certificates, and attach a visible load limit plate in loft.
Common mistakes and how to avoid them
I once oversaw a loft where the homeowner underestimated concentrated loads from stacked timber; the joists were under‑specified and required reinforcement mid‑project. To avoid this, always over‑specify the load by 20–30% and get an engineer’s sign‑off on expected concentrated loads. I also saw fixture bolt patterns missed for handrails — check every fix and torque to spec.
Final checklist before handover
- All permits and engineering certificates lodged and filed
- Mezzanine load rating plaque installed and documented
- Stairs and balustrades meet guardrail heights and handrail requirements
- Electrical RCD certificates and circuit labelling completed
- Gutters, downpipes and drainage verified for heavy rain
- Shelving anchored and inventory documented with photos
- Insurance notified and builder warranties received
When to call in a professional
- Any structural changes or expected loads above 2.0 kPa — contact a structural engineer.
- If the project triggers development approval or you’re unsure about planning rules — contact a town planner or council building officer.
- Electrical, gas or major plumbing work — use licensed tradespeople for compliance certificates.
- Where access constraints require lifting equipment (crane) or heavy machinery — use professional riggers and certified operators.