

Shed doors — by the end of this guide you’ll be able to choose, source and fit the right door for a garden or storage shed in Melbourne, plan the budget, and complete a DIY Colorbond kit installation or brief a tradesperson. Expect 4–8 hours for a simple hinged or sliding fit, 1–2 experienced installers for larger panels; skill level: intermediate DIYer with basic carpentry and metalwork experience.
This hands-on guide covers selection, materials comparison, door types, step-by-step Colorbond kit assembly, steel door maintenance, security and Melbourne buying options so you can act confidently.
Before you start
- Permissions: check local council rules for sheds over 10 m² (see council link in Cost Factors).
- Tools: 12V impact drill, 4.8–5.5 mm self-drilling metal screws, M8 bolts, pop rivet gun (4.8 mm), silicone sealant (neutral cure), spirit level, tape measure, metal snips, jigsaw with metal blade, and PPE (gloves, eye protection).
- Materials: chosen door kit or sheet lengths, foam weatherstrip, zinc-rich primer for cut edges, touch-up paint (Colorbond colour match), zinc anode strips for coastal sites.
- Helpers: 1 assistant for 1.2–2.4 m doors; 2 helpers for large panels above 2.4 m.
Introduction to Shed Doors: Purpose and Options
What you’ll achieve: identify the right access solution for a garden shed — measuring, choosing material, picking a door type that balances security, weather resistance and cost. Typical projects take 0.5–3 days depending on door type and finish.
Why doors matter: a well-chosen door controls access, ventilation, weather protection, and the durability of stored items. Garden shed doors also shape how you use the shed—side access for potting benches, wide double doors for mowers, sliding doors for tight paths.
This article is a practical companion to our wider shed doors selection guide including Colorbond and steel resources — for a full overview see the linked pillar below for cross-reference and deeper roof/frame guidance.
shed doors selection guide including Colorbond and steel
Related use-case: if your shed doubles as an outdoor kitchen, read our barbecue shed features overview for design cues on ventilation and service access.
Materials Overview: Colorbond vs Steel and Other Metals
Choosing between Colorbond shed doors, galvanised steel, or other metal options depends on corrosion resistance, finish longevity, edge protection after cutting, and local climate. Below table compares typical properties and then a concise summary follows.
| Material | Durability / Corrosion | Finish Options | Best Use |
|---|---|---|---|
| Colorbond (pre-painted steel) | High — layered paints & zinc/Alu coating; good coastal mixes with correct edge protection | Wide Colour palette (heritage and modern shades) | Garden sheds, visible facades, low-maintenance applications |
| Galvanised steel (zinc-coated) | Good — sacrificial zinc layer, requires painting on cut edges | Limited; typically primed or painted on site | Budget doors, workshops, rural sheds |
| Stainless steel | Excellent — high corrosion resistance, expensive | Metal finish only; brushed or polished | High-exposure or specialist industrial doors |
| Aluminium | Good — non-ferrous, resists rust but can corrode in marine settings | Powdercoat available | Lightweight doors, sliding panels |
Regulatory context: refer to Australian design and construction standards for steel cladding and external doors. For performance and anchorage rules consult the Australian Building Codes Board for NCC guidance on corrosion categories and wind loading (relevant to door fixings and frame choice).
Technical notes: Colorbond is a trade name for pre-painted steel with an outer paint system over a zinc/Aluminium alloy-coated substrate. Its technical literature details specific corrosion class suitability and recommended edge treatments — see BlueScope/Colorbond technical data for exact substrate and paint warranty specifics.
For further guidance about broader door and brand options see our doors and garage doors buying guide.
Popular Shed Door Types and Their Suitability
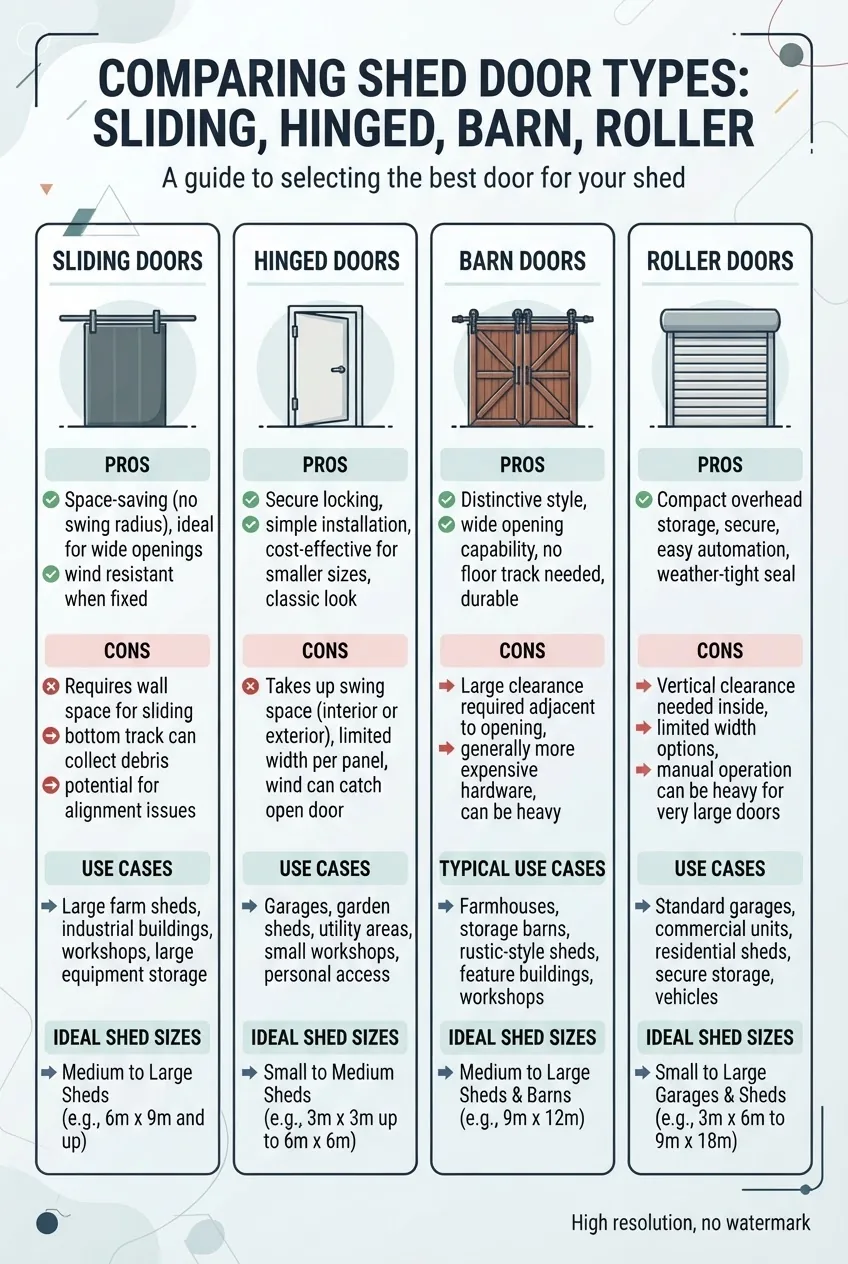
Different uses and site constraints drive the choice between sliding, hinged, barn and roller doors. Below I list the common types, when each makes sense, and practical suitability recommendations.
-
Hinged (single or double) doors
Use: Best for regular pedestrian access and garden sheds where full-width opening is not required. Suitability: small-to-medium sheds (0.9–1.2 m single leaf; 1.6–2.4 m double). Pros: cheapest, easy to install and weather-seal. Cons: swing area needs clearance; can be vulnerable without good locks.Recommendation: add a metal threshold sill and a deadbolt lock for garden security; use Colorbond panels for visible finishes.
-
Sliding shed doors
Use: Ideal where swing clearance is limited—narrow paths, side-entry sheds. Suitability: narrow sheds, side entries, potting sheds. Pros: minimal external space, smooth operation when tracked correctly. Cons: track maintenance and weather sealing can be more complex.For design pointers see our sliding shed doors guide and our narrow shed sliding doors feature for tight sites.
-
Barn-style doors (paired sliding or bi-fold)
Use: Rustic aesthetic or wide openings where full access is needed but roller automation is unnecessary. Suitability: mid-to-large garden sheds and hobby workshops. Pros: visual appeal, robust when built on steel frames. Cons: need strong header and track; can be heavy.Recommendation: use heavy-duty rollers and continuous top guide on sheds above 2.4 m wide to avoid sagging.
-
Roller doors (overview)
Use: Large openings with automated access needs, often used on garage-like sheds. Suitability: storage sheds where vehicle access is required. Pros: compact roll-up action, automatable. Cons: higher cost and complexity; detailed cost guides exist elsewhere.For deeper cost and automation options see garage roller doors overview, roller door options for sheds, and garden shed roller door options.
-
Side entry and personnel doors
Use: Small doors installed in a side wall for quick access. Suitability: sheds used as potting rooms or workshops where a full-width door is unnecessary. Pros: minimal footprint; easy to weather-seal. Cons: limited access for large equipment. -
Bi-fold doors
Use: Combine wide opening with compact folding; suited to alfresco or café-style sheds. Suitability: garden sheds converted for entertaining or outdoor kitchens. Pros: aesthetic and practical; often aluminium for lightness. Cons: fittings require precise alignment.
For further roller door sizing and prices consult our roller door prices and sizes page and for automated cost breakdowns see automatic roller door prices.
Colorbond Shed Door Kits: Features and Installation Guide
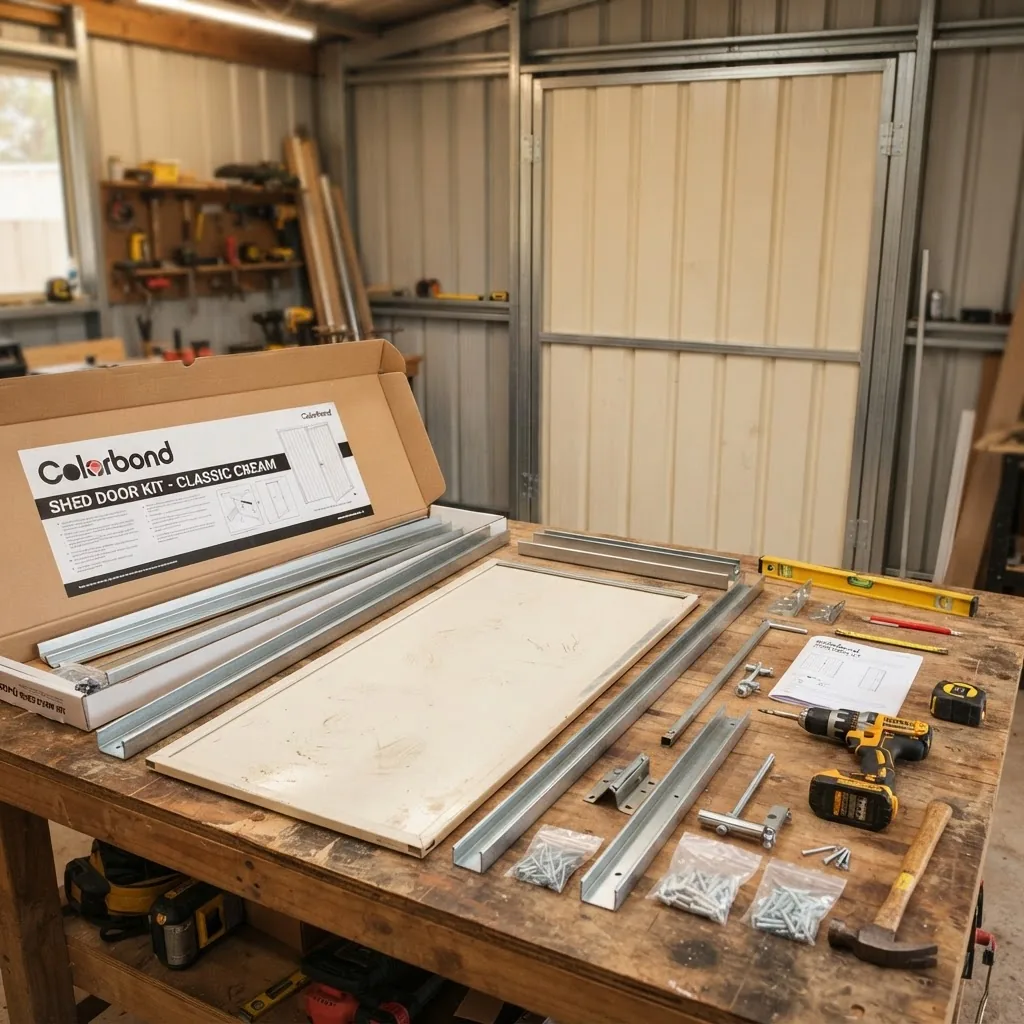
A Colorbond shed door kit provides pre-cut panels, frames, fixings and weather seals matched to Colorbond colours—ideal for a homeowner who wants a consistent finish and a straightforward fit. Below is a hands-on kit installation guide with component checklist and stepwise assembly.
Kit components (confirm contents before starting)
- Pre-cut Colorbond panel(s) sized to roof/door opening
- Steel door frame sections (pre-notched)
- Fixing pack: self-drilling screws (4.8 x 20 mm), M8 bolts for hinges, pop rivets
- Weatherstrip and foam sill seal
- Hinges or sliding brackets, lock strike plate
- Touch-up paint pot and edge primer
- Instructions and warranty card with Colorbond colour code
Step-by-step installation (core steps)
- Measure and confirm the opening — Use a steel tape and spirit level; record width and height in three places (top, middle, bottom). Door opening tolerance: frame should be 3–6 mm smaller than clear opening per side for thermal expansion. If variance >6 mm, plane the frame or shim with galvanised shims.
- Prepare the frame — Lay out frame on flat supports; pre-drill 5 mm clearance holes where instructed. Apply zinc-rich primer to any cut edges and screw holes to maintain corrosion protection. Estimated time: 30–45 minutes.
- Anchor the frame — Lift frame into opening with two people. Use M8 coach bolts into timber or 10 mm expansion anchors into concrete. Torque to 20–25 Nm for M8 into timber; avoid over-torqueing which can distort the frame.
- Fit the door panel — For hinged doors attach hinges with M8 bolts through pre-drilled holes; for sliding doors mount rollers and test travel on track. If using sliding, ensure rollers are greased and the track is level within ±3 mm across the opening.
- Seal and flash — Install foam sill and silicone bead (6–8 mm diameter bead) along frame perimeter. Use neutral-cure silicone (not acetoxy) to avoid paint staining. For coastal sites add a sacrificial zinc anode strip near cut edges.
- Install locking hardware — Fit a three-point lock on double doors or a deadbolt with strike plate on single doors. Use stainless steel fixings for coastal exposure. Test lock engagement 10–15 times to bed the mechanism.
- Touch-up and finish — Paint exposed edges and screw heads with supplied Colorbond touch-up paint; allow 24 hours drying before subjecting finish to heavy moisture. Clean metal swarf from site to avoid rust spots.
- Adjust and commission — Check door operation across a 24-hour temperature range (morning vs afternoon) to note expansion; retighten fixings to the torque above if necessary. Final check list: smooth operation, flush seals, lock function, and touch-up completed.
Tools and timings — expect 4–8 hours for a two-person installation of a standard double Colorbond door (1.8–2.4 m wide). Required tool checklist: 12V impact driver, torque limiter (if available), pop rivet gun, silicone gun, metal snips, bench clamps, and 150–200 g touch-up paint.
Pricing context: kit pricing varies by size and finish — according to 2024 industry supplier data in Melbourne, standard 1.8 m Colorbond door kits typically range from $450–$900 AUD depending on fittings and colour-match requirements.
Case example (Melbourne homeowner): “I installed a 1.8 m Colorbond double door kit on a Dandenong backyard shed over one weekend with my partner. We followed the kit instructions, used M8 coach bolts into timber studs and added extra sill seal. The match to the roof is perfect and the door seals well in storms,” — S. Nguyen, Brighton, Melbourne.
For kit sheds and custom orders see custom kit sheds options, and for window/door combos consult shed windows kit and installation.
Steel and Metal Shed Doors: Advantages and Maintenance
Steel shed doors offer strength and price competitiveness. When properly protected — through galvanisation, paint systems, and edge sealing — steel doors give many years of service. Tradespeople use a routine set of maintenance tasks to extend lifespan, particularly in high-corrosion or coastal environments.
Advantages
- Strength and resistance to impact compared with timber or thin plastics.
- Cost-effective for large openings and heavy use.
- Compatibility with robust security hardware — multi-point locks, deadbolts.
Maintenance checklist used by tradespeople
- Inspect every 6 months: check for paint chips, exposed steel and surface rust.
- Annual wash: mild detergent and rinse to remove salts and organic debris.
- Repair chips immediately: wire-brush to remove loose rust, apply zinc-rich primer, then touch-up paint within 48 hours.
- Lubricate hinges and rollers every 6 months with a silicone or lithium grease.
- Check and re-seat external fixings yearly; replace any corroded screws with stainless equivalents.
Lifespan expectations: a well-maintained Colorbond door in Melbourne suburban conditions typically lasts 20+ years with periodic touch-ups; plain galvanised steel can be durable but requires vigilance at cut edges. According to a 2024 trades survey, routine annual maintenance extends door life by an average of 6–8 years in coastal suburbs.
If you manage a farm or machine shed consult heavy-duty machine shed door solutions for thicker gauge steel and reinforced frames used in rural settings. For large open-front sheds see open bay shed doors.
Security and Weatherproofing Considerations for Shed Doors
Shed doors should defend against break-in and moisture. Think of the door as the gate to your backyard: pick locking hardware, seals and construction methods that match the value of contents inside.
Key security and weatherproofing features to prioritise:
- Three-point locking systems for double doors — resists prying along the vertical edge.
- Hinge bolts or rising butt hinges to prevent hinge-side removal.
- Continuous sill and threshold with foam compressible gasket for water exclusion.
- Stainless or galvanised fixings in external exposures to prevent failure.
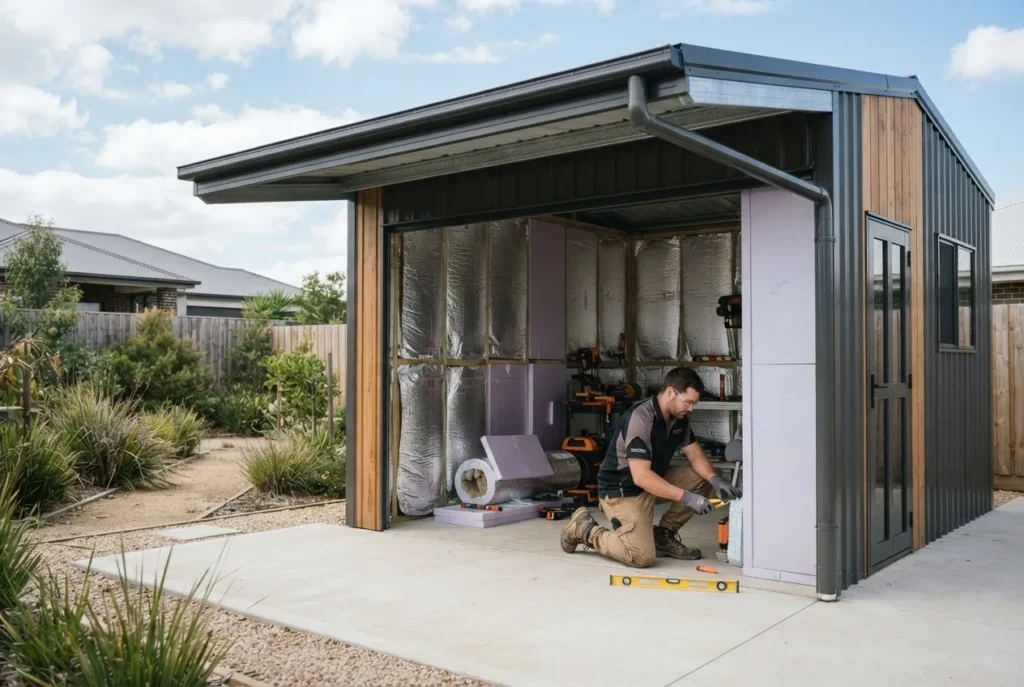
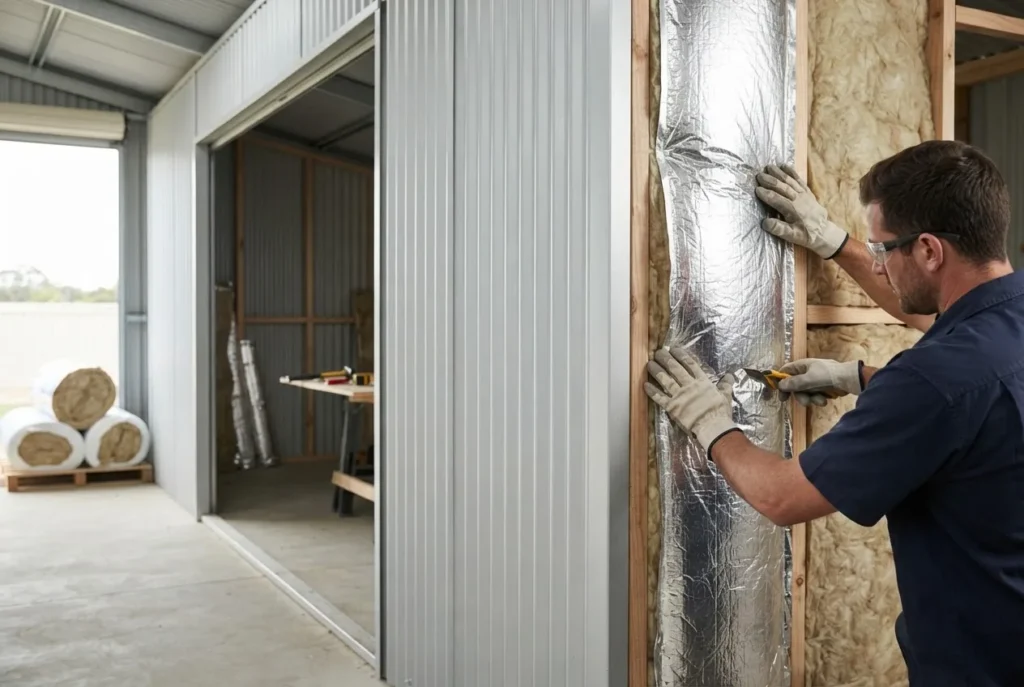
- Insulation: closed-cell foam panels or foil-faced PIR for internal insulation where condensation/mildew is a concern.
- Pest-proofing: folded hem on bottom edge and external insect mesh for ventilation openings.
Security accessories: deadbolts, hasp-and-padlock systems with shrouded staples, and internal slam-locks are effective. For valuable contents consider alarm contacts on doors and shed-rated deadbolts. For storm resilience, add windstraps or door braces where wind speeds exceed local design wind load (check ABCB or local authority data).
For more design ideas and secure finishes see our companion piece on secure shed door ideas.
Cost Factors and Where to Buy Shed Doors in Melbourne
Costs vary by size, material, fittings, and installation complexity. Below I outline approachable cost factors, give a simple pricing methodology, and list local supplier pointers across Melbourne suburbs.
How to estimate cost (methodology)
- Base material cost: measure door area (m²) and multiply by material rate. Example (2024 Melbourne supplier data): Colorbond panels $40–$70/m²; galvanised sheet $30–$50/m².
- Frame and hardware: add $120–$450 depending on hinge/lock grade and frame steel gauge.
- Installation labour: DIY saves labour; expect $150–$350/hr for tradespeople in Melbourne depending on scope; simple install 2–6 hours.
- Finish and extras: touch-up paint, sealant, and weatherstrip $40–$150; coastal sacrificial anodes $20–$50.
Sample quick estimate (standard 1.8 m x 2.0 m double Colorbond door):
- Panels (3.6 m²) at $55/m² = $198
- Frame & hardware = $320
- Labour (4 hours @ $200/hr) = $800
- Finishes & sealants = $100
- Total indicative = $1,418 (According to 2024 Melbourne supplier data)
Buy locally: compare these Melbourne suppliers and resources for pricing and local stock.
- Aussie Barns sheds and cost guide — broad supplier for mid-range kits.
- affordable door options — compare gate-style doors and price points.
- automatic roller door prices — automation cost reference.
- Dandenong sheds and door pricing — local Melbourne area suppliers.
- Portland sheds and door cost, Devonport shed and door options, custom shed designs in Armidale.
- Nowra shed door buying guide, custom kit sheds options, and Sheds Armidale custom designs and pricing information.
Local regulations and permits: check City of Melbourne building and planning pages for permit triggers and the need to lodge a building application for sheds with doors that change floor area or exceed height/area thresholds — see Melbourne council building info for specifics.
Other price guides in region: Dandenong sheds and door pricing, Devonport shed and door options, Portland sheds and door cost, and Nowra shed door buying guide for nearby market comparisons.
Note on price variance: custom sizes, specialised hardware, coastal coatings and painting inflate quotes—budget a 15–30% contingency for non-standard sizes. According to a 2024 Melbourne supplier report, custom colours and powdercoat can add 20–40% to a standard kit price.
Conclusion: Choosing the Right Shed Door for Your Garden Shed
Summary: match door type to access needs and site constraints first (sliding for narrow access, double hinged for simplicity, roller for vehicle access). Choose Colorbond where appearance and low maintenance are priorities; use galvanised steel where cost and heavy use dominate. Factor in security hardware and weatherproofing as part of the door cost, not an optional extra.
Actionable tips: measure carefully (3-point measurements), plan for expansion gaps (3–6 mm per side), specify stainless fixings in coastal areas, and budget a 15–30% contingency for custom work. If fitting a Colorbond kit, follow the stepwise install method above and test door operation across 24 hours to confirm movement and seal integrity.
If you’re ready to buy, gather two local quotes including site visit; if you’re ready to fit a kit, allocate a weekend and recruit a helper. For specialized or large installations call a licensed builder.
Core installation and selection steps (hands-on checklist)
- Measure the opening — 3 vertical heights and 3 widths; record the smallest dimension.
- Choose material and finish — Colorbond for visible, galvanised for budget, stainless for high corrosion.
- Order kit or raw materials — include fixings, sealant and touch-up paint; consider delivery and lead time (2–14 days).
- Prepare tools and helpers — drill, rivet gun, silicone, clamps; two people for >1.8 m doors.
- Install frame and anchor — M8 bolts into timber studs or 10 mm anchors into concrete.
- Hang door and seal — set gaps 3–6 mm; use foam sill and a 6–8 mm silicone bead.
- Fit locks and test — test 10–15 cycles; retighten after 24 hours.
- Apply touch-up and clean site — zinc-prime cut edges, paint within 48 hours, remove metal swarf.
Common mistakes and how to avoid them (from on-site experience)
I once installed a sliding Colorbond door without full track levelling; it bound in hot weather and required track re-shimming. Lesson: measure and level the track to ±3 mm, and test travel before finishing the seal.
I fitted a cheap lock and later had the shed compromised — always specify at least a three-point lock or shrouded hasp for valuable items. Stainless fixings prevent failure in coastal suburbs.
Final verification checklist
- Door opens and closes smoothly across full travel and after 24-hour temperature change.
- All exposed cut edges have zinc primer and touch-up paint applied.
- Fixings are stainless or galvanised; torque values checked (M8 ≈ 20–25 Nm).
- Weatherstrip compresses uniformly; no daylight gaps around perimeter.
- Lock engages reliably and key operation is smooth.
When to call a professional
Call a licensed builder or structural engineer if the door opening alters structural elements, if wind loading is above standard suburban levels, or if you require automation for heavy roller doors. Seek a qualified tradesperson if you lack power-tool experience or if the job involves cutting into structural cladding.