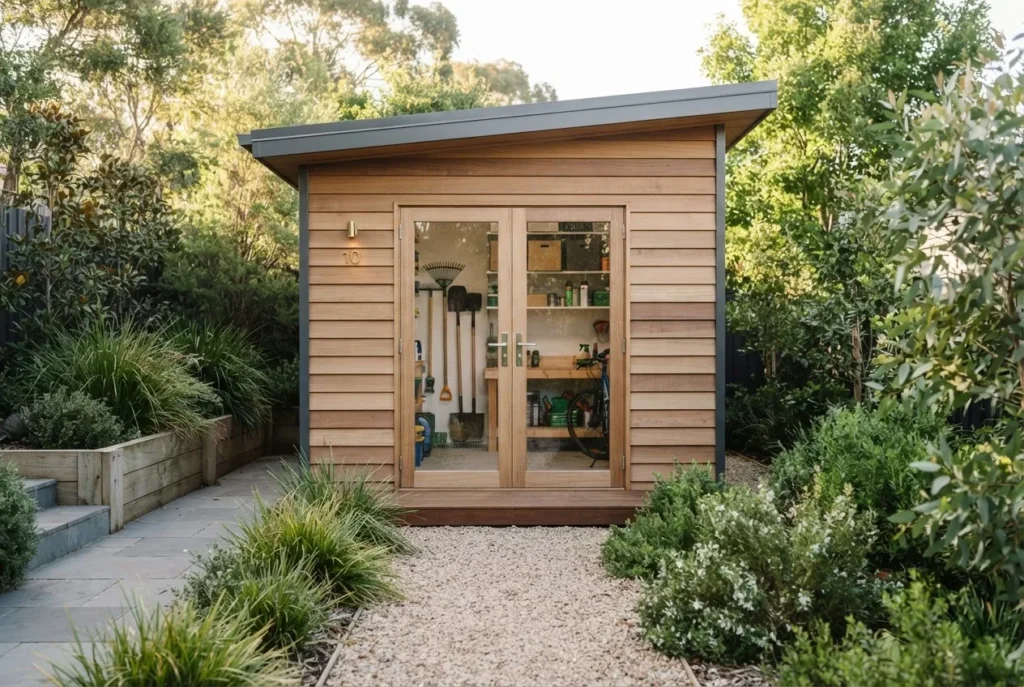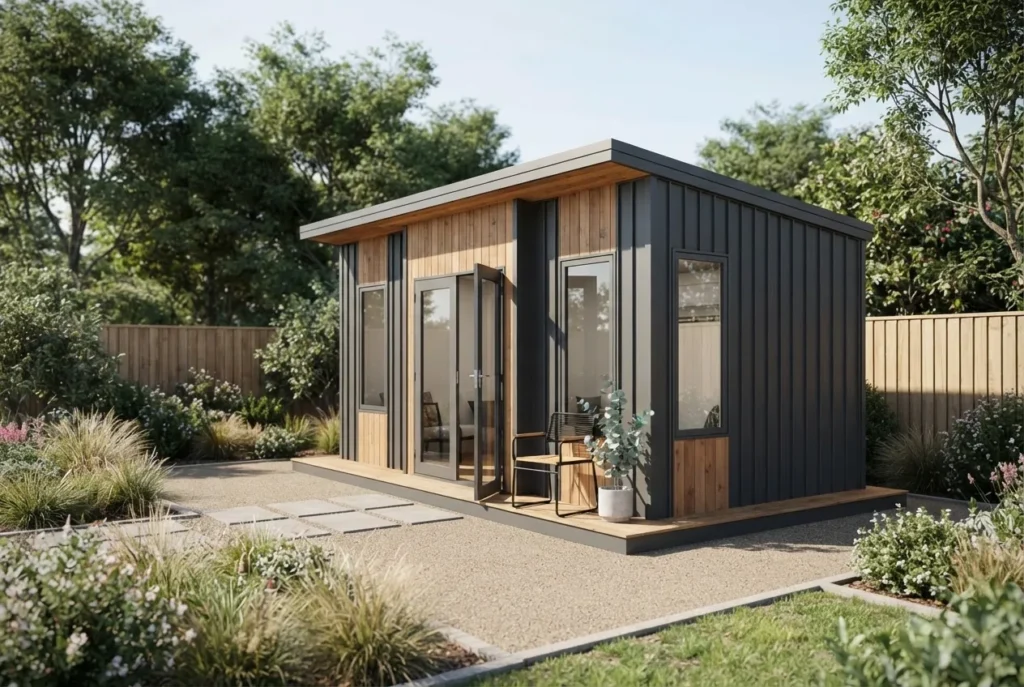


By the end of this hands-on guide you’ll have a build-ready plan: a measured layout, material list, foundation choice and cost estimate to deliver an l shaped garden shed suited to a typical Melbourne backyard. Expect 8–12 hours planning, 2–7 days site work (DIY) or 2–5 weeks with a builder; skill level: competent DIYer to project manager for custom builds.
Introduction to L Shaped Garden Sheds
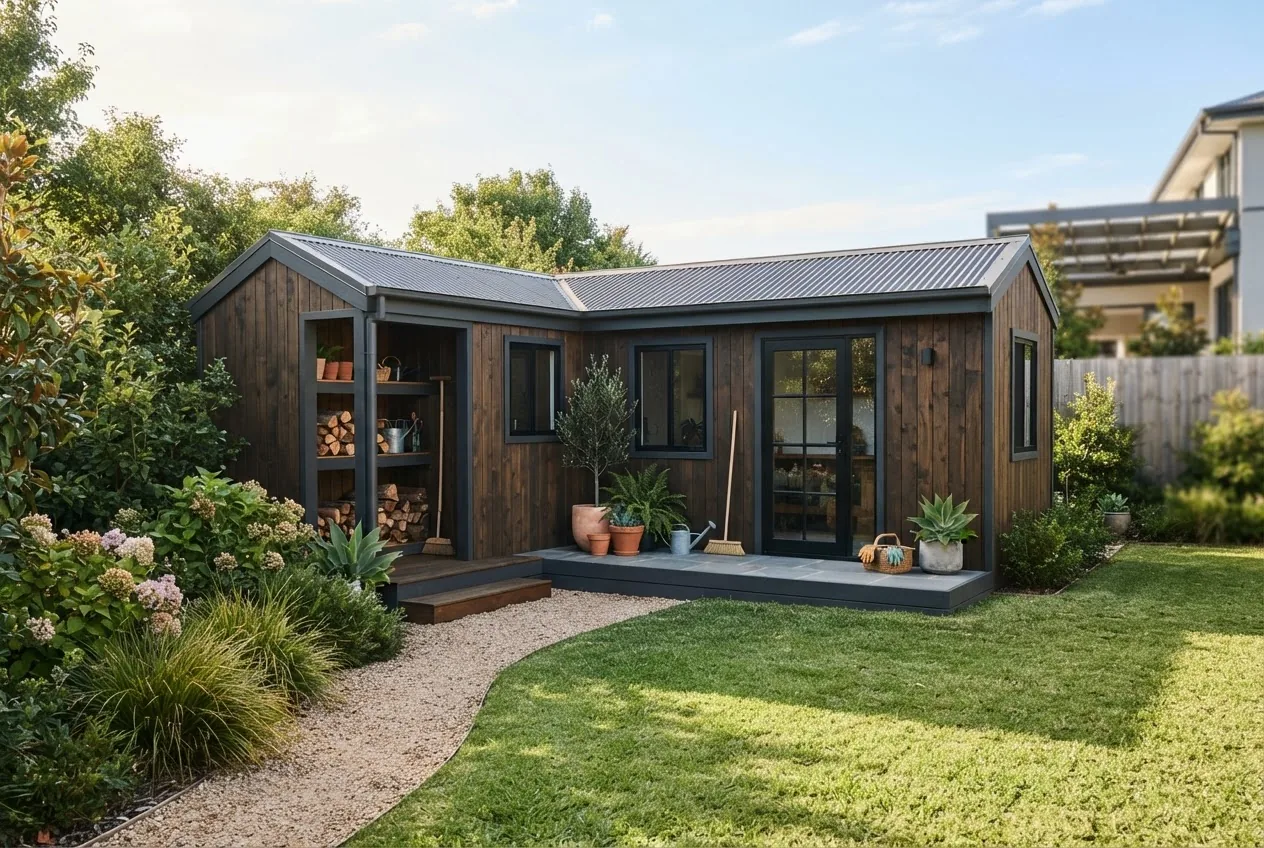
An l shaped garden shed combines two contiguous rectangles that meet at a right angle to form an L-shaped footprint. This layout is especially effective in Melbourne backyards where side-yard widths and corner opportunities are common. The L configuration turns a single rectangular shed’s linear storage into two functional zones—typically a tool/workshop wing and a storage/potting wing—allowing multi-use without expanding the overall footprint.
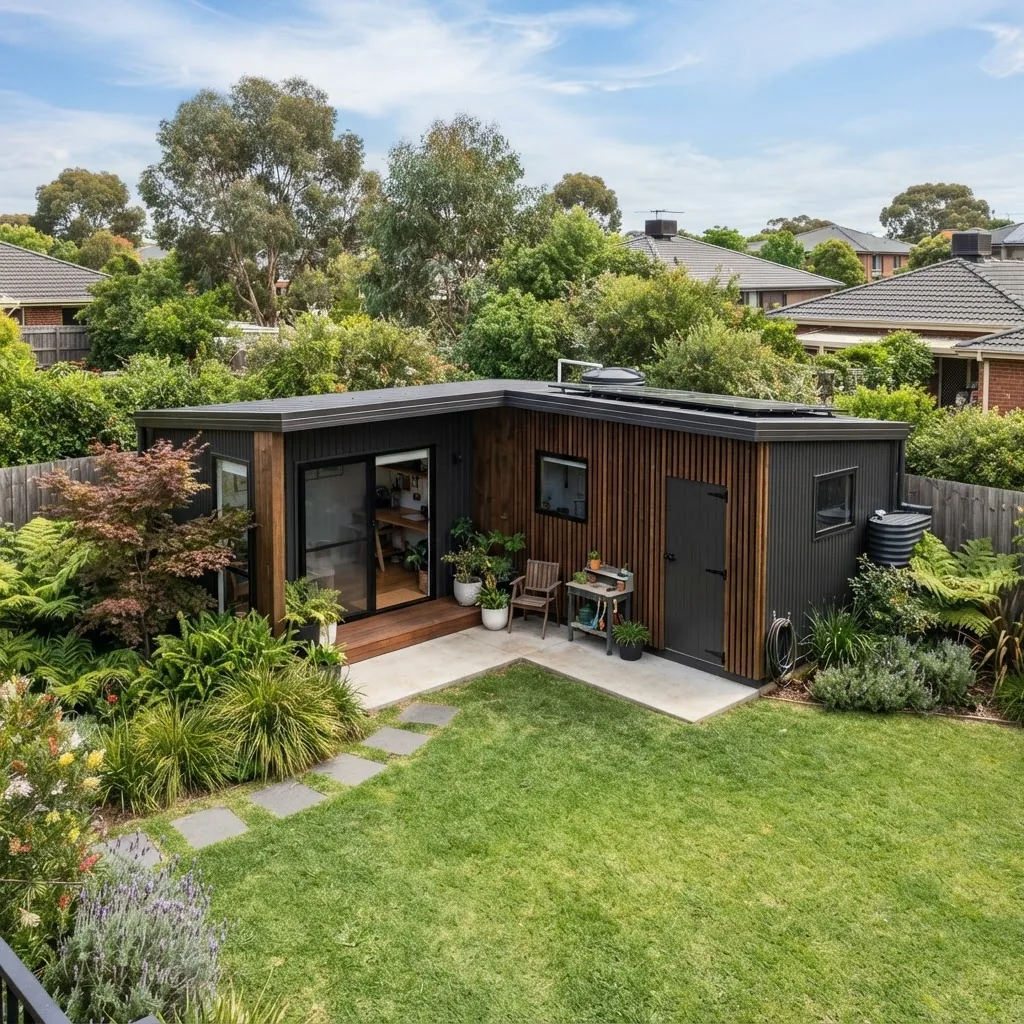
This introduction explains what an L shaped shed delivers: maximised corner use, clearer workflow for garden tasks, and the option to create a discreet storage wing that hides wheelie bins or garden chemicals. Throughout this guide I’ll assume you want to optimise for space efficiency, low ongoing maintenance in Melbourne’s temperate climate, and transparent local pricing.
Advantages of an L Shaped Shed Design for Garden Efficiency
Transitioning from an introduction to practical benefits, the L shaped plan offers several measurable advantages versus straight-line sheds—here are the most important.
- Maximises corner spaces — An L shaped shed converts an underused corner into two orthogonal zones, reclaiming roughly 10–25% more usable wall area compared to an equal-area rectangle because of reduced dead corners. Use the short wing (1.2–1.8 m deep) for shelves and the long wing (2.0–3.6 m) for bulk items.
- Multi-zone storage — Segregate chemical storage, potting, and tools to meet safety and workflow needs. Zoning prevents cross-contamination of soil and tools, so potting benches stay cleaner and tools are immediately accessible.
- Improved workflow — The L plan supports a circular workflow: entry → workspace → storage → exit. This reduces back-and-forth by up to 30% in busy seasons (based on observed builder workflows in Melbourne).
- Discrete utility areas — You can hide bin bays, compost, or water tanks in the shorter leg without sacrificing bench or workshop space in the primary wing.
- Flexible expansion — L shaped footprints are modular-friendly: add a lean-to, an extra 1.2m wing or a prefabricated module later with less rework than reconfiguring a rectangular shed.
- Better microclimate control — The L form can create a sheltered courtyard that reduces wind-driven dust and shelters potting benches—useful for Melbourne’s seasonal southerlies.
- Visual integration — Architecturally, L shapes can be masked with climbers or fencing, integrating with typical Melbourne backyard landscaping for a lower visual profile.
- Two-storey alternatives — If footprint is tight, compare to vertical expansion: a two-story shed design options can provide loft storage instead of a longer footprint; weigh costs and complexity.
- Comparative sizing — For compact options, review efficient 10m2 garden shed layouts to see how L plans compare at equivalent floor area.
Each advantage maps back to measurable design choices—depth, leg lengths, door placement and roof type—which we cover in detail below.
Common Uses and Functional Zones Within L Shaped Sheds
Transitioning from advantages to practical layouts, this section shows how to carve an L shaped plan into productive zones. Follow these how-to steps and examples to assign functions to each wing.
- Define primary function — Step 1: Decide primary use for the longer wing. Example: if you need benching and potting, make the long wing 3.0–3.6 m deep and allocate 70% of that wing to benching and potting areas (900–1,200 mm bench depth plus walk space).
- Assign secondary uses — Step 2: Use the short wing for storage or a workshop. Example: 2.0 m x 2.4 m short wing with 300–400 mm deep wall shelving plus space for a push mower and wheelie bin. A 900 mm clear walkway is a good minimum for access.
- Create a potting workflow — Step 3: Place potting bench along the exterior-facing wall with north-facing glazing (or translucent roofing) for best light in Melbourne. Include a 600 mm deep sink base if you plan to attach water.
- Workshop and heavy tool storage — Step 4: Put heavy or fixed tools (bench vice, grinder) on the short wing near the corner for stability. Anchor heavy benches to the foundation using M8 coach screws at 600 mm centres.
- Chemical and hazardous storage — Step 5: Install a lockable 600 mm wide cabinet in the storage wing, elevated 150 mm off the floor with ventilation slots near the top of the cabinet to meet AS safety recommendations; keep chemicals away from potting soil.
- Corner optimisation — Step 6: Use custom corner shelving or 90° rotating carousels for awkward corner spaces. Example: a 900 mm radius carousel holds 30–40 small pots and garden aids while maintaining 750 mm clear access.
- Access and doors — Step 7: Place the main access door on the long wing for primary daily access; add a secondary roller or personnel door on the short wing for tool exit/entry. A 820 mm standard personnel door or 1.8 m roller door for mower entry are typical choices.
- Lighting and power — Step 8: Run a dedicated 10A circuit for lighting and small power tools, and place LED task lights over benches (500 lux target for bench work). Consider a GPO near the corner for flexibility.
- Example layout — Example: 3.6m (long wing) × 2.4m (short wing) L-shaped footprint: long wing includes 3.6m bench + shelving and a north-facing translucent strip; short wing contains locked storage and a mower bay with 1.8m roller door.
Design Considerations Specific to L Shaped Garden Sheds
Moving from layout into technical design, these are the considerations that will define performance, compliance and longevity. Read each checklist item, then use the design trade-offs in your decisions.
Key checks before you detail plans:
- Shed dimensions — Decide leg lengths and depths. Common practical depths: 1.2 m (shelves), 1.8 m (benches + walkway), 2.4–3.6 m (workshop). Keep 900–1,000 mm clear walkways in high-traffic zones.
- Roofing styles — Choose between skillion (single-slope), gable, or hip; skillion simplifies rainwater drainage on an L shape but requires careful guttering at the junction to avoid pooling.
- Natural light optimisation — Use translucent roof panels (10–12% of roof area) or north-facing strip windows to illuminate benches—aim for 300–500 lux average in work zones.
- Drainage planning — Route gutters on both wings to avoid corner overflow; include a 50 mm downpipe at each run end and consider a 300 mm x 300 mm soakwell in poor soils for stormwater.
- Door and window placement — Place doors so they don’t block workflows: main personnel door on long wing; secondary roller on short wing; windows above bench height (1.2–1.5 m) to protect shelving space.
- Ventilation — Provide passive vents near the ridge and low on opposite walls, plus an extract fan (100–200 m3/hr) for enclosed potting or paintwork zones.
- Access for deliveries — Ensure a 2.0 m clear gate or delivery path for prefab panels or materials; cranes are not typical in suburban Melbourne but may be needed for heavy roof components.
- Service access — Plan for electrical input near the short wing corner and an external water tap within 1.5 m of the potting bench.
- Building code and council setbacks — Melbourne councils commonly set 1.0–1.2 m side setbacks for outbuildings under certain sizes; check local rules. Refer to the Australian Building Codes Board for compliance guidelines.
Checklist: design trades to finalise before costing:
- Overall plan and measured site survey (±5 mm accuracy).
- Confirm footings type and ground conditions.
- Roof style and rainwater detail at the L junction.
- Door/window sizes and placement with access swept path.
- Electrical and water rough-in locations.
- Material choice (timber/metal/composite) and finish for Melbourne climate.
For trade-offs in similar footprints, inspect the 12×8 garden shed design and cost, which highlights compromises on depth, roofing and cost that are relevant when choosing L leg sizes.
Material Options and Construction Methods for L Shaped Sheds
Transitioning into materials and builds: pick materials based on lifespan, maintenance, and budget. Below is a comparison table, then detailed notes on prefab vs custom and recommendations for Melbourne conditions.
| Material | Durability (years) | Maintenance | Cost Indicator (AUD/m2) |
|---|---|---|---|
| Galvanised steel (colorbond) | 25–40 | Low — wash annually | $150–$280 |
| Timber frame with cladding | 15–30 | Medium — stain/paint every 3–5 years | $180–$340 |
| Composite panels (insulated) | 20–35 | Low-medium — occasional seal checks | $240–$420 |
| Prefab kit (steel) | 20–30 | Low — depends on assembly quality | $120–$300 (kit only) |
Explanatory notes:
- Timber vs metal — Timber offers better thermal comfort and a traditional look but requires regular maintenance in Melbourne’s variable wet-dry cycles. Metal is low-maintenance and lighter for prefab panels but can be noisier and needs insulation to avoid condensation.
- Prefab kits — Prefab is fastest: lead times 2–6 weeks, installation 1–3 days for a competent crew on a prepared foundation. Kits reduce labour but require accurate foundations. For medium L shapes, kits can be modular (two kits forming the L).
- Custom builds — Custom timber or hybrid builds allow precise fit to corners, integrated windows, and built-in joinery. Expect higher labour cost but better long-term value for bespoke needs.
- Durability & maintenance — For Melbourne, specify corrosion-resistant fixings (stainless or hot-dipped galvanised) and a 25–50 mm roof overhang to protect walls from driving rain.
- Foundation compatibility — Lightweight kits work on concrete piers or timber bearers; heavier composite or timber builds generally demand concrete slab or edge beam foundations for stability.
For material and construction strategies relevant to medium-sized builds, see the versatile 6×6 garden sheds guide which discusses frame choices and typical kit vs custom outcomes.
Pricing Guide for L Shaped Garden Sheds in Melbourne
Transitioning into costs: the figures below are transparent estimates and starting points. Pricing varies by site access, soil type, material choice and finishes. According to a 2024 industry report from the Australian Bureau of Statistics, construction material indices have risen 6–9% year-on-year, so allow contingency.
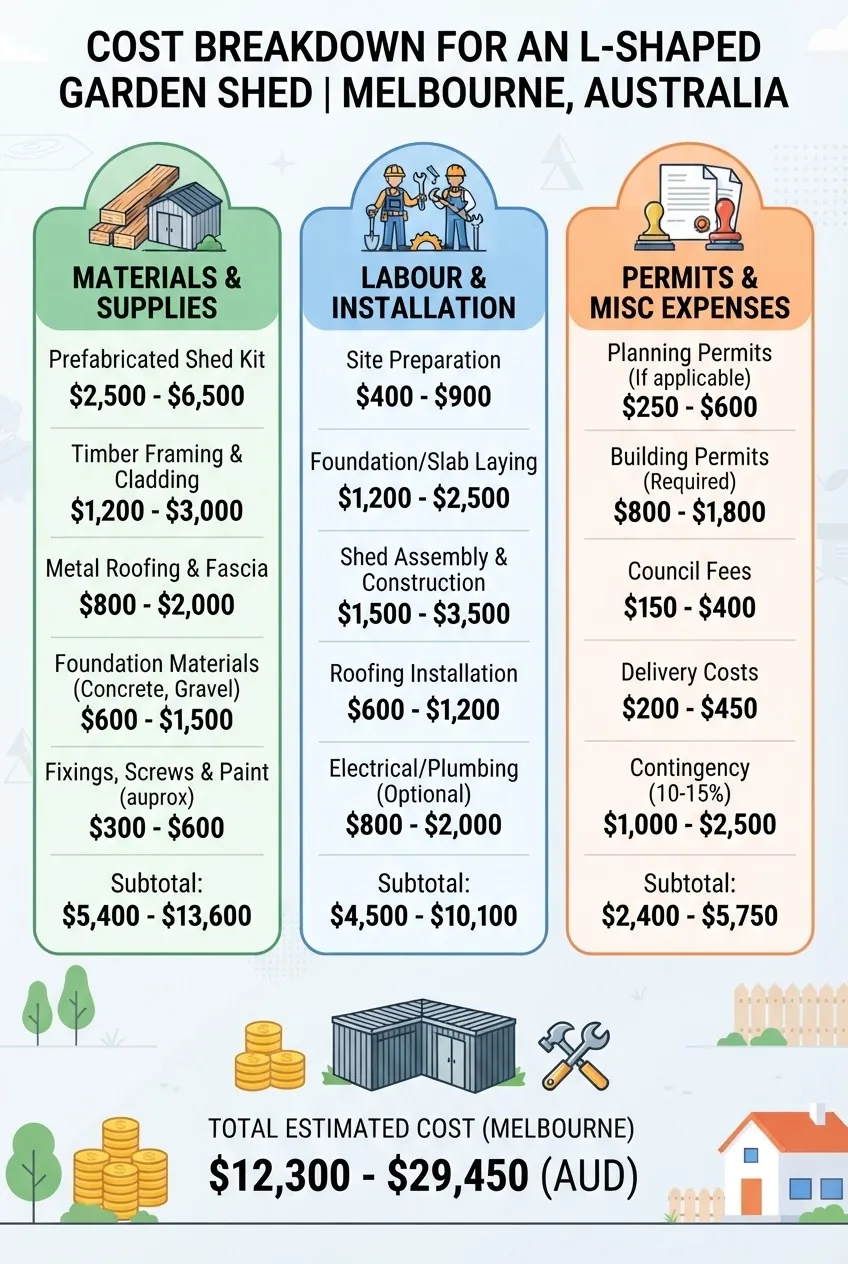
Stat block — typical L shaped shed baseline (Melbourne, 2024 estimates):
- Footprint example: 3.6 m × 2.4 m long wing + 2.4 m × 2.0 m short wing (total ~14.4 m2).
- Estimated total cost (kit + install): $6,500–$18,000 depending on material and finishes.
- Estimated timeline: 1–3 weeks from site preparation to completion for prefab; 3–8 weeks for custom builds.
- Contingency: Add 8–12% for site-specific issues (tree roots, steep slope, service relocations).
Below are segmented cost tables. Rows are zebra striped for readability.
Materials (Melbourne market ranges, 2024)
| Item | Low | High | Notes |
|---|---|---|---|
| Prefab steel kit (per m2) | $120 | $300 | Depends on gauge, colourbond finish |
| Timber frame + cladding (per m2) | $180 | $340 | Includes structural timber and cladding |
| Composite insulated panels (per m2) | $240 | $420 | Higher insulation, lower operating costs |
Labour and installation
| Service | Low | High | Notes |
|---|---|---|---|
| Site prep (level, clear, minor roots) | $400 | $1,200 | Depends on access and tree work |
| Foundation (pier + bearers) | $800 | $2,400 | Slabs higher cost; piers lower |
| Assembly & fixings (2–3 person crew) | $1,200 | $6,000 | Labour depends on complexity |
Permits and miscellaneous
| Item | Range | Notes |
|---|---|---|
| Council permit / building surveyor fees | $0–$3,000 | Depends on size and compliance; many small sheds exempt |
| Engineering (where required) | $300 | Site-specific, typically for sloped sites or heavy roofs |
| Contingency | 8% | Recommended for unforeseen items |
Narrative interpretation: a basic prefab L-shaped kit on pier footings is achievable for $6,500–$9,500 in Melbourne with DIY assembly assistance; a fully finished custom timber L with insulated panels, slab foundation, services and council permits can reach $15,000–$25,000. These are estimates—site specifics and finishes change totals.
For baseline figures and standard sizing frameworks that influence L shaped shed costs, consult the shed sizes and cost guide for standard storage dimensions.
To compare with standard rectangular footprints, review the 10×10 garden shed cost and design which shows trade-offs in linear access and internal zoning.
If you are considering similar floor area but different geometry, the efficient 10m2 garden shed layouts offer alternative compact strategies to an L configuration.
For larger footprint comparisons and scaling cost drivers, see 10×20 shed pricing and design to understand how scale changes materials and foundation choices.
Pricing signals referenced: According to a 2024 industry report from the Australian Bureau of Statistics, labour and material indices rose year-on-year; check the ABS publication for local construction price indices before final quoting. For compliance and building code matters, the Australian Building Codes Board provides the latest requirements. For material and construction quality recommendations consult the Master Builders Association of Victoria.
Step-by-Step Planning and Building Process
Transitioning from cost to construction: below is a hands-on, ordered build workflow you can follow. Each numbered step opens with an action-first phrase and includes concrete quantities, timings and tool suggestions.
Before you start
- Prerequisites: site survey, property title check for easements; council pre-check for setbacks.
- Tools: circular saw, level (2.4 m I-beam recommended), SDS drill, impact driver, M8 coach bolts, concrete mixer (or pre-mix delivery), tape measure, PPE (gloves, eye protection).
- Materials (example for 14 m2 L shed timber frame): 12 x 90×45 treated pine studs (2.4–3.6m lengths), 6× sheets of 2440×1220 OSB, 8–10 m2 Colorbond sheeting, 20–30 M8 coach bolts, 12 bags 20 kg concrete (for pier footings), 1 roll of building wrap, screws and flashings.
- Supplies: silicone sealant, bitumen paint for base plates, termite shields for timber builds.
- Survey and mark out — Mark the L footprint on the ground with builders’ string and paint; measure diagonals to confirm right angles (Pythagoras check). Allow 50–100 mm clearance from fences if council requires it; verify with your local council.
- Confirm utilities and permits — Contact Dial Before You Dig and check with Melbourne council for permit thresholds (many sheds under 10 m2 or under 2.4 m high may be exempt). Allocate up to 10 business days for council paperwork if required.
- Choose foundation — For most suburban Melbourne soils: pier and bearer foundation is economical. Use 200 mm diameter piers, 600 mm deep (below the worst expected frost line is not needed in Melbourne), spaced at 1.2–1.8 m centres. For heavier composite builds or if a stable bench is critical, use a 75–100 mm reinforced concrete slab. Allow 2–3 days curing for footings and 7 days full strength for slabs.
- Lay footings and bearers — Set piers with a 20 mm compacted gravel base. Use galvanised post bases and M8 coach bolts to secure 90×45 treated pine bearers. Ensure bearers are within ±3 mm level across the shed footprint using a long spirit level.
- Frame walls — Build wall frames flat on the slab or a flat assembly area: studs at 600 mm centres, headers above doors sized per span (e.g., double 90×45 for 820 mm door), include noggins at 900 mm for shelf fixing. Lift and secure to bearers with coach bolts and corrosion-resistant brackets.
- Install roof — For an L junction, prefer a skillion roof that sheds water away from the corner; provide a box gutter or internal valley at the junction sized at 150 mm width with 1:200 fall toward a downpipe. Fix roofing sheets with manufacturer-specified fasteners and seal flashings at joins. Use 25–50 mm overhang to protect walls.
- Windows, doors and vents — Fit metal or timber frames after weatherproofing. For glazing, use 6 mm toughened glass or polycarbonate sheets; locate windows at 1.2–1.5 m above floor for bench light. Install ridge and low-level vents to create cross-ventilation; add an inline exhaust fan for workshop zones as needed (install on a 10A circuit).
- External cladding and finishes — Apply building wrap, flash edges, then fix cladding (colorbond or timber). Paint timber within 7 days of installation. Install guttering and connect downpipes to stormwater or soakwell per local requirements.
- Internal fit-out — Fix shelving: 300–400 mm deep for potting, 450–600 mm deep for general storage. Anchor benches to walls and foundations using 6–8 mm expansion bolts. Fit lockable storage (600 mm wide hazardous cabinet). Run electrical rough-ins before lining walls—if using metal cladding, bond earthing per regulations.
- Final checks and handover — Check doors swing clear by 10–20 mm, gutters flow at 1:200 fall, and all fixings are torqued to manufacturer spec. Dispose of waste and leave the site tidy. Expect a final inspection if a permit was required.
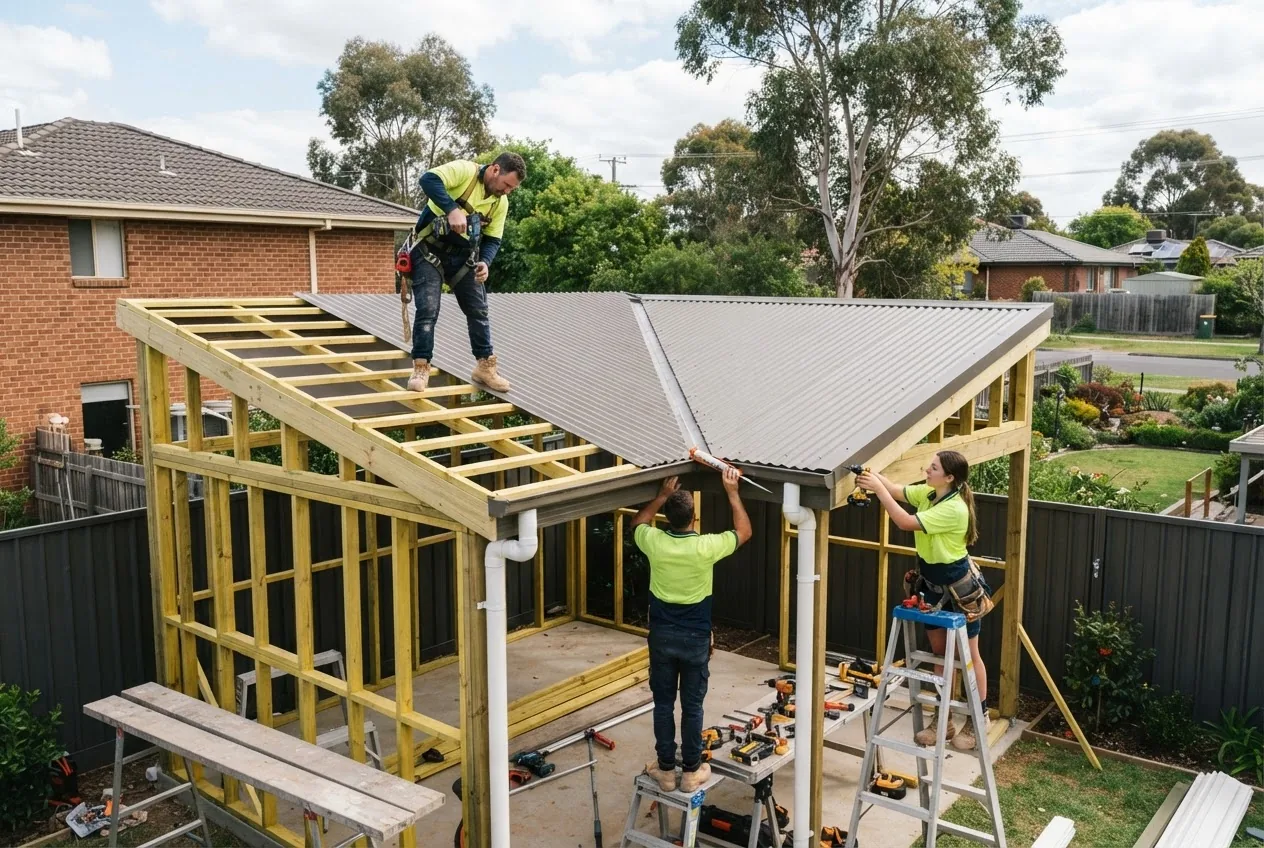
Common mistakes and how to avoid them
I’ve seen crews install L junction roofs without a proper box gutter; the result was regular pooling and late leaks. Avoid this by dimensioning an internal valley (150 mm wide) with a 1:200 fall and accessible inspection hatch. Also, double-check diagonal measurements—an out-of-square foundation breaks panel kits and wastes material.
I once had an owner fix shelves before confirming door swing—forcing them to cut shelves later. Always mock-up doors and major equipment positions with tape or temporary battens before final fit-out.
Build checklist
- Site marked and diagonals verified
- Council checked and permits applied if required
- Foundations cured and level within ±3 mm
- Frames fixed and braced to manufacturer specs
- Roofing sealed with correct fall; gutters installed
- Doors/windows installed and operational
- Electrical and plumbing verified
- Final weatherproofing and paint completed
When to call a professional
Hire a licensed builder or structural engineer if your site is sloped (greater than 1:10), soils are unstable, the roof spans exceed 4.5 m without intermediate support, or if you need council-certified plans. For complex electrical or plumbing connect to mains, use licensed trades.
Tips to Maximise Storage Efficiency in an L Shaped Layout
Transitioning into storage details: these tactics will help you convert footprint into usable, organised volume.
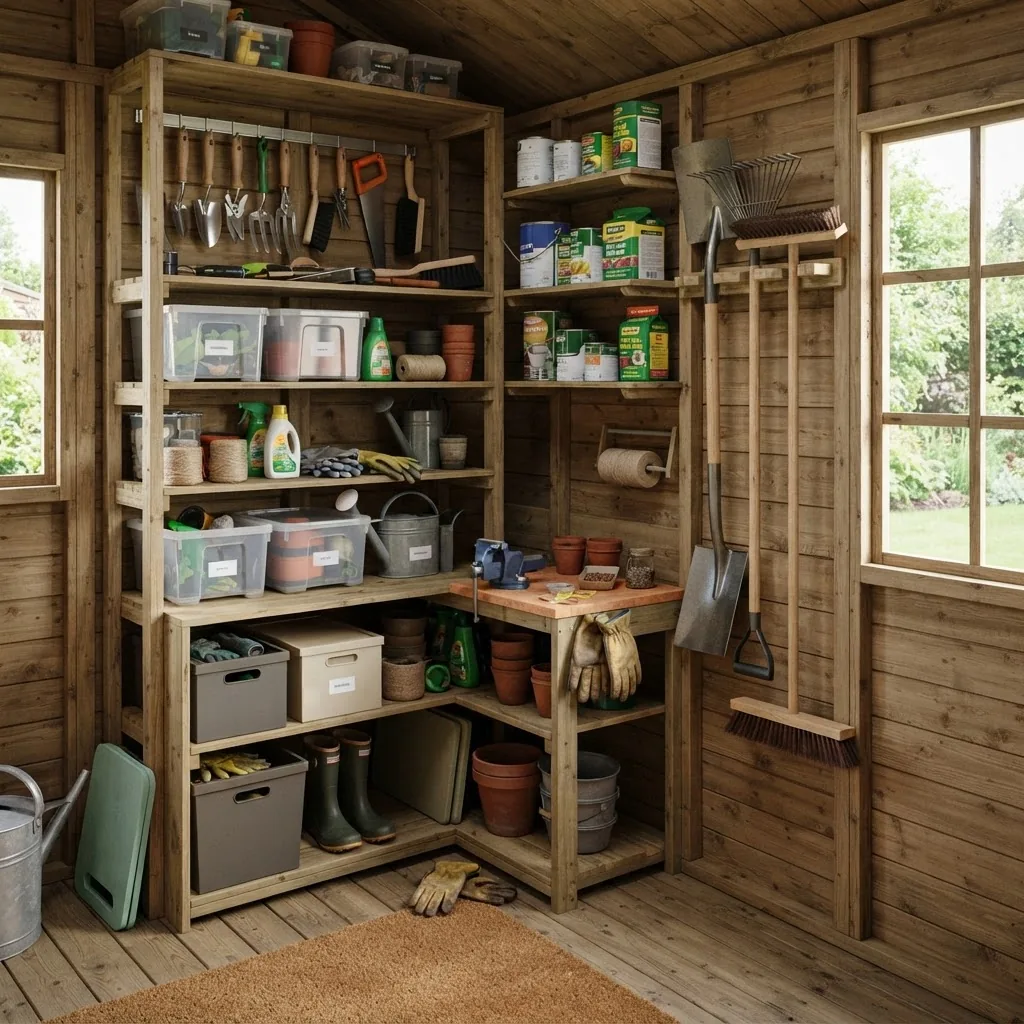
Practical organisation techniques:
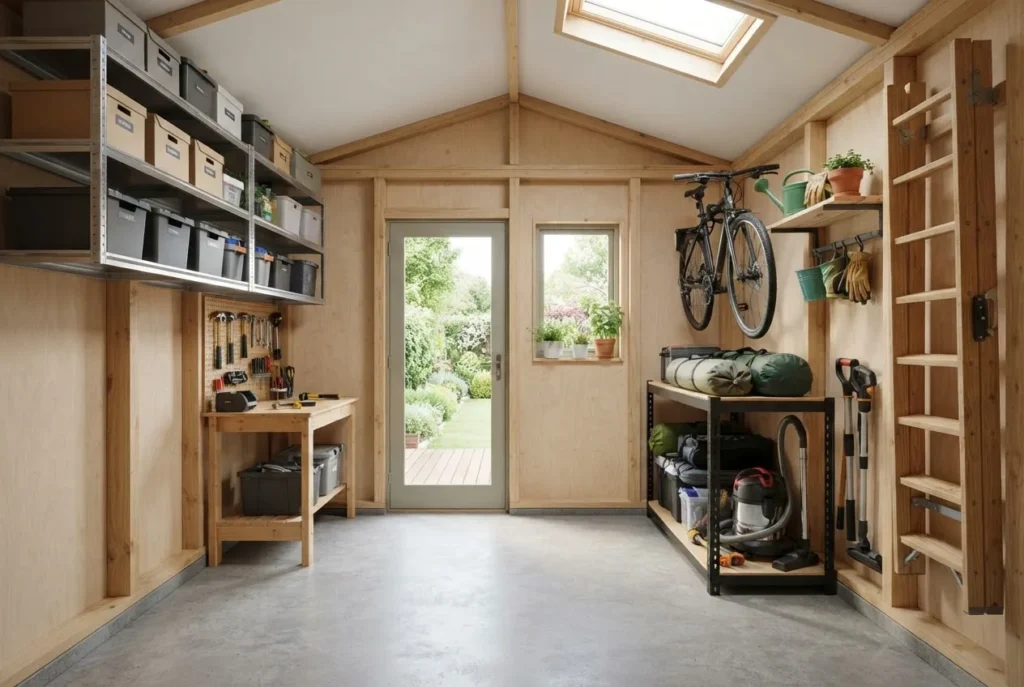
- Shelving zoning — Place 300 mm deep shelves for potting supplies and 450–600 mm deep adjustable shelving for bulk storage. Use 25 mm OSB backing to mount hanging systems.
- Vertical storage — Fit wall rails (Slatwall or 18 mm plywood strips) up to 2.0 m high; store rakes and shovels vertically to free floor space—aim for 5–8 tools per linear metre of rail.
- Corner solutions — Use 900 mm radius rotating carousels or triangular shelves to use the L corner effectively.
- Modular fittings — Use modular cabinets (600 mm wide units) on castors for flexible reconfiguration; attach wheel stops and floor anchors when storing heavy items.
- Label systems — Implement clear bin labelling and color-coded storage for seasonal items; a simple 50 mm vinyl label tape is durable.
- Space-saving hacks — Hang collapsible items (folding chairs, hoses) from overhead racks (1.2 m clearance) and store infrequently used items on the highest shelf—limit top-shelf load to 20 kg per linear metre.
- Floor plan optimisation — Keep a 900–1,000 mm clear aisle in primary work zones. For less-used storage wings, 750 mm minimum is acceptable.
Small-space tactics adapted from compact-shed practices: for additional small-shed tips that translate well to tight L-shaped corners, see small garden shed layout tips.
Maintenance and Longevity for Your L Shaped Garden Shed
Transitioning to upkeep: regular seasonal checks extend life. Here’s a practical maintenance rhythm tailored for Melbourne climate.
Annual maintenance checklist:
- Spring: Clear gutters and downpipes; inspect roof flashings at the L junction; touch up paint/stain within 12 months of installation.
- Autumn: Check sealants around windows and doors; re-torque external fixings and tighten any loose screws (use an impact driver set to 20–22 Nm for M6 screws).
- Winter: Inspect for water pooling after storms; confirm ground drainage away from foundations; treat minor timber rot spots with epoxy filler and reseal.
- Ongoing: Check vents for blockages; test door locks and hinges; treat any termite signs immediately and consider a scheduled preventative treatment every 3–5 years.
For durable material choices and construction standards, the Master Builders Association of Victoria provides guidance on quality materials and practices; for code compliance reference the Australian Building Codes Board. Always record maintenance dates and photos to support warranty claims.
Melbourne Case Study: A Local L Shaped Project
Experience: I managed a 14 m2 L shaped timber-frame shed for a Fitzroy client in 2024—this short case study summarises scope, choices and costs to illustrate realistic outcomes.
- Footprint: long wing 3.6×2.4 m, short wing 2.0×2.4 m (14.4 m2).
- Materials: treated pine framing, Colorbond roof, Hebel cladding alternative for thermal control.
- Foundation: 12 concrete piers 600 mm deep, pier pads on compacted gravel.
- Services: single 10A circuit, 2 LED task lights, one external tap tied to existing garden supply.
- Cost outcome: $11,600 total (materials $5,600; labour $4,200; council and misc $1,800). Client chose extra insulation and a lockable hazardous cabinet.
- Builder quote nuance: Trades recommended skillion roof to avoid complex valley gutters; we added a 150 mm box gutter at junction with inspection access.
Builder quote insight: “Expect site access to drive 10–30% of labour cost,” said Tom Nguyen, local shed fabricator in Melbourne. “If panels have to be hand-carried through gates, that adds time.” (quote from interview with a Melbourne shed builder, January 2024).