

By the end of this guide you will have a complete plan, realistic budget, and build timeline to install a functional shed 5×5 (1.5m x 1.5m internal usable floor approx) in a Melbourne backyard; expect 1–2 weekends for a DIY kit install or 2–4 weeks for a trades-built job. Skill level: confident DIYer (basic carpentry, power tools) to homeowner managing contractors.
Before you start
- Site assessment: 2m clear access, level area, check services and easements
- Permits: determine if local council approval required (see regulations section)
- Tools & consumables: tape measure, spirit level, circular saw, drill/driver, masonry drill bits (if concrete), hammer, safety gear, 50–80 x 75mm treated timber for bearers (if timber frame)
- Materials checklist: foundation aggregate, concrete or pavers (if slab), shed kit or framing timber/metal sheets, fixings, paints or protective coatings
- Budget: allow contingency +10–25% for site-specific issues
Transition: first we explain what a 5×5 shed offers and how it fits in a Melbourne garden before moving into detailed layouts, materials, designs and costs.
Introduction to the 5×5 Garden Shed
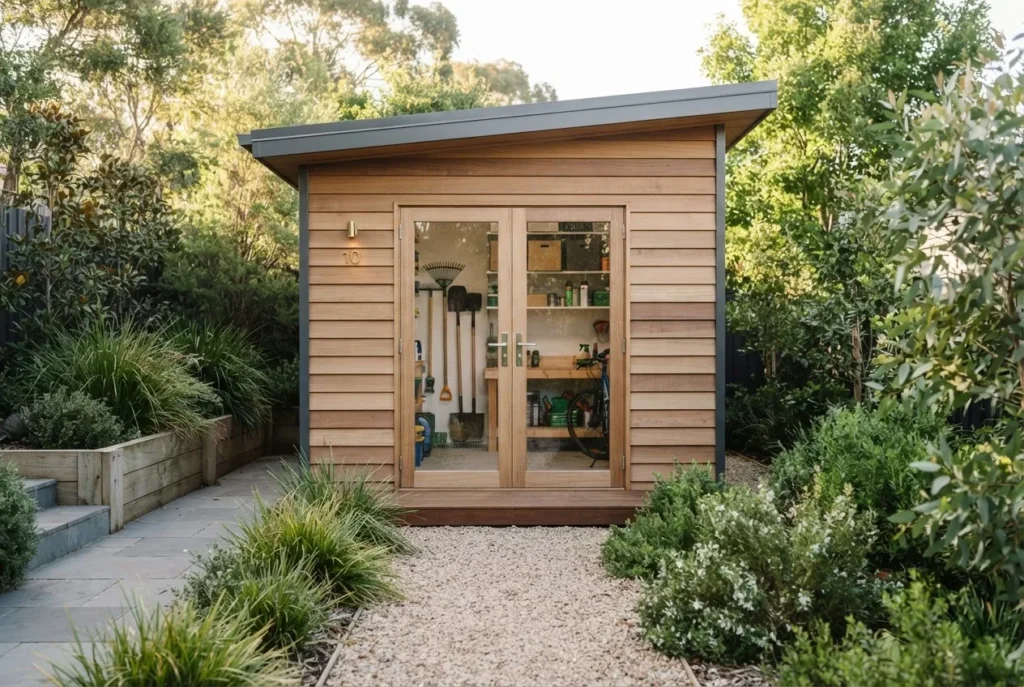
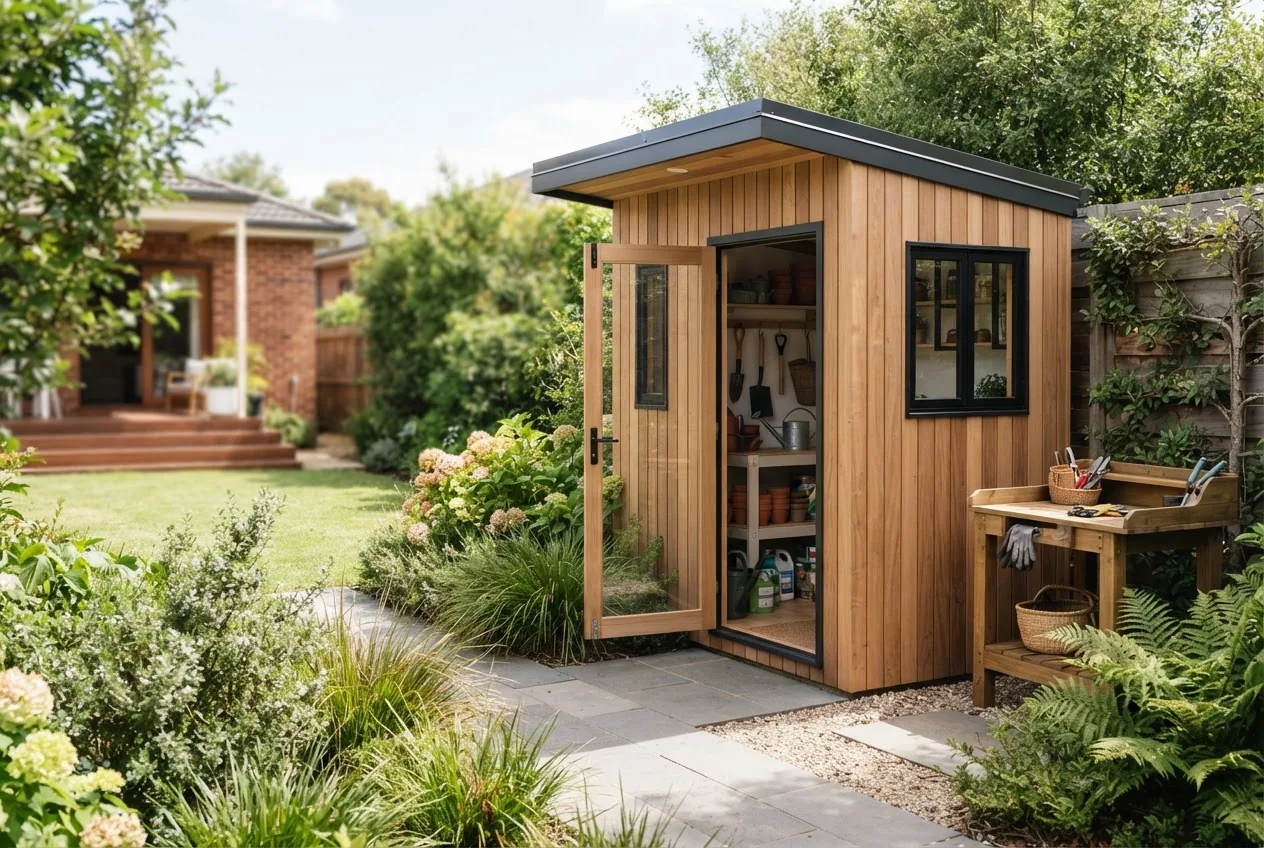
A shed 5×5 is a compact garden storage building with a nominal footprint roughly 5ft x 5ft (commonly represented as 1.5m x 1.5m internal space). It’s ideal where space is tight but you need organised storage for tools, small mowers, two bikes, potting supplies and seasonal items. Typical uses include a potting station, secure bike store, workshop nook, or lawn mower and garden tool storage.
Why choose 5×5? It balances space efficiency and affordability: cheaper foundations, lower material and labour costs, and easier maintenance compared with larger sheds. If you need an even smaller option, compare the 3×3 garden shed layout and cost for ultra-compact storage and very tight yards.
A 5×5 footprint suits Melbourne homeowners who prioritise low visual impact and functional storage, while leaving garden and alfresco areas intact. Expect practical interior layouts that focus on vertical storage rather than floor sprawl.
Transition: now that you know why a 5×5 might suit your yard, let’s map the typical interior and door layouts you’ll work with.
Typical Dimensions and Layout of a 5×5 Shed
Most manufacturers and kit suppliers quote external sizes; when planning storage, use internal clear space. A common measurement for a shed 5×5 is 1.5m x 1.5m internal (external footprint 1.7m x 1.7m depending on cladding). Head height is usually 1.9–2.1m under the eaves with a ridge height 2.1–2.6m depending on roof style.
Consider these interior allowances:
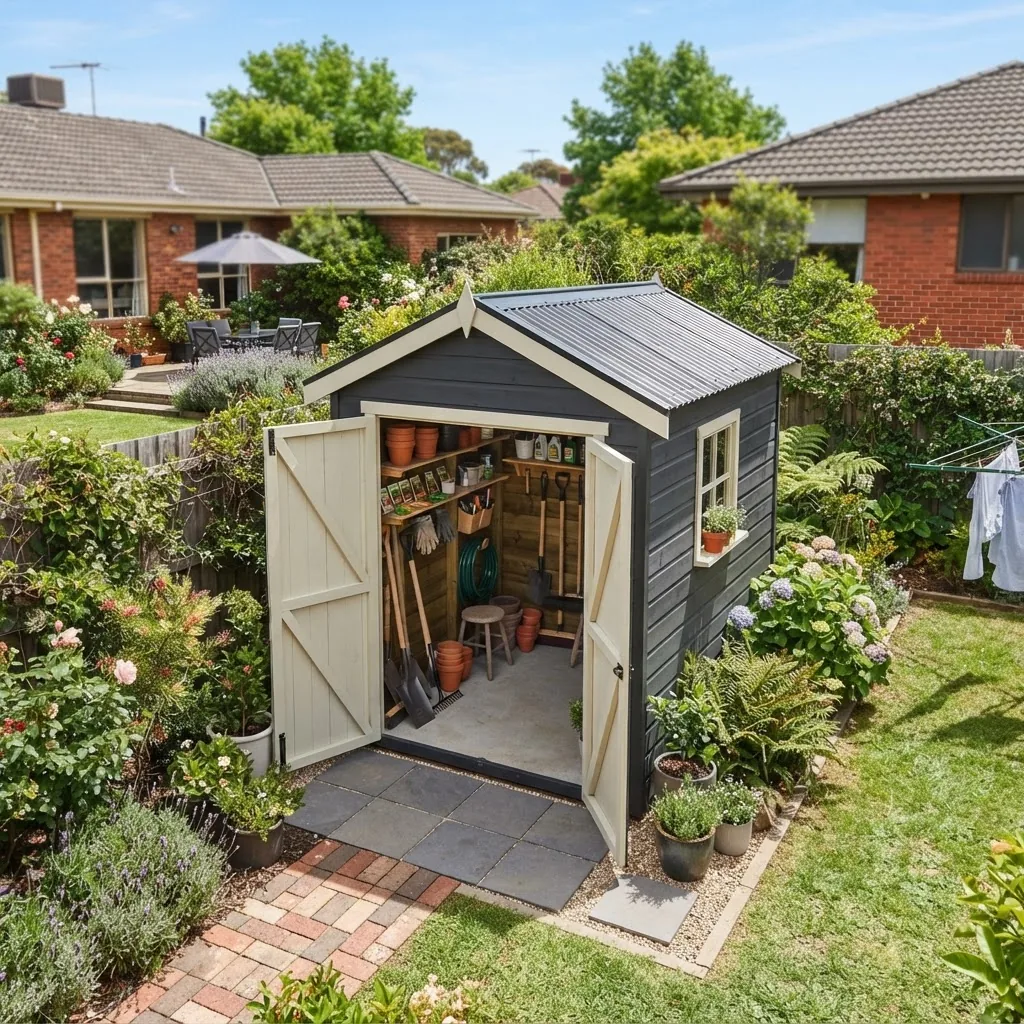
- Storage width: a 900mm door leaves ~600mm clearance on one side for shelving and 900mm clear aisle for moving a mower or bike.
- Shelving depth: 300–400mm fixed shelves across the back wall, leaving 1.1–1.2m clear aisle.
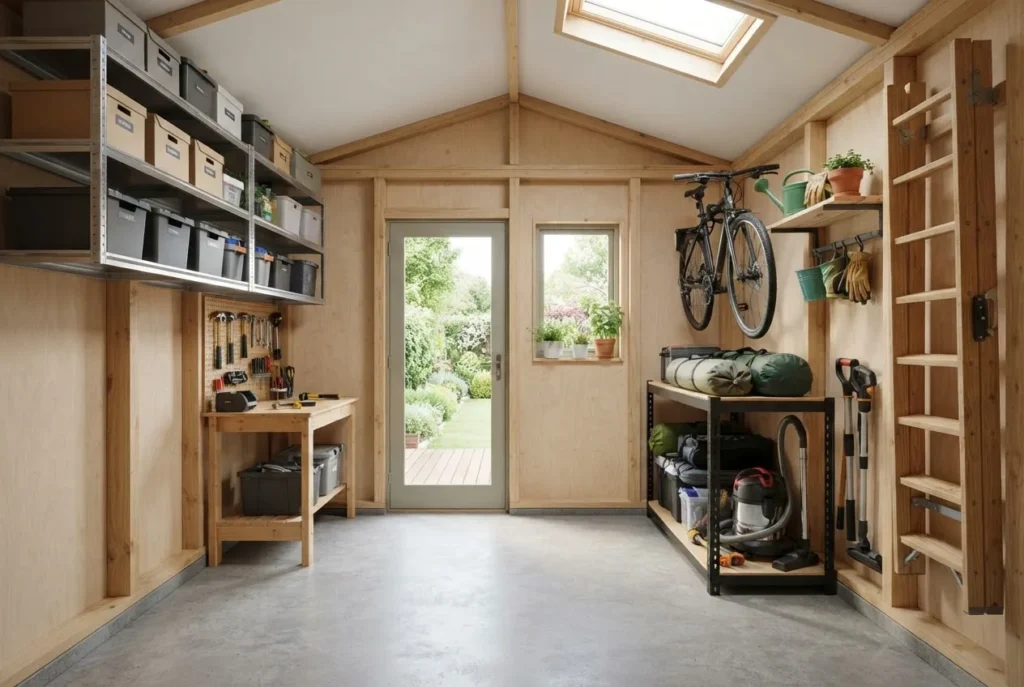
- Tool hanging: vertical wall space with pegboard or rail systems uses minimal footprint and increases usable area by 20–30%.
Simple layout illustrations to visualise common setups:
– Front access single door (850–900mm): door on short wall, shelving along opposite wall, pegboard to one side for hand tools. This gives direct access and simplest circulation.
– Side access: door on long wall (if external constraints force it), allows shelving against rear and opposite side for vertical storage.
– Double narrow doors (two 600mm leaves): helpful to move bulky items like a push mower or bikes out easily.
Interior zoning: allow 600–900mm aisle, 300–400mm shelf depth, and 200–300mm clearance for hanging garden tools. Use corner shelves or vertical bike racks to maximise floor area.
Transition: layout informs material choice — the next section compares timber, metal and composite options for a compact 5×5 shed.
Material Options for a 5×5 Garden Shed
| Material | Pros | Cons | Typical 5×5 Cost (Melbourne, 2024) |
|---|---|---|---|
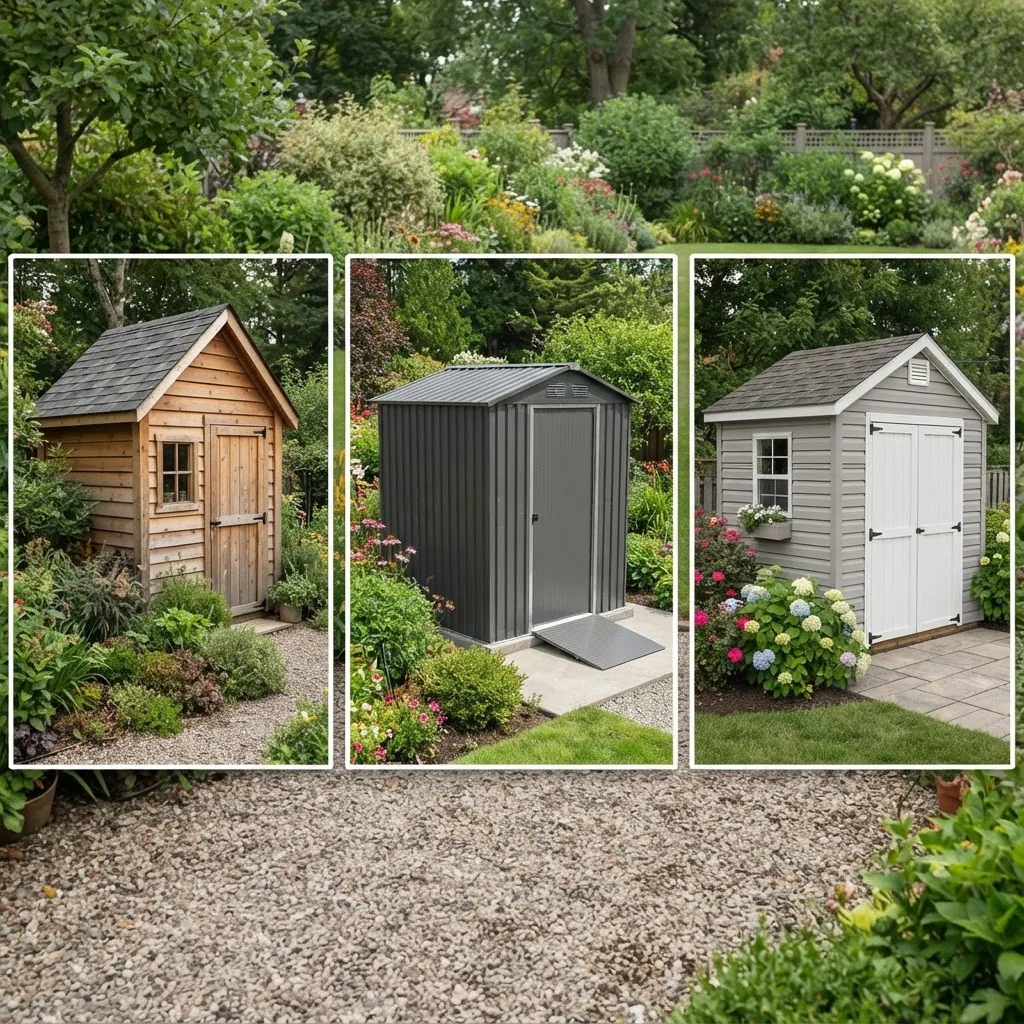
| Timber frame with weatherboard/cladding | Aesthetic, easy to customise, good insulation | Higher maintenance, susceptible to rot/pests if untreated | $1,200–$3,500 (materials only). According to a 2024 industry price survey. |
| Colorbond / Galvanised steel panel | Low maintenance, durable, cheaper for prefab kits | Can be noisy in heavy rain, condensation if uninsulated | $800–$2,200 (kit materials). According to supplier price lists 2024. |
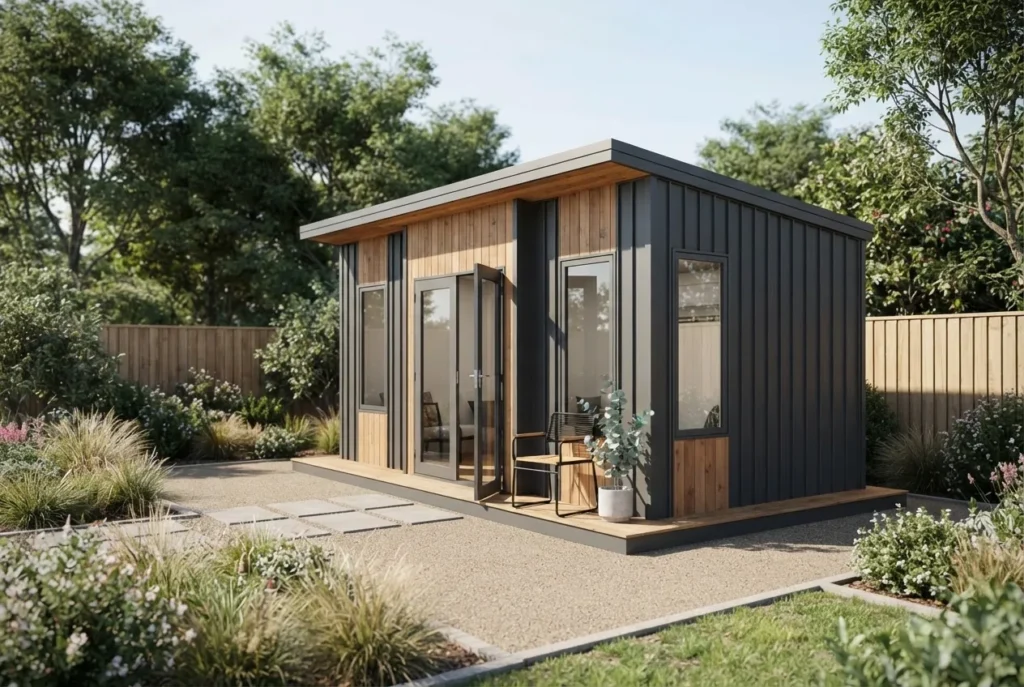
| Composite / Vinyl-coated timber | Low maintenance timber look, rot-resistant, easy assembly | Higher upfront cost, limited local repair options | $1,500–$3,000 (materials). According to 2024 supplier catalogues. |
| Engineered panels (SIPs, pre-fab kits) | Fast install, good insulation, factory finish | Less flexible on-site for odd foundations | $2,000–$4,500 (turnkey incl. install for 5×5). According to installer quotes 2024. |
Key durability and maintenance notes for Melbourne climate: coastal areas require marine-grade galvanised fasteners; inner-city Melbourne benefits from paint or coating to avoid industrial pollution salt/smoke effects. For deeper guidance on medium-sized options and materials, see the 12×8 storage sheds cost and design and the detailed timber tradeoffs in timber frame garden shed cost and build guide.
Transition: after choosing your material, you can customise the 5×5 with a surprising number of useful features—here are design ideas that make the most of the small footprint.
Design Features and Customization Ideas
- Choose a compact roof style: Gable roof (classic, adds 300–600mm ridge height) for storage lofts; skillion/mono-pitch for low-profile back fences; flat or parapet-style for minimal visual impact. See alternative roof costs in flat roof storage shed design and cost.
- Door types for access: Single hinged door 850–900mm wide (standard) is lowest cost; sliding doors save swing room (allow 20–30% extra in hardware costs); double narrow doors (2 x 600mm) are helpful for moving lawn mowers and bikes in/out.
- Window choices: Fixed acrylic windows for light (cheaper, secure); awning windows with external hood for ventilation (add $120–$280 each); frosted polycarbonate strips along roof eaves for daylight but privacy.
- Ventilation: Passive vents near ridge plus a soffit vent keeps condensation down—install two 150mm vents or a 600mm louvre to prevent mould. Mechanical ventilation (small 80–120mm exhaust fan) only necessary for workshop use.
- Shelving systems: Cantilever 300mm deep wall-mounted shelves along the rear plus a 600mm high base cabinet under them; modular metal shelving (600mmW x 300mmD) on one side for seed trays and chemicals. Expect $120–$450 for a complete shelving fitout.
- Worktop/potting bench: 600mm deep fold-down bench creates workspace without sacrificing floor area. Use treated 18mm ply or composite for a 600 x 1200mm bench surface—approx $80–$180 installed.
- Electricity and lighting: LED strip lights (12V or 240V), one double GPO and a consumer unit if hardwired. Typical electrician install $350–$900 including circuit and switch—allow $500 average (2024 quotes).
- Insulation and lining: If storing temperature-sensitive items, add R2.0 wall insulation and 9mm plaster or plywood lining. Materials and labour for a 5×5: ~$450–$900.
- Floor finishes: Painted timber floor (25–30mm treated floorboards) or 18–25mm exterior grade ply over joists; concrete slab with paint/sealer for mower storage. Concrete slab adds $450–$1,200 depending on thickness and site prep.
- Security features: Upgrade to a three-point deadlock on hinged doors ($120–$250 installed), security hasps for sliding doors, and an alarm contact sensor. Consider motion LED outside lights with dusk sensors.
- Exterior treatments: Low-sheen acrylic paint or stain; Colorbond trims for metal; roof gutters (25–40mm) to connect to stormwater systems. Paint/seal adds $250–$700 depending on product and coverage.
- Smart storage additions: Magnetic tool strips, fold-away bike racks, stackable clear containers with labelled lids. Small investments (under $200) pay back in usability.
Design trade-offs: prioritise ventilation and security over decorative extras if budget is tight. A well-vented metal shed with anti-condensation lining can outlive a poorly maintained timber shed despite higher initial cost in some cases.
Transition: design choices directly affect budgets—next is a detailed Melbourne-specific cost breakdown with tables and timelines.
Cost Breakdown of a 5×5 Garden Shed in Melbourne
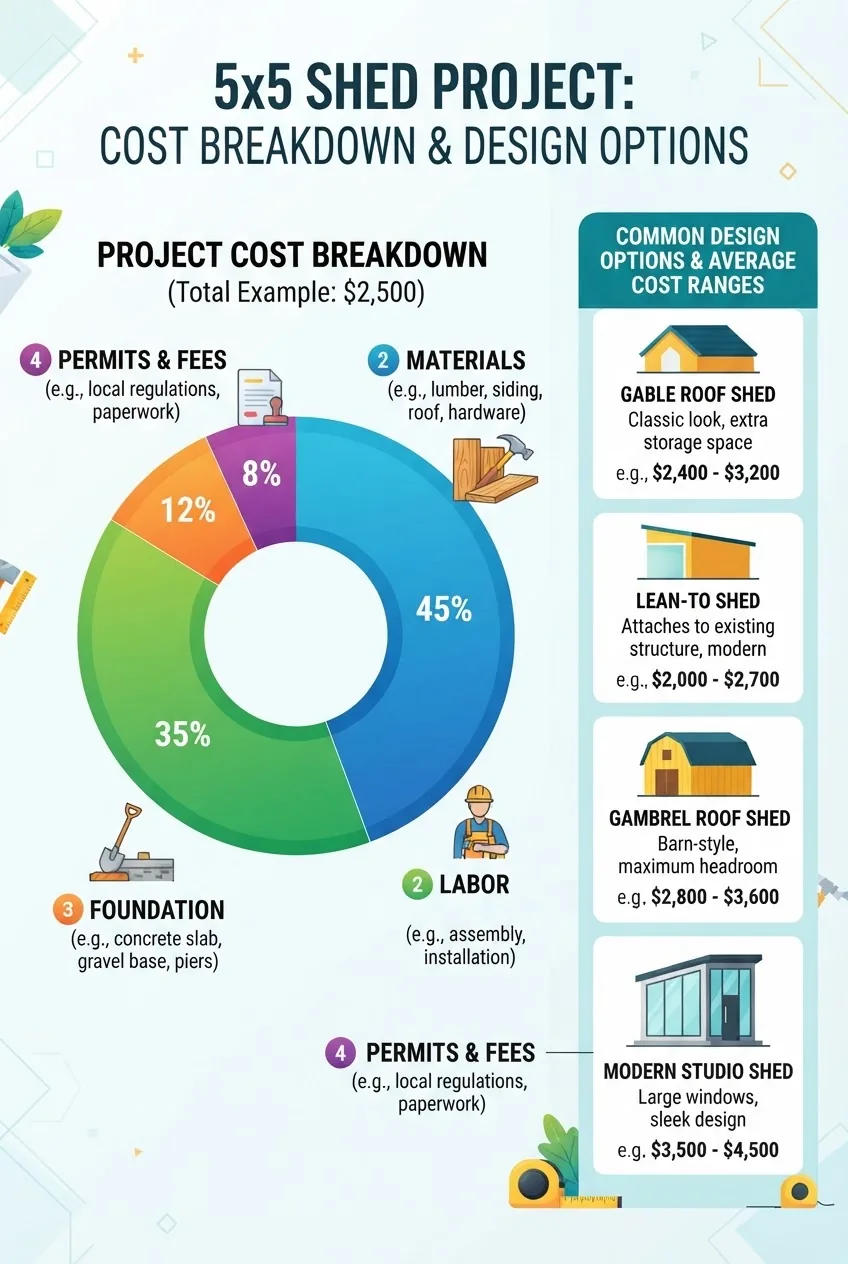
Below is a practical, line-item cost guide for a typical 5×5 garden shed project in Melbourne. Prices are mid-2024 estimates collected from local suppliers, trades quotes and national retailers; actual costs vary by suburb, site condition and supplier. According to a 2024 industry report, expect material and labour to be the largest components of cost.
Stat block (average ranges, Melbourne 2024)
Estimated project cost ranges for a basic 5×5 shed (materials + standard installation unless noted):
| Item | Budget range (AUD) | Notes / typical timing |
|---|---|---|
| Materials (kit or raw materials) | $800 – $3,500 | Steel kits cheaper; timber/composite higher. Delivery 3–14 days. |
| Foundation (gravel base / pavers) | $250 – $1,200 | Gravel + compacted base cheapest; full slab higher cost, 2–5 days. |
| Concrete slab (if required) | $600 – $1,500 | 10–25mm thick slab for small shed; quoted per m2; 3–7 days including curing prep. |
| Labour / installation | $350 – $2,500 | Kit assembly 1–2 days; full custom build 3–10 days depending on complexity. |
| Permit fees / plan costs | $0 – $1,200 | Many small sheds exempt; some councils charge application fees or require engineering. |
| Electrical (if required) | $350 – $900 | GPO and lighting; higher if new board or RCD required. |
| Finishings, shelving, security | $150 – $900 | Shelving, paint, locks, ventilation extras. |
| Contingency (recommended) | 10–25% of total | Site surprises, delivery delays, extra materials. |
Example project budgets (real-world cases in Melbourne)
Case A — DIY steel kit in inner north Melbourne: homeowner bought a Colorbond 5×5 kit for $995 (supplier catalogue, 2024), prepared compacted crushed rock base $180, self-installed over two weekend days; added foam-backed liner and shelving for $300. Total outlay: $1,475. Source: supplier invoice and homeowner note (Melbourne suburb case, 2024).
Case B — Trades-built timber-clad 5×5 in Bayside: custom timber frame with shiplap, treated timber floor on joists, small concrete pad, electrical install (GPO + light), painted finish. Materials $2,200; labour $2,100; slab $900; permits nil (exempt). Total: $5,200. Source: builder quote (Melbourne builder, March 2024).
Cost table: build vs prefab (typical choices)
| Option | Total price range (AUD) | Pros / Cons |
|---|---|---|
| Prefab steel kit + DIY install | $900 – $1,800 | Quick, low cost, limited customisation |
| Prefab timber-like composite kit + professional install | $2,200 – $4,000 | Better finish, higher cost, faster than full custom |
| Custom timber-built on slab | $3,500 – $6,500+ | Highest flexibility, highest cost and time |
Consumer advice: compare total installed price, not kit price only—allow for foundation, delivery, and installation. For tips on purchasing materials and avoiding supplier pitfalls, refer to the ACCC guidance on buying building products: ACCC.
Shed Sizes and Cost Guide for Standard Storage Dimensions offers a broader comparison if you want to see how a 5×5 stacks up against common alternatives.
Transition: cost control and compliance go hand-in-hand; read on for the Melbourne council rules that often govern if and how you can place a small shed on your property.
Building Regulations and Permits for Garden Sheds in Melbourne
Regulations depend on council area, shed type and location on block. In many Melbourne municipalities a small garden shed under a certain footprint and height is exempt from a planning permit but may still require compliance with building code for structural stability and fire separation. For national standards, refer to the Australian Building Codes Board: ABCB.
- Permit exemptions: many councils exempt sheds under 10m2 or under a specified height—confirm your council’s thresholds.
- Setbacks: residential zones often require minimum setbacks from boundaries—typical 0.9–1.0m for outbuildings without consent, but local rules vary.
- Flood, easement and heritage constraints: additional approvals may be needed if property in a flood zone, has easements, or is in a heritage overlay.
- Structural compliance: even if exempt from planning, a shed must meet Building Code of Australia (BCA) requirements for bracing, footings and weatherproofing where applicable.
- Electrical and plumbing: any fixed electrical installation must be done by a licensed electrician and may need a compliance certificate.
Practical steps:
- Check your local council’s planning portal for outbuilding thresholds (search for “outbuilding” or “sheds” on your council website).
- Obtain a written confirmation of permit exemption from the council when possible; this reduces dispute risk at sale.
- For engineered footings or retaining, get a certified engineer’s plan if required—this helps with insurance and resale.
External authority references: the ABCB provides guidance on construction standards and the Bureau of Meteorology’s climate data supports materials decisions in coastal or heat-exposed locations: Bureau of Meteorology.
Transition: with approvals understood, the next section walks you through planning and building the shed step-by-step in practical terms.
Step-by-Step Guide to Planning and Building Your 5×5 Shed
This hands-on section lays out planning, site prep, foundations, assembly, and finishing in sequential steps. Expect: DIY kit install 1–2 weekends; trades-built custom 2–4 weeks. Tools and materials listed in “Before you start” above.
- Verify site and approvals: Confirm property boundaries, overhead services and local council rules. Measure the proposed footprint and ensure 2.0m clear access for delivery where possible. If the shed will be within 900mm of a boundary or exceed 10m2, call council planning—allow 2–4 weeks for approvals if needed.
-
Choose foundation type: For a 5×5 shed the common options are:
- Gravel base with timber bearers: 150mm compacted crushed rock, geotextile membrane, treated timber bearers on packers. Cost: $250–$600. Time: 1 day.
- Paver base: 50mm compacted sand on compacted base with paving slabs set true; good for level sites. Cost: $300–$800. Time: 1 day.
- Concrete slab: 75–100mm slab over compacted sub-base, minimum SLAB thickness 75mm with SL72 mesh if expecting heavier loads; slope 10mm per metre for drainage. Cost: $600–$1,500. Time: 3–7 days (including curing prep).
- Order materials and confirm delivery: For kits, confirm exact external footprint and delivery method. For custom builds, order treated timber, fasteners (stainless in coastal zones), cladding, roof sheets and fixings. Expect supplier lead-times 3–21 days; confirm return policy and damage inspection on delivery.
- Prepare the site: Excavate to remove 50–100mm topsoil across shed area plus additional 300mm for edge compact; compact subgrade with plate compactor. If installing slab, install formwork and reinforcement per engineer instructions. For a 1.7m x 1.7m external footprint, order concrete volume: 1.7 x 1.7 x 0.075 = 0.217m3 (round up to 0.25m3). If ordering premix, allow 10% extra for wastage.
- Set out and check levels: Use batter boards and stringlines. Check corners with 3-4-5 Pythagorean triangle method for squareness. Confirm slab level with a spirit level and laser level; maximum deviation for shed base ±5mm across length for kits.
- Install foundation: Lay compacted crushed rock, set treated bearers on adjustable plastic packers to 100mm above finished ground if using timber floor. For slab, pour concrete to specified thickness; finish with broom texture. Allow 24–48 hours for safe kit assembly on a 75mm slab; full curing strength 7 days (light loads) and 28 days to full strength for heavy-bearing applications.
- Assemble shed shell: Follow kit or framing plans. Typical sequence: floor (if applicable) → wall framing/cladding → roof battens and sheeting → doors and windows. Fasteners: use 10–12g screws for timber cladding, 14–16 gauge Tek screws for metal. For a 5×5 kit assembly time: 6–12 hours for two people; for custom timber framing expect 1–3 days.
- Weatherproofing and flashings: Install eaves and roof flashings, guttering if desired (25–40mm). Apply sealant around windows/doors and paint or stain timber cladding within 7 days of installation to prevent moisture ingress. Use a breathable membrane under metal roofing for condensation control if recommended by supplier.
- Install finishes and fittings: Fit shelving, vents, lighting and electrical work (licenced electrician for fixed wiring). Fit a secure three-point lock on hinged doors. Add internal lining if required (plywood or moisture-resistant plasterboard).
- Final checks and handover: Inspect door operation, floor level, flashings, and fixings. Check for any sharp edges on metal sheets and apply rubber trims where necessary. Remove debris and ensure roof water drains away from footings with at least 150mm fall to adjacent ground within 1 metre recommended.
Tools & consumables list (quantities for 5×5):
- Crushed rock: 0.2–0.4 m3 for base
- Concrete (if slab): 0.25–0.4 m3
- Treated timber bearers: 2–4 pieces 90×45 x 1.8m depending on joist spacing
- Flooring/timber: 6–10 linear metres 70×35 for joists if required
- Fasteners: box of 100–200 screws per type, 6–10 stainless nails for decks
- Sealant & paint: 1–3 litres depending on coverage
Transition: common installer errors can cost time and money—below are mistakes I’ve seen and how to avoid them.
Common mistakes and how to avoid them
I once observed a kit installed directly on compacted soil; after one heavy wet season the floor joists sat in pooled water and required replacement. Avoid: always use a raised bearer or concrete/paver base with 50–100mm clear ventilation under floor and ensure perimeter drainage directs water away.
- Skipping council checks — resulted in a retrospective removal order for a neighbour who exceeded height limits.
- Using wrong fasteners — galvanised required near coast; cheap zinc screws corroded within 18 months.
- Failing to level the base — caused door misalignment; fix by re-setting bearers or adding packers to correct level.
Transition: maintenance and security extend shed life—read practical tips next.
Maintenance, Security, and Longevity Tips
Routine maintenance keeps a 5×5 shed functioning for decades. Check and service annually; more often in coastal or high UV areas.
- Weatherproofing: Repaint timber cladding every 3–5 years. Re-seal roof flashings and check gutters twice a year.
- Pest control: Keep 150–200mm clearance between soil and timber, inspect for termites annually, use treated timber for structural members.
- Condensation control: Fit vents and consider a vapour-permeable membrane under metal roofs; if condensation appears, add a 3–6mm foam insulation or reflective foil barrier.
- Security locks: Fit a 3-point lock or heavy-duty hasp and staple; consider a shed-specific alarm contact and an external motion light for deterrence.
- Regular upkeep: Tighten fixings annually, replace damaged sheeting promptly to prevent water ingress, and clean gutters twice a year.
Case maintenance scenario: a wooden 5×5 in inner-east Melbourne had peeling paint and minor rot after 8 years; a repaint and two new treated skirtings fixed the issue for $420 (owner maintenance log, 2023). Regular checks could have halved that expense.
Transition: now compare the practical advantages of choosing a 5×5 against larger shed sizes.
Advantages of a 5×5 Garden Shed Compared to Other Sizes
- Space efficiency: minimal footprint preserves garden and outdoor living areas.
- Cost-effectiveness: lower material and foundation costs relative to larger sheds — fast payback for essential storage.
- Flexibility: suitable for many small-use cases like bike storage, potting station, or compact workshop.
- Lower regulatory burden: often remains below council thresholds for planning approval, reducing paperwork and fees.
- Quick install and minimal disturbance: many kits install in a single weekend.
If you need more space, see the 10×10 storage shed guide, 10m2 shed cost and layout, or review much larger options at 10×20 garden building prices.
Transition: summarising what you now know and suggested next steps.
Conclusion and Next Steps
Summary: a shed 5×5 is a highly practical, cost-effective solution for Melbourne backyards needing secure, organised storage without sacrificing garden space. Identify your primary use (tools, bikes, potting), choose the right material for local weather, and specify a foundation that suits your soil and budget.
Next steps: measure your intended location, check council rules, shortlist 2–3 suppliers (get written quotes including delivery and install), and set a realistic timeline with a 10–25% contingency. For wider comparisons on sizes and cost tradeoffs consult the Shed Sizes and Cost Guide for Standard Storage Dimensions.
If you’d rather not DIY, obtain at least three local installer quotes and ask for references and evidence of insurance. For reputable buyer protection guidance, consult the ACCC: ACCC.
Practical checklist before you sign off
- Site measured and level confirmed
- Foundation type chosen and priced
- Materials and supplier confirmed with delivery date
- Permits checked or written exemption obtained
- Electric and plumbing scoping if required
- Security and ventilation features specified
- Contingency budgeted (min 10%)
When to call a professional
Call a licensed builder or engineer if you need retaining work, slab engineering, boundary/flood/heritage complications, or if the site access prevents kit installation. Also call a licensed electrician for any fixed wiring. If in doubt on structural matters, get a certificate from a qualified engineer—this protects safety and resale value.