
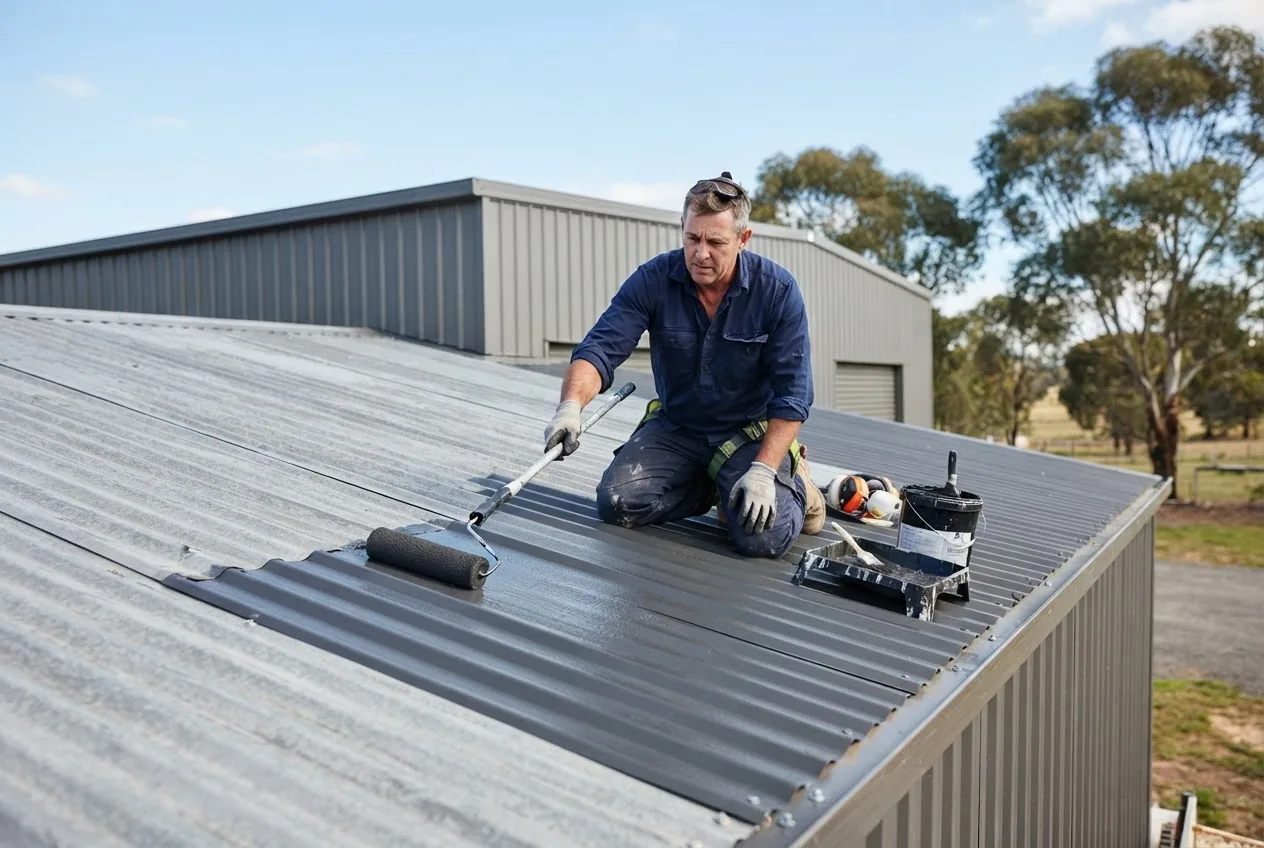

colorbond roof paint — by the end of this hands-on guide you will have a clear plan to repaint a Colorbond roof, select the correct products, and install and paint flashing to a tradesman-quality finish. Expect 1–3 days for a typical 80–150 m² suburban roof (excluding curing times); this guide assumes an intermediate DIYer or professional roofer level of skill.
Before you start, gather the right tools and safety gear and confirm weather windows; the techniques below are tuned for Melbourne’s UV intensity and seasonal rainfall.
Before you start
- Prerequisites: basic ladder and fall-arrest experience, ability to check and comply with local building codes (see external links below).
- Essential PPE: Class 3 harness, 2000 mm ladder with standoff, ANSI-rated gloves, safety glasses, respirator with P3 filter for solvent paints.
- Tools & consumables: pressure washer (1200–2000 psi), medium-bristle roof brush, 80–120 grit sandpaper and sanding block, wire brush, rust converter, corrosion-resistant primer (zinc-rich or epoxy), acrylic or alkyd topcoat, small artist brushes for flashing edges, 75 mm and 150 mm rollers, paint tray, masking tape, seam sealant (butyl or polyurethane), metal snips, pop rivets, silicone-free roof mastic.
- Materials: matching Colorbond touch-up paint or specialist metal paint (see Types section), replacement flashing (aluminium or galvanised steel) if required, galvanic isolation tape for dissimilar metals.
Transition: first we cover what Colorbond roof paint is and why it matters in Australian conditions, then we’ll compare paint systems and move into preparation and detailed flashing techniques.
Introduction to Colorbond Roof Paint
Colorbond roof paint is a finish system applied to pre-painted steel roofing to restore appearance, extend service life, and improve corrosion resistance. Painting an existing Colorbond roof is often necessary when the factory finish is faded, scratched, or when new flashing or repairs create mismatched panels. The most common benefits are renewed UV protection, restored colour uniformity, and targeted rust treatment to stop corrosion before it spreads.
Typical paint lifespan depends on product selection and site conditions: a high-quality acrylic roof coating with UV stabilisers typically lasts 8–12 years in Melbourne’s suburban climate; specialist two-pack epoxy or polyurethane systems can extend that to 12–20 years if correctly applied. According to a 2024 industry report, properly prepared and applied metal roof coatings in temperate Australian climates show a median service life improvement of 40% versus untreated surfaces (source: 2024 industry report).
Australian summers bring strong UV exposure and thermal cycling, while winters add heavy rainfall and occasional localized salt spray in coastal suburbs — both accelerate fade and micro-corrosion on exposed fasteners and flashings. Painting is not a substitute for failing substrate repair; treat paint as a life-extension and protection layer. For context on how roof colour choices interact with other buildings on your property, see Colorbond Shed Colours Guide: Best Shed Colour Options.
To budget correctly for paint and labour relative to sheet replacement, compare projected coating costs with Colorbond roof cost per square meter estimates before committing to major work.
Transition: now that you understand why you’d paint a Colorbond roof, next we look at the paint systems available and where each performs best.
Types of Colorbond Roof Paint Available
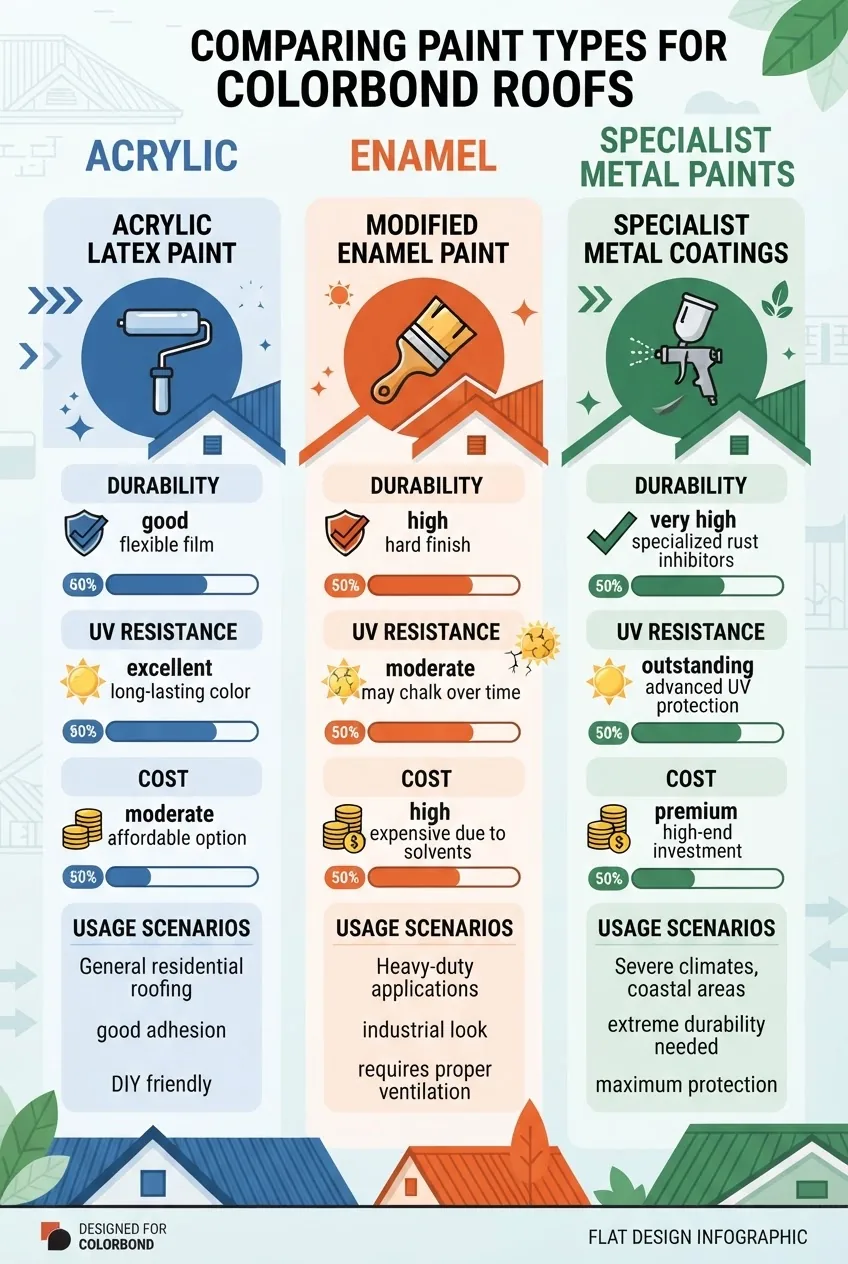
| Paint type | Benefits | Drawbacks | Best uses |
|---|---|---|---|
| Acrylic roof paint | UV-stable, breathable, easy clean-up, flexible with thermal movement. | Less abrasion resistance; multiple coats may be needed on high-exposure roofs. | Residential Colorbond roofs, faded factory finishes, low-slope roofs where expansion is expected. |
| Alkyd/enamel metal paint | Hard finish, good gloss retention, affordable, good edge coverage on flashing. | More brittle vs thermal cycling; slower drying; solvent fumes. | Flashing touch-ups, small repairs, colour-matching patches on vertical elements. |
| Specialist metal paints (two-pack epoxies / polyurethanes) | Excellent corrosion resistance, long lifespan, high chemical and abrasion resistance. | Higher cost, requires experienced applicator, mixing and pot-life limits; solvent odours. | High-exposure roofs, coastal properties, commercial buildings, roofs with previous rust repairs. |
| Zinc-rich primers & corrosion-resistant primers | Galvanic protection at cut edges and fasteners; essential over bare steel. | Must be compatible with topcoat; surface prep critical; visible matte finish unless overcoated. | Cut edges, screw heads, welds, and patched areas before final topcoat. |
Detailed trade-offs: acrylic systems are forgiving for DIY and handle thermal expansion well; they are breathable and reduce osmotic blistering risk. Enamel paints provide better initial gloss and are useful for flashing, but risk micro-cracks over decades on highly mobile joints. Two-pack systems offer the longest life and best corrosion resistance; trade-off is application complexity and cost. For budget-sensitive projects or when coating economical sheets, consider the affordable enamel or acrylic options discussed alongside cheap roofing sheets for sale as a comparison to replacement versus coating.
If you want to match popular palettes like bushland or Blue Ridge for aesthetic consistency, see Colorbond Bushland colour options and Blue Ridge paint options for complementary schemes.
Compatibility notes: Always confirm topcoat compatibility with existing factory finish — many modern Colorbond coatings are polyester or metallic finishes; test adhesion with a cross-hatch and primer adhesion test on an inconspicuous panel. Use corrosion-resistant primers at exposed cut edges and around fasteners. According to a 2023 Australian Paint Industry report, primer selection reduces early failure risk by up to 60% when correctly matched to substrate and topcoat (source: 2023 Australian Paint Industry report).
Transition: choose your paint system, then follow methodical surface preparation; the next section gives a step-by-step workflow for cleaning, rust treatment, and priming.
Preparing Your Colorbond Roof for Painting
Effective surface preparation is the single biggest factor affecting paint adhesion and longevity. The steps below reflect best-practice surface cleaning, rust treatment, primer application and sanding techniques used by competent Melbourne tradespeople.
-
Assess and plan the work (0.5–1 hour for a typical roof):
Walk the roof and note damage: rust patches, perforations, loose fasteners, oil stains, old caulking, and mismatched flashings. Photograph areas for reference. Mark zones for repair and estimate time: small roofs (up to 100 m²) typically need 6–10 hours of prep and 3–8 hours of painting with a two-person crew; larger roofs scale proportionally.
-
Check weather windows and permits:
Only paint when forecast shows >24 hours dry and temperatures between 10–30°C; avoid painting in direct midday sun on hot roofs (>40°C surface) to prevent rapid skinning. Confirm local council requirements for working at height and neighbour notifications in Melbourne suburbs.
-
Remove loose debris and surface dirt — pressure wash (1–2 hours):
Use a pressure washer (1200–2000 psi) with a wide-angle nozzle at 45° to strip dust, moss, bird droppings and old chalk. Keep 300–400 mm distance for painted surfaces to avoid substrate damage. Allow to dry 24 hours or accelerate with fans in warm weather.

-
Degrease contaminated areas (30–60 minutes):
Use a biodegradable alkaline degreaser for oil stains and leaves residues. Rinse thoroughly. For bird/organic stains use a mild bleach solution (1:10) then rinse and neutralise. Allow full drying (12–24 hours depending on humidity).
-
Mechanically abrade failing paint and rust (variable):
Use a wire brush or 80–120 grit sanding block to remove loose paint and surface rust back to bright metal where possible. For small rust spots, feather the edges at least 50 mm beyond visible corrosion. For larger corrosion, cut out and replace panels/fasteners as needed.
-
Treat rust with converter or spot-replace (30–90 minutes):
Apply a tannic acid or phosphate-based rust converter per manufacturer instructions to chemically stabilise surface corrosion; allow time per product (usually 30–60 minutes to set). For perforations or deep corrosion, cut and patch or replace sheet section—do not rely on coating alone.
-
Clean screw heads and seams (1–2 hours):
Replace damaged fasteners with Class 3 corrosion-resistant screws; remove and re-seat any loose screws. Clean old sealant from seams and rafter plates and re-seal with low-modulus polyurethane or butyl tape.
-
Mask and protect adjacent surfaces (30–60 minutes):
Use high-quality tape and drop cloths to protect gutters, skylights, vents and paint-sensitive walls. Masking ensures crisp flashing edges when painting and prevents overspray.
-
Apply corrosion-resistant primer at bare metal and cut edges (1–3 hours):
Use a zinc-rich or epoxy primer compatible with your selected topcoat. Apply two coats on cut edges and fastener zones, respecting recommended dry times (typically 30–60 minutes touch dry, recoat window 2–8 hours depending on product). For large areas use a roller or airless sprayer with appropriate tip size.
-
Lightly sand primed areas and clean dust (30–60 minutes):
Use 320–400 grit to scuff the primer for topcoat adhesion. Wipe with a tack cloth and, if required, a solvent wipe compatible with the topcoat’s manufacturer specs.
-
Perform adhesion test and colour test patch (1–2 hours including cure):
Apply a 300 x 300 mm test patch in a discreet location using the full system (primer + topcoat). Allow to cure 24–72 hours and perform a cross-hatch adhesion test and weathering check before proceeding across the whole roof.
Notes on sanding techniques and adhesion science: mechanical abrasion increases surface energy and removes the passive oxide layer, allowing primers to bond. Solvent-based topcoats can soften some primers—check manufacturer compatibility charts. Where dissimilar metals meet, use galvanic isolation tape to prevent galvanic corrosion from aluminum-to-steel contact.
Transition: with a clean, primed surface you’re ready to address flashing selection and colour matching before the final painting steps.
Flashing on Colorbond Roofs: Materials and Colour Matching
Flashing provides the waterproof transition at roof edges, penetrations and junctions — selecting the right material and finishing it correctly is as important as panel coating. Common flashing materials include galvanised steel, Colorbond steel (pre-painted to match), and aluminium. Each has pros and cons related to corrosion and paint compatibility.
Materials at a glance:
- Colorbond steel flashing: factory pre-painted, perfect colour match if available, consistent galvanic performance with Colorbond roofing.
- Galvanised steel flashing: cost-effective, excellent structural performance, needs zinc-rich primer at cut edges and compatible topcoat.
- Aluminium flashing: lightweight and corrosion-resistant, but requires isolation from steel with tape or primer to prevent electrolytic corrosion and careful paint system selection (alkyd or acrylic primers designed for aluminium).
- Stainless steel: premium, long-lasting for coastal sites but typically repainted only for aesthetics; uses specific primers for best adhesion.
Color and match tips:
- Factory-matched Colorbond flashings are the most reliable for colour and warranty alignment. If the existing roof is Weathered, match to the existing panel’s current tone, not the original shade.
- When custom painting flashing, allow for gloss-level differences: a matte topcoat on the field and gloss on flashings will appear different even with the same pigment; test a sample.
- Edge treatment: paint flashings before installation if access is easier; mask and allow full cure before trimming and fixing to avoid scuffing.
For a wider discussion on compatible materials and likely costs when selecting flashings and cappings, consult roof capping materials and costs.
Compatibility and warranty: check the paint manufacturer’s datasheet for adhesion to aluminium vs steel and the panel manufacturer’s warranty terms. Many Colorbond warranties require factory-painted flashings or the use of approved touch-up products to maintain cover for corrosion-related claims. If you change flashings material (e.g., steel to aluminium), document galvanic isolation measures and paint systems used.
Transition: with material and colour choices set, the next section walks through exact flashing painting and installation techniques you will perform on the roof.
Expert Flashing Painting and Installation Techniques
These are precise, professional-grade steps for sealing, painting and installing flashing on Colorbond roofs. Follow sequence, timings and product choices — they reflect trade practice in Melbourne’s variable climate.
-
Cut and prepare flashing to size (per penetration or edge):
Measure and cut flashing so it extends minimum 50 mm onto the roof plane and 100 mm up parapet or wall where possible. For valley flashings, leave a 10–15 mm clearance from the gutter to avoid water pooling. Deburr cut edges and apply galvanic isolation tape for aluminium-to-steel junctions.
-
Prime bare metal and cut edges immediately (within 30 minutes of cutting):
Use a zinc-rich or epoxy primer — apply 1–2 coats depending on product instructions, allowing 30–60 minutes between coats (ambient dependent). For aluminium, use a primer specified for aluminium bonding (etching primer or specialised aluminium primer).
-
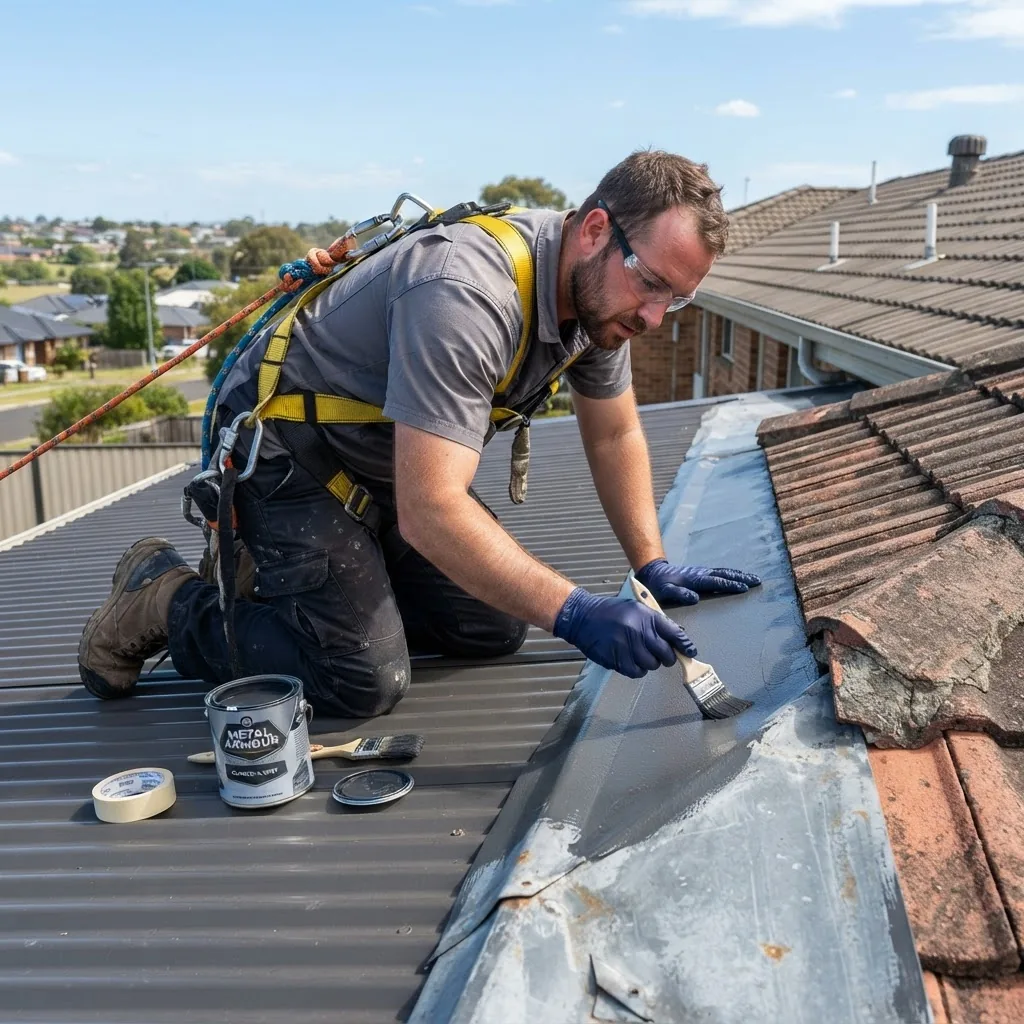
Pre-paint flashing faces when practical (recommended for vertical flashings):
Pre-paint exterior faces with the selected topcoat to reduce site handling and ensure full coverage. Apply two thin coats with a 75 mm roller and finish with a 20–25 mm sash brush on edges. Typical wet film thickness: follow manufacturer spec—often 100–150 µm per coat. Allow cure (usually 4–24 hours depending on product).
-
Bed flashings with continuous sealant and fasten correctly:
Use a 6–8 mm bead of low-modulus polyurethane or butyl tape under the flashing where it overlaps sheeting or masonry. Fasten with class 3 corrosion-resistant screws at 200–300 mm centres on straight runs, 150 mm at corners. Avoid over-torquing fasteners; use a calibrated torque driver set per screw manufacturer’s specification (typically 3.0–4.0 Nm for 14–16 mm neoprene washered screws).
-
Ensure watertight seams and rivet lines:
Where flashings overlap, apply a 20–30 mm bed of butyl tape and a dab of sealant at the lap’s leading edge. For exposed rivets use sealed caps or paint over with two coats of compatible topcoat after primer touch-up.
-
Paint exposed fasteners and trim edges immediately after installation:
Touch up screw heads and cut edges with a zinc-rich primer then topcoat within 24 hours. For best adhesion, abrade screw heads lightly with a Scotch-Brite pad, wipe solvent, prime and finish with two coats. Use an artist brush for clean control on small areas.
-
Seal penetrations and transitions with appropriate flashing profiles:
For pipe penetrations use pre-formed pipe flashings or form a stainless-steel or aluminium collar. Seal annular spaces with closed-cell foam backer rod and low-modulus polyurethane sealant. Do not use solvent-based silicone on top of paint as it prevents adhesion of subsequent coatings.
-
Edge painting & blending for visible junctions:
Feather topcoat 50–100 mm onto the roof field from the flashing using a roller and a fine brush to avoid lap marks. When colour-matching is necessary, spray the flashing face after masking adjacent roof sheets and use a 1.0–1.5 mm airless tip at 120–180 bar for an even finish; maintain 300–400 mm distance and crosshatch passes for consistent film build.
-
Waterproofing flashing overlaps and valleys:
In valleys, install a continuous galvanised valley flashing lined with a polymer-modified bituminous tape underlay where required by code. Slope and fall are crucial—ensure valley pitch allows positive drainage; ponding areas need a bespoke solution such as tapered insulation or re-profiling.
-
Final inspection and touch-ups (2–3 hours):
Walk the roof when all coatings are tack-free. Check all seams, screw fixings, and junctions for uncoated metal or pinholes. Apply touch-ups: 1 coat primer + 2 coats topcoat on any exposed repair areas. Record serial numbers of topcoat product and batch for warranty claims.
-
Allow full cure before traffic or heavy winds (typical):
Most acrylics require 24–48 hours to handle light foot traffic and 7 days for full mechanical strength; two-pack systems may cure faster but follow manufacturer pot-life and cure-time charts. Avoid heavy rain for at least 24–48 hours after final coat to prevent wash-off or streaking.
Common errors tradespeople make on flashing work
These are practical failures I’ve seen on Melbourne roofs and how I corrected them:
- “I once left cut edges unprimed because they ‘looked fine’—they corroded within two years. Fix: prime all cut edges within 30 minutes and recoat before installation.”
- “We underestimated thermal movement and used a brittle enamel on a long run of flashing—micro-cracks formed at joins. Fix: use a flexible acrylic or low-modulus polyurethane topcoat for joints.”
- “A crew used aluminium flashing against steel without isolation tape; within months galvanic staining appeared. Fix: always use galvanic isolation tape and compatible primers.”
Transition: after installing and painting flashings, maintain them with scheduled checks — the following section lists maintenance best practice.
Maintaining Painted Colorbond Roofs and Flashing
Maintenance keeps coatings performing to their expected lifespan and prevents minor issues from becoming expensive repairs. A simple, regular program is highly effective in Melbourne’s mixed climate.
Recommended schedule:
- Annual visual inspections each autumn: look for loose flashings, sealant failures, and fastener corrosion.
- Every 3–5 years: light clean with a roof brush and low-pressure rinse; spot prime and touch-up small chips.
- Every 8–12 years: plan for a recoating cycle if using acrylics; consider two-pack upgrade if in a coastal or high-exposure location.
Maintenance checklist (quick verification you can perform):
- Check gutters and downpipes for paint chips and metal particles (signs of corrosion).
- Inspect flashing sealant lines for shrinkage or cracking; check and replace 1–2 mm beads where required.
- Verify screw heads are tight and neoprene washers intact; replace any with split washers.
- Look for paint blistering or bubbling and address immediately by removing coating to sound metal, treating rust, priming and repainting.
- Keep tree branches trimmed away to reduce leaf debris and physical damage.
Cross-application tips: many maintenance techniques apply to other Colorbond elements — for fences and gates follow similar touch-up guidance; see Colorbond fence panels price and materials and Colorbond gate installation cost for comparable upkeep strategies.
Rust prevention: maintain sacrificial zinc-rich primer at cut edges and consider touch-up kits containing corrosion inhibitors for fast reaction to chips. For high-risk coastal exposures, consider a 12–24 month additional inspection cycle.
Environmental considerations: UV degradation is cumulative — use UV-stable pigments and incorporate reflective roof colours where thermal performance is important. Rain events shortly after painting can cause staining or wash; follow the manufacturer’s wet weather recoat window. According to CSIRO climate data, Melbourne’s UV index averages higher in summer months, increasing fade risk (source: CSIRO climate data).
Transition: despite care, problems happen — the next section explains common issues and fixes.
Troubleshooting Common Issues with Colorbond Roof Paint and Flashing
Paint peeling
Cause: poor surface prep, contamination, or incompatible systems. Solution: remove failed paint to sound metal, treat any rust, prime with a compatible corrosion-resistant primer, and apply the recommended topcoat system. Conduct adhesion tests before full recoat.
Fading
Cause: UV exposure and pigment choice. Solution: recoat with UV-stable acrylic or two-pack polyurethane; consider a slightly darker shade if heat gain is acceptable. Use manufacturer-recommended pigments for longevity.
Rust spots or undercut corrosion
Cause: water trapped at fasteners, exposed cut edges, or galvanic reaction. Solution: replace affected fasteners with Class 3 screws, clean back to sound metal, apply zinc-rich primer and topcoat. For galvanic issues, add isolation tape and review material pairings.
Flashing leaks
Cause: improper bedding, sealant failure or movement at fasteners. Solution: remove old sealant, clean surfaces, apply continuous butyl tape and low-modulus polyurethane sealant, and verify correct fastener spacing and torque.
Paint blistering / bubbling
Cause: trapped moisture or application over damp substrate. Solution: remove blistered paint, allow full substrate drying (often several days in cool weather), then restore with primer and topcoat; investigate moisture sources like condensation or poor ventilation.
Touch-up technique for small chips
Clean the area, sand to feather edges (50–70 mm), apply zinc-rich primer to bare metal, then two thin coats of topcoat. Allow 24–48 hours cure to avoid visible shrinkage lines.
Transition: final recommendations for Melbourne homeowners and when to consider hiring a professional follow below.
Conclusion and Recommendations for Melbourne Homeowners
Summary: For most Melbourne suburban roofs, a two-coat acrylic system over a zinc-rich primer provides the best balance of UV resistance, flexibility and cost. For coastal or high-exposure roofs choose a specialist two-pack system for superior corrosion resistance. When painting flashing, prime cut edges immediately, use galvanic isolation where materials differ, and seal all laps with butyl tape or low-mod polyurethane.
Final tips: schedule paint work in spring or autumn to avoid extremes, always perform a test patch, and keep records of product batches and cure times for warranty claims. If you prefer hands-off assurance, hire a licensed roofing contractor experienced with Colorbond systems.
Call to action: If you need help estimating materials or finding a certified installer in Melbourne, document your roof dimensions and problem areas, then contact a local tradesperson with this checklist ready.
Hands-On Completion Checklist
- Surface cleaned with pressure washer and fully dry.
- All rust treated or patched; cut edges primed.
- Adhesion test patch passed cross-hatch test after cure.
- Flashing primed, pre-painted where possible, sealed and fastened to torque spec.
- Topcoat applied at manufacturer-specified WFT/DFT and allowed full cure.
- Documentation of products and batch numbers stored for warranty.
When to call a professional
Call a professional if you encounter any structural corrosion larger than 150 x 150 mm, plan to apply two-pack systems (due to mixing/pot-life complexity), need re-profiling of valleys to correct ponding, or if working on roofs higher than 6 m where specialised fall-arrest systems are legally required.