
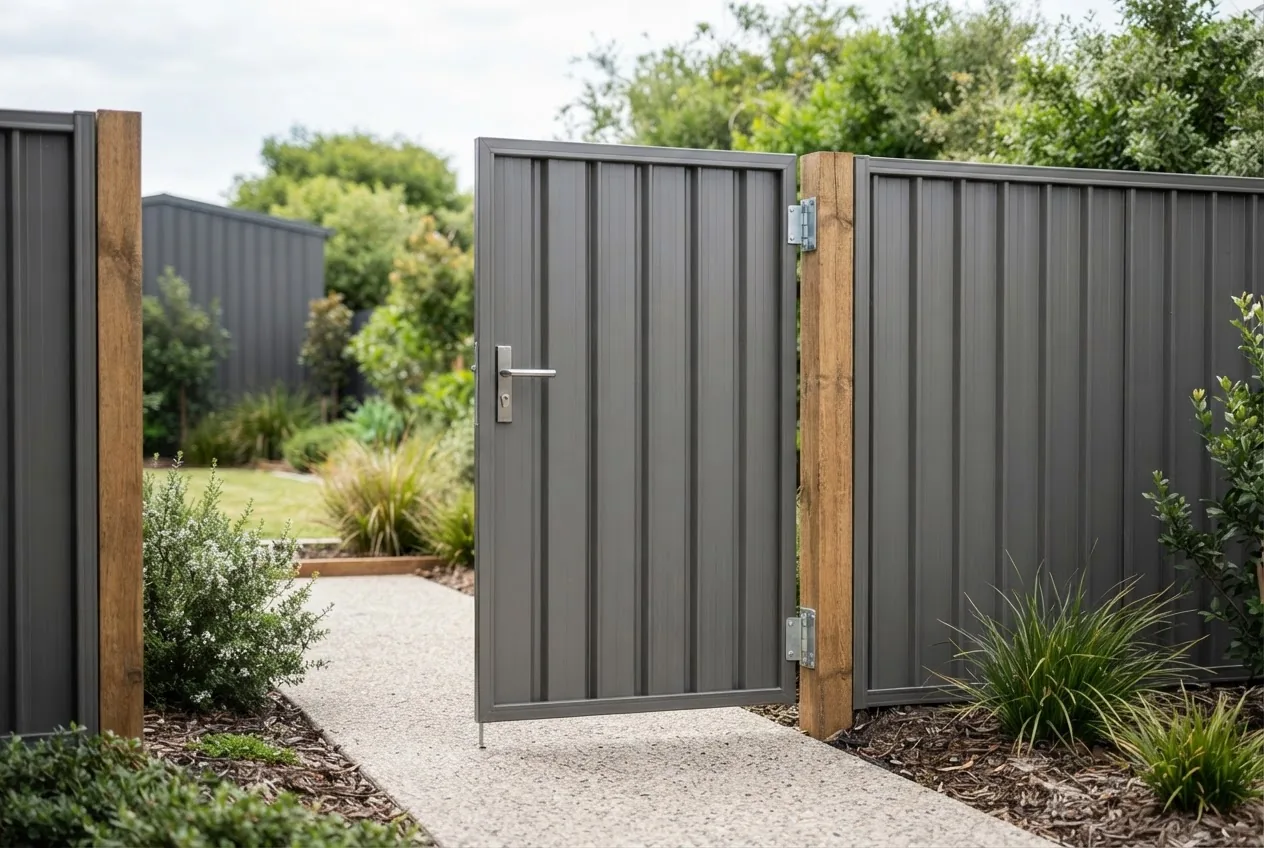

Colorbond gates are steel fence gates coated with a durable paint system; standard fence gate sizes typically range from 820mm to 1200mm wide for pedestrian gates and 2400mm+ for vehicle gates, and Melbourne installation costs usually fall between AUD 450–2,500 depending on size, hardware and site work.
This guide focuses on fence gate sizes and provides a detailed, Melbourne-specific installation cost breakdown plus measurement and installation guidance to help homeowners decide, measure accurately and budget for Colorbond gate projects.
Understanding Colorbond Gates
Answer: Colorbond gates are steel fence gates made from pre-painted, corrosion-resistant steel with a polymer topcoat; they offer high durability, consistent colour matching and lower ongoing maintenance than timber, making them a common choice for Melbourne homes seeking a low‑maintenance, secure gate.
Colorbond: a brand name for pre-painted steel roofing and cladding produced with a baked-on, corrosion-resistant finish that resists flaking and fading.
Colorbond fence gates are constructed from steel sheets fixed to a steel frame; they come in single-leaf (one swinging panel) and double-leaf (pair) configurations and can be ordered in standard panel profiles or custom-filled frames. Their advantages include steel gate durability, consistent colour options, and resistance to rot and termite attack.
When comparing materials, homeowners typically weigh cost, appearance, durability and maintenance. The table below compares Colorbond to timber and aluminium for common gate criteria.
| Criterion | Colorbond (steel) | Timber | Aluminium |
|---|---|---|---|
| Durability | High (corrosion-resistant coating) | Medium (prone to rot/termite) | High (corrosion-free but softer) |
| Maintenance | Low (clean, occasional touch-up) | High (stain/paint, repairs) | Low (cleaning, occasional repaint) |
| Cost (material) | Medium | Low–Medium | Medium–High |
| Security | High (solid panels available) | Medium | Medium–High |
Colour is a strong selling point for Colorbond gates because the factory-applied finish offers consistent tones that match fences and sheds. For detailed colour matching and options, see Colorbond Shed Colours Guide: Best Shed Colour Options and Colorbond Bushland Colour Guide.
For specific paint and tone variations such as Blue Ridge, consult Colorbond Blue Ridge paint options, and for related fencing product pricing see Colorbond fence panels price guide.
Transition: Next we cover the precise gate sizes you’ll encounter and a step-by-step measuring guide so you order the right gate first time.
Common Colorbond Gate Sizes and How to Measure
Answer: Standard Colorbond gate sizes commonly available are 820–920mm wide for pedestrian single-leaf gates, 1000–1200mm for wider pedestrian gates, and 2400–3600mm for single or double vehicle gates; measure the clear opening, swing space and post centres to confirm exact size or order a custom gate.
Gate leaf: the individual moving panel of a gate (one leaf for single gates, two leaves for double gates).
Standard Australian residential gate width references (typical, not mandatory):
- Pedestrian single-leaf: 820mm to 920mm clear opening (most common for side-access gates).
- Wide pedestrian: 1000mm to 1200mm (wheelchair, pram, or bulky item access).
- Single vehicle: 2400mm to 3000mm (sufficient for small cars; driveway single leaf).
- Double vehicle (pair): 3000mm to 3600mm+ total opening (two leaves with centre meeting stile).
- Custom sizes: any width/height outside standard ranges; expect higher material and labour costs.
How to measure a gate opening — step-by-step (do this twice for accuracy):
- Clear opening width: Measure the horizontal distance between the finished faces of the posts or brick piers where the gate will close (this is the clear opening; call it “W”).
- Post centre measurement: If posts are already fixed, measure centre-to-centre of posts to confirm frame size.
- Height: Measure from finished ground level to the top where gate will be flush; allow for 10–20mm clearance under gate for ground movement or slopes (this is “H”).
- Swing space: Check for obstructions (plants, paths, fences) in the full swing path; measure the radius required from hinge line to leading edge.
- Reveal and rebates: If you need the gate to sit inside a recess (rebate), measure the rebate depth and add to frame dimensions.
- Slope and ground changes: Measure both ends of the opening if the ground slopes; give preference to the higher point for clearance calculations.
Example walk-through (Melbourne backyard case):
- Site: Brunswick terrace side access with brick piers already set.
- Measured clear opening W = 930mm, height at hinge side H = 1800mm, ground slope 15mm drop across opening.
- Ordered: a 920mm single-leaf Colorbond gate with 15mm underside clearance, left-hand hinge, and a 100mm rebate allowance to sit within the piers.
Practical tips when measuring:
- Always measure at least three times and record numbers; if uncertain, round down the clear opening slightly and allow the gate maker to confirm frame size.
- For double gates, measure each leaf opening and the centre gap; specify hinge location and meeting stile width.
- Label left/right from the outside view (street-facing) to avoid installer confusion.
- If buying an off-the-shelf gate, verify the manufacturer’s specified clear opening and frame thickness.
Transition: After measuring, your next consideration is the Melbourne-specific costs you should expect when installing a Colorbond gate, including materials, hardware and labour.
Factors Affecting Colorbond Gate Installation Cost in Melbourne
Answer: Gate installation cost in Melbourne varies by gate size and complexity, labour rates, post and footing work, site access, hardware quality and additional services (welding, painting, council permits); expect typical installed prices from AUD 450 for simple pedestrian gates to AUD 2,500+ for large custom vehicle gates with premium hardware.
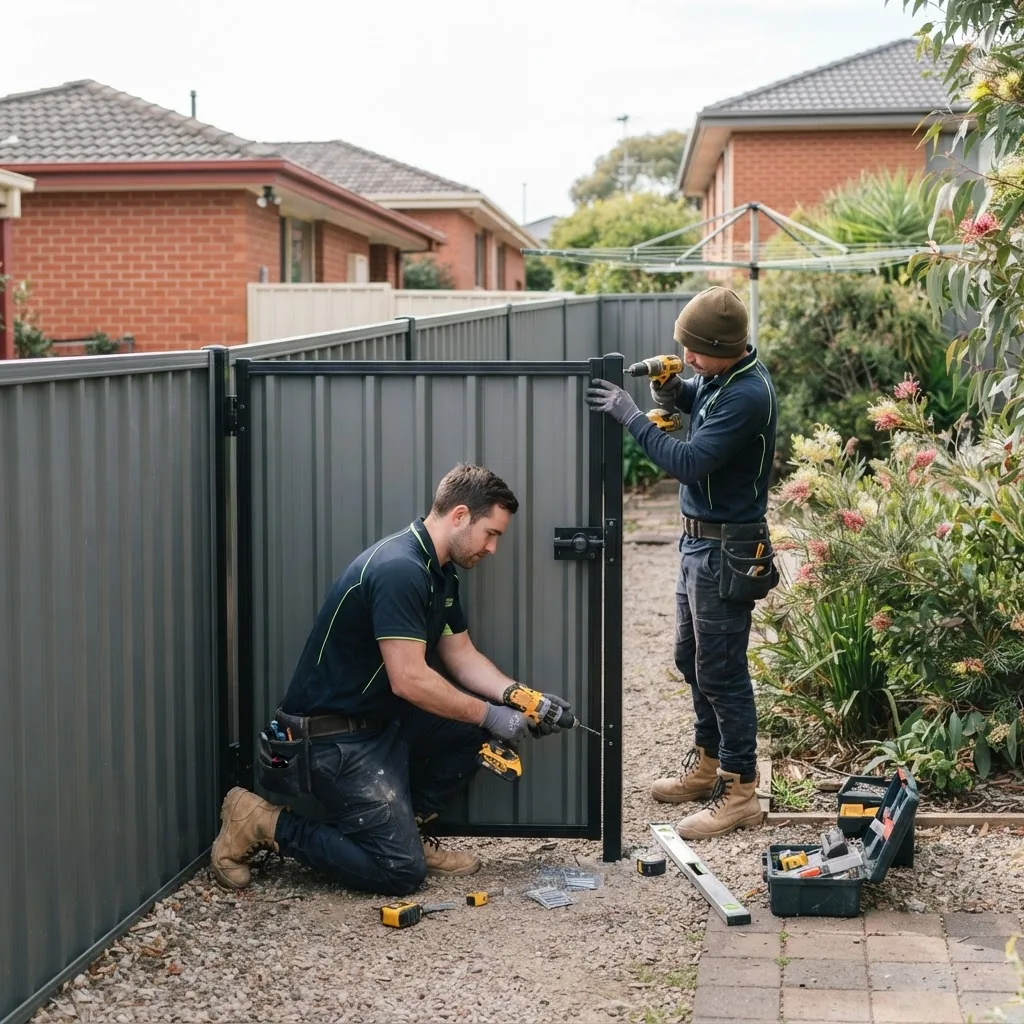
Key cost influencers (bullet summary with typical Melbourne price ranges and notes):
- Gate size and type: Larger gates use more steel and heavier frames — pedestrian gates AUD 450–1,000; vehicle gates AUD 1,200–2,500+. (According to a 2023 local fencing cost survey.)
- Labour rates: Tradespeople in Melbourne typically charge from AUD 60–120/hour depending on experience and whether work requires two installers. (According to a 2024 industry report.)
- Post and footing preparation: Concrete footings and new posts add AUD 150–600 per post depending on depth and soil conditions.
- Hardware quality: Standard hinges and latch AUD 60–180; premium stainless-steel hinges, self-closing mechanisms or electric strikes AUD 200–800.
- Site access and complexity: Limited access, retaining walls or sloping blocks increase labour and may add scaffolding or angled cutting costs (AUD 150–600 extra).
- Custom finishes and painting: Special paint matching or additional protective finishes increase material and labour costs (AUD 100–400 extra).
- Permits and compliance: Some Melbourne council areas require planning or building permits for certain gates or fences; permit fees vary by council (see external link to council requirements below).
- GST and removals: Include GST on trade invoices and potential removal/disposal of old gates (AUD 50–200).
Detailed sample cost breakdown — Melbourne 2024 example project (single pedestrian gate installation):
| Item | Estimate (AUD) | Notes / Source |
|---|---|---|
| Colorbond gate (manufactured, 920mm x 1800mm) | $260–$480 | Material quote range from local Melbourne suppliers (2024 price samples). |
| Posts & concrete footings (2 posts) | $220–$420 | Includes concrete, post sleeves, labour. |
| Hardware (hinges, latch) | $80–$250 | Standard vs premium stainless fittings. |
| Labour (2–4 hours) | $240–$480 | Trades rate estimates for Melbourne (2024 industry rates). |
| Disposal & incidentals | $50–$150 | Old gate removal, small extras. |
| Total installed | $850–$1,780 | Typical Melbourne single pedestrian gate (2024 sample) |
Cost notes and sources:
- Prices vary depending on gate size and specific site conditions — Prices vary depending on gate size and specific site conditions.
- For comparative pricing on other Colorbond materials, see cheap roofing sheets prices and Colorbond roof cost guide.
- According to a 2023 local fencing cost survey, specialised custom gates can cost 25–40% more than standard sizes due to additional fabrication time.
Regulatory and compliance costs: some Melbourne councils require planning permission or have maximum fence height rules; check your local council requirements before ordering. For Australian standards on steel gates and fencing installation guidance consult external resources below.
Transition: With a budget range in mind, the next section walks through the exact installation steps you or an installer will follow so you understand where the time and costs are spent.
Step-by-Step Process of Installing a Colorbond Fence Gate
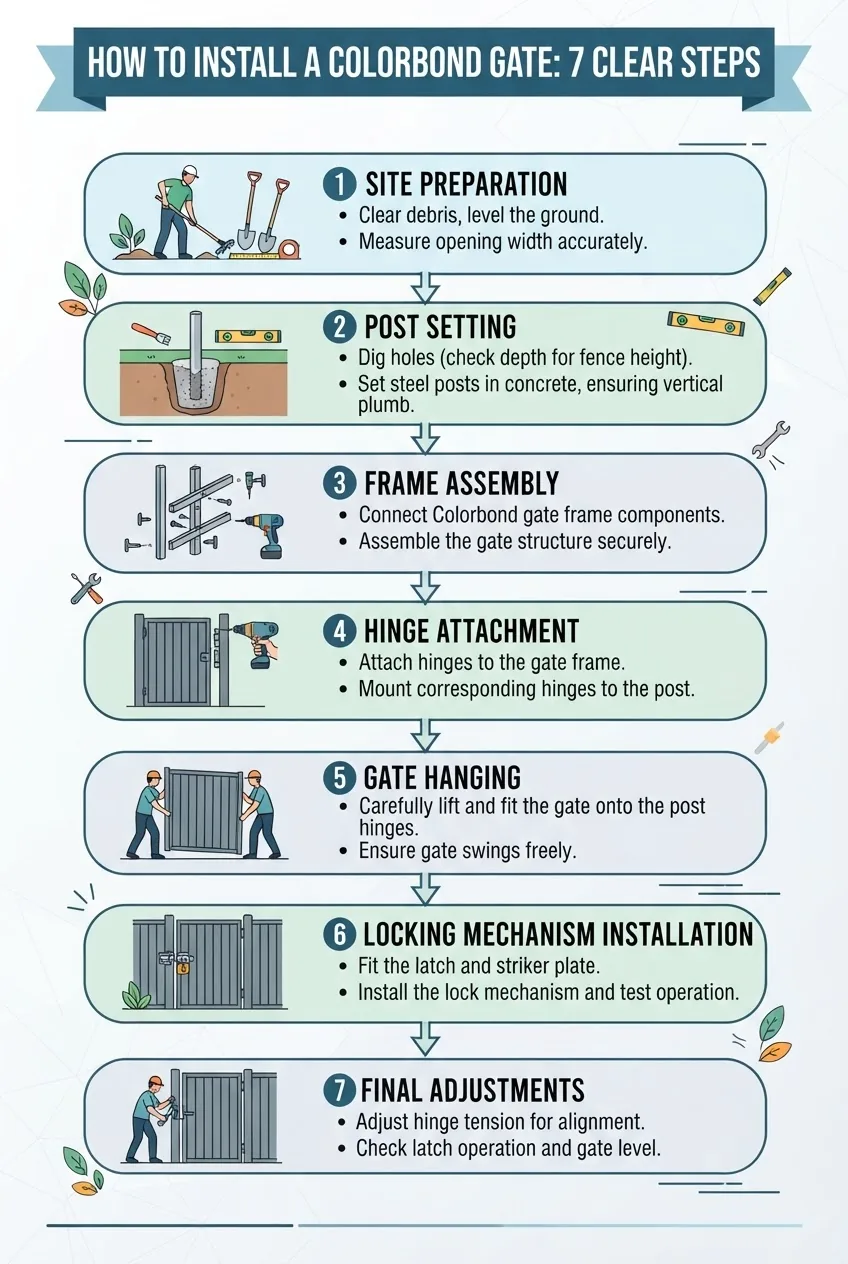
Answer: Installing a Colorbond gate involves site preparation, setting posts in concrete, assembling and squaring the gate frame, fitting hinges and hardware, hanging the gate leaf(s), aligning and adjusting for smooth operation, and final sealing/paint touch-ups; the full process typically takes 2–6 hours for a single pedestrian gate.
Tools typically required:
- Spirit level and string line
- Post hole digger or auger
- Concrete mix and mixing tub
- Angle grinder or metal saw (for frame adjustments)
- Drill/driver and metal drill bits
- Torque wrench / spanners
- Measuring tape and marker
Seven installation steps (numbered):
- 1. Site preparation: Clear the area of obstacles, check underground services, and mark post positions by measuring the clear opening (W) and desired hinge side. Ensure you have required council approvals if necessary.
- 2. Set posts in concrete: Dig holes to the recommended depth (typically 600–900mm for domestic gates depending on frost/slope), position posts plumb and brace them while pouring concrete; allow concrete to cure (minimum 24 hours for quick set, 48–72 hours for full strength).
- 3. Assemble frame and attach Colorbond infill: Fabricate or unpack the gate frame, weld or bolt corners as per manufacturer, and fix Colorbond sheeting or palings to the frame with matching fasteners. Check for squareness using diagonal measurements.
- 4. Fit hinges and latch hardware: Position hinges at recommended points (typically top and bottom with a third centre hinge for heavy gates), pre-drill fixing holes and use suitable grade bolts or screws; attach latch, drop bolt or lockstrikes as specified.
- 5. Hang the gate leaf(s):strong Lift the gate into place (use two people for heavier leaves), secure hinge bolts loosely, and adjust vertical and horizontal alignment until the leaf swings freely without binding; tighten fixings once aligned.
- 6. Install catch/locking mechanism and final fittings: Fit self-closing devices, electric strikes or manual locks ensuring the latch engages smoothly and the gate closes squarely; test several cycles.
- 7. Final adjustments, sealing and cleanup: Check underside clearance, adjust for shrinkage or ground movement, touch-up any exposed steel with matching paint, and remove waste and temporary braces.
Safety tips during installation:
- Always wear eye protection when cutting steel; use gloves for sharp edges.
- Secure heavy gates during installation to prevent tipping — use temporary supports.
- Check underground service plans before digging post holes; contact Dial Before You Dig in Australia.
- If electrification is required (automated operators), use a licensed electrician for electrical connections and compliance.
Melbourne example project timeline:
- Day 1: Site markout and set posts in concrete (allow curing).
- Day 2: Assemble frame, affix Colorbond sheet, fit hardware and hang gate.
- Day 3: Final adjustments, paint touch-ups and handover (if no curing delays).
Transition: Deciding whether to do these steps yourself or hire professionals affects cost, speed and warranty — the next section compares DIY vs professional installation to help you choose.
DIY vs Professional Installation: What You Need to Know
Answer: DIY installation can save labour costs but requires metalworking tools, accurate measuring and structural competence; professional installers provide speed, warranty, compliance checks and safer outcomes — for heavy or custom Colorbond gates in Melbourne hiring a pro is often the best value.
Comparison table: DIY vs Professional (cost, time, skill, risk, warranty)
| Factor | DIY | Professional |
|---|---|---|
| Typical cost | Lower (save labour: ~AUD 200–700) | Higher (labour included: ~AUD 450–2,500 installed) |
| Time | Longer (weekends, learning curve) | Faster (1–2 days for standard gates) |
| Skill required | Metalwork, concreting, alignment skills | Trained installers with specialised tools |
| Risk | Higher (incorrect alignment, structural failure) | Lower (inspections, warranty) |
| Warranty & compliance | Usually none | Often includes workmanship warranty and compliance checks |
Practical guidance to choose:
- Choose DIY if you have metal-cutting tools, prior concreting experience, and the gate is a simple, small pedestrian unit.
- Choose professional installation for vehicle gates, custom joins, automation, or if council permits and certified work are required.
- Always get at least two written quotes from Melbourne-based installers and check trade references and public liability insurance.
Cost comparison example (Melbourne sample): DIY project materials for a 920mm gate might total AUD 500–800; a professional installed job could be AUD 850–1,800 — consider the value of warranty and speed against savings. (According to a 2023 local fencing contractor price sample.)
Transition: Once installed, proper maintenance will extend your Colorbond gate’s life and reduce long-term costs — read the maintenance checklist next.
Maintenance Tips to Extend the Life of Your Colorbond Gate
Answer: Regular cleaning, hinge lubrication, periodic paint touch-ups, rust spot repair and checking drainage/clearance will keep a Colorbond gate functional and looking new for decades; simple seasonal maintenance typically takes 15–30 minutes per inspection.
Maintenance checklist:
- Clean the gate every 6–12 months with mild detergent and water to remove grit and salt that can accelerate corrosion.
- Lubricate hinges and locks twice a year with a light machine oil or dry lubricant; check fasteners for tightness.
- Touch up paint chips immediately using manufacturer-matching touch-up paint to prevent bare steel exposure.
- Inspect bottom clearance and remove debris that could trap moisture against the steel.
- Check drainage around posts and footings and regrade if water pools near posts.
- For protective finishing and sealing details, see Colorbond capping materials and Colorbond roof paint options.
When to call a pro: if you find structural damage, significant rusting through, hinge weld failures, or if automation/electrical components require repair, hire a licensed installer or electrician to maintain safety and warranty.
Transition: The following FAQ gives quick, specific answers to common questions homeowners ask about Colorbond gates.
Frequently Asked Questions About Colorbond Gates
Answer: The FAQ below provides concise, actionable responses about materials, sizes, costs, installation choices, repairs and security to help homeowners make quick decisions.