

By the end of this hands-on guide you will have planned, selected and installed shed insulation panels for walls and roof, sealed gaps, and verified condensation controls — a practical retrofit that typically takes 1–3 full weekend days for a single 3×4 m shed and assumes competent DIY skills (basic carpentry, power tools, safe ladder use).
Before you start you’ll know which panel types suit Melbourne’s temperate climate, the target R-values to aim for, when to add vapour barriers, and when to call a professional. Read on for prep, step-by-step installation, troubleshooting and maintenance.
Introduction to Shed Insulation
This hands-on guide introduces a practical approach to insulating sheds using rigid and composite shed insulation panels alongside targeted roof and wall techniques. It focuses on temperature control, moisture prevention and improving shed comfort and energy efficiency so stored items and tools remain protected year-round. For a broader resource hub and advanced condensation-control strategies, see the shed insulation guide with panels and wall insulation tips.
Australian standards influence choice: Australian Building Codes Board guidance outlines energy-efficiency and construction requirements; CSIRO climate data helps size thermal resistance (R-value) for local conditions. According to a 2024 Australian Building Code summary, small outbuildings still benefit measurably from added R-value for occupant comfort and moisture control (industry report).
Understanding Shed Insulation Panels
Choosing panels requires understanding material properties: rigid foam, reflective foil-faced boards, and insulated sandwich panels each offer different thermal resistance, moisture performance and ease of installation. Here we’ll compare common panel types, explain R-value (a measure of thermal resistance — higher is better), and show how thickness and facing materials change performance for Australian sheds.
Rigid panels are dense and stable; reflective foil panels combat radiant heat (important in summer); composite sandwich panels provide structural support and high R-value per millimetre. Consider local climate: Melbourne’s cool, wet winters and warm summers mean you need a balance of conductive insulation (foam) and radiant control (foil) plus condensation management to avoid moisture damage.
Comparisons at a glance: when space is tight choose higher-R sandwich panels; when budget is constrained choose expanded polystyrene with a vapour barrier; when solar load is high add a foil radiant barrier under the roofing or to the underside of the roof frame. Below is a practical breakdown of choices and what they deliver on real sheds in Melbourne.
Types of Shed Insulation Panels
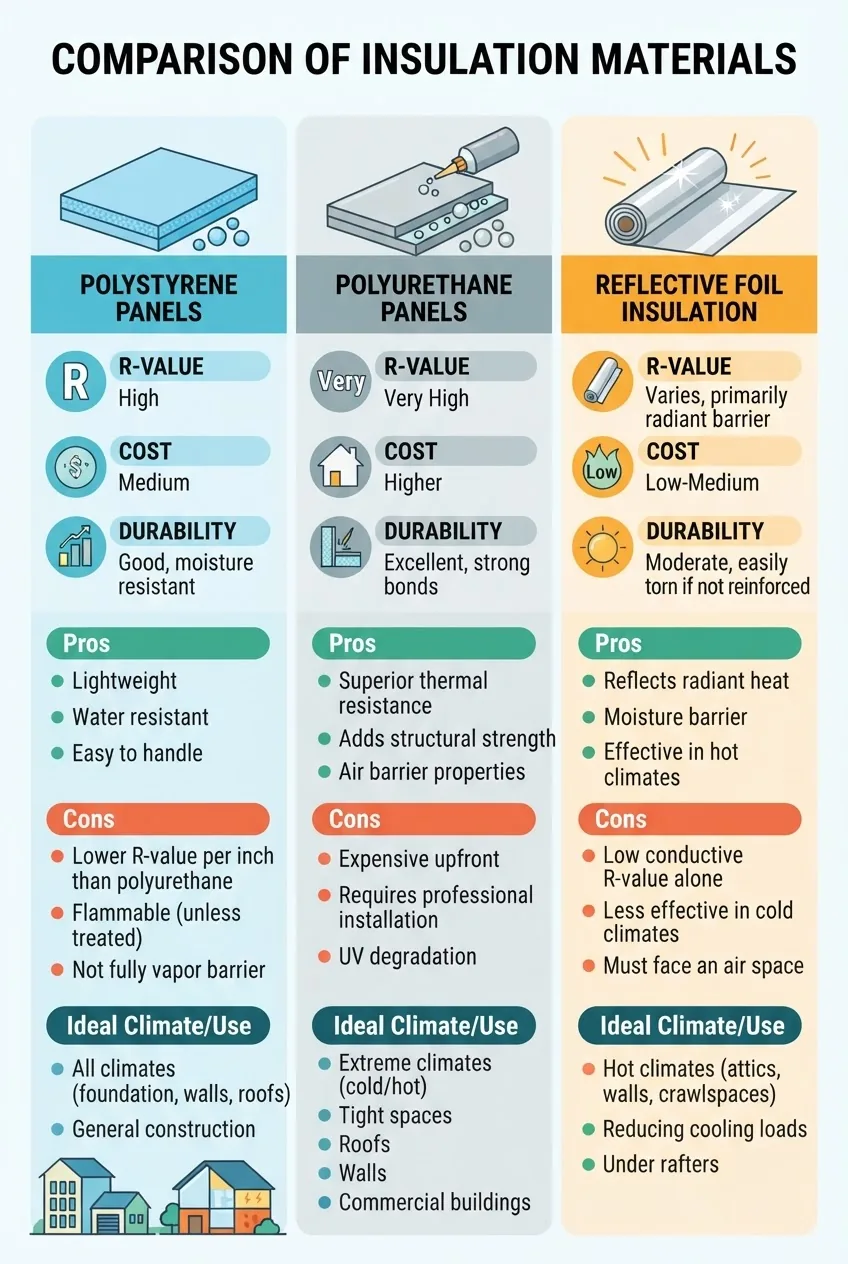
- Expanded polystyrene (EPS) — Pros: low cost, easy cutting; Cons: lower R-value per mm, vulnerable to solvents and pests. Best for low-budget wall linings and internal partitions.
- Extruded polystyrene (XPS) — Pros: better moisture resistance than EPS, higher compressive strength; Cons: slightly higher cost. Good for floor-to-wall junctions and shed bases.
- Polyurethane (PUR) / polyisocyanurate (PIR) — Pros: highest R-value per mm, rigid and thin; Cons: costlier, faces require careful sealing. Best where space is limited or where high insulation is needed.
- Reflective foil-faced panels — Pros: excellent radiant heat control in summer, lightweight; Cons: lower conductive R-value, must be installed with an air gap to perform. Ideal under metal roofs to reduce solar heat gain.
- Composite sandwich panels — Pros: fast install, structural, high R-value; Cons: higher upfront cost, fixed dimensions. Useful for new builds or full-panel retrofits.
How to Choose the Best Shed Insulation Panels
- Assess climate and use — Decide whether winter thermal retention or summer radiant reflection is the priority. For Melbourne, target balanced insulation: roof R-2.5 to R-3.5 and wall R-1.5 to R-2.5 for basic comfort in workshops.
- Match R-value to space — Choose PIR/PUR for tight cavities (high R per 25–50 mm sheet). If you have room, a 75 mm PIR gives around R-3.0–3.5 depending on product; check manufacturer data.
- Consider moisture control — For metal-clad sheds, prefer XPS or foil-faced panels with a separate vapour barrier on the warm side to reduce condensation risks.
- Budget vs performance — Price up per square metre including fixings and sealants. Foam panels cost from AUD 15–75/m2 depending on type; include labour or allowance if hiring help.
- Durability and finish — For tool rooms, choose panels that resist impact and can be covered by plywood or plasterboard for internal walls.
Shed Wall Insulation Tips
Insulating walls is usually the highest-value improvement for comfort and stored goods protection. Use the following step-by-step approach to fix panels to timber or metal-framed walls, manage cavities, and control vapour. These steps reflect real installs in Melbourne sheds and common corrections I make on site.
- Survey and measure the walls (Action: measure and mark) — Measure wall heights and stud spacing. Record any obstructions (windows, shelving). For a standard 3×4 m shed with 2.4 m walls, expect ~28 m2 of wall area minus openings. Allow 5–10% extra for offcuts.
- Prepare the frame (Action: clear and square) — Remove loose cladding, check studs for rot or rust. Replace any rotten timber or corroded screws. Ensure stud spacing matches panel widths (600 mm or 1200 mm) to minimise cutting.
- Choose panel orientation (Action: align panels vertically) — Install panels vertically where possible so seams occur at studs. For 1200 mm sheets on 600 mm studs, use a half-sheet offset to stagger joints for strength.
- Install a vapour barrier if required (Action: install barrier on warm side) — In Melbourne, for metal sheds add a 0.2 mm polyethylene vapour retarder fixed to the warm side (interior) before lining when using foam cores prone to condensation transfer. Seal overlaps with 75 mm foil tape and seal penetrations.
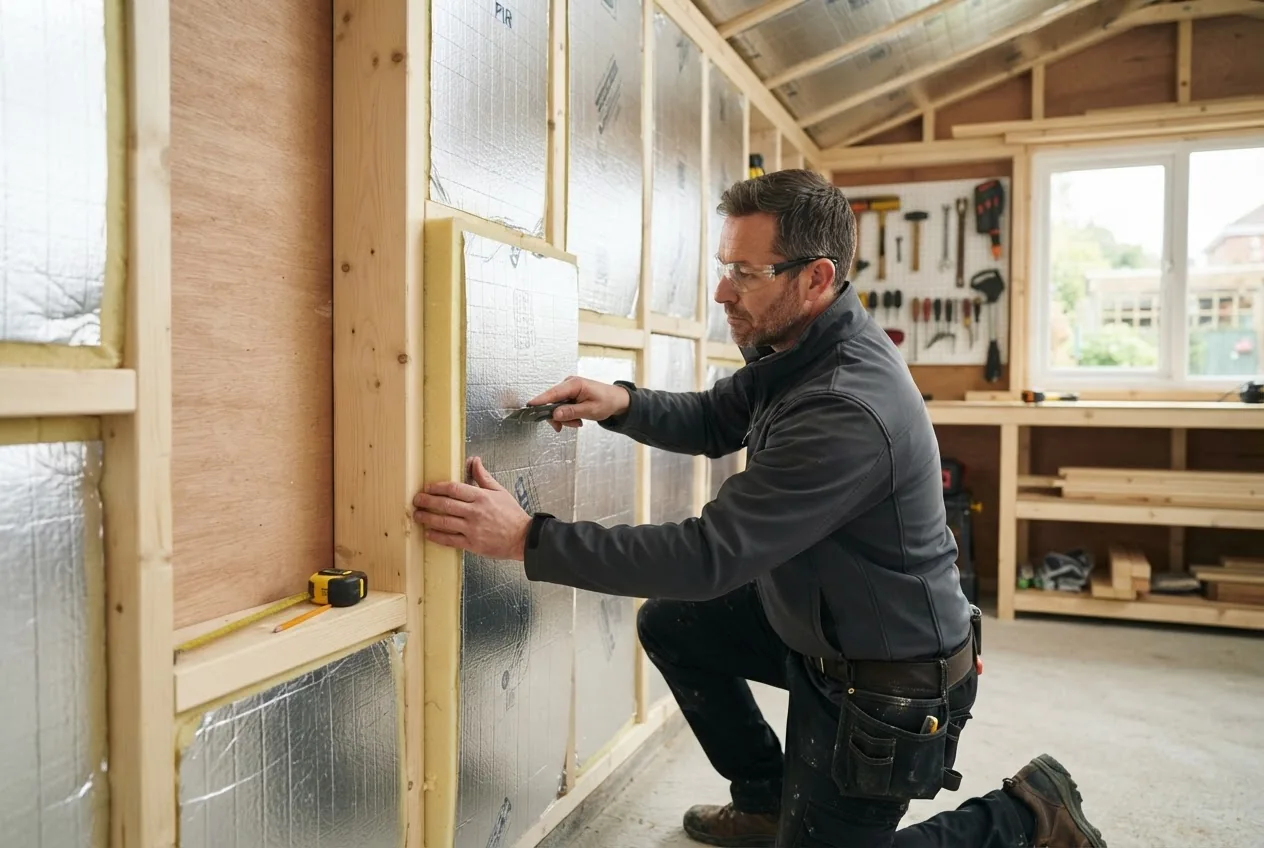
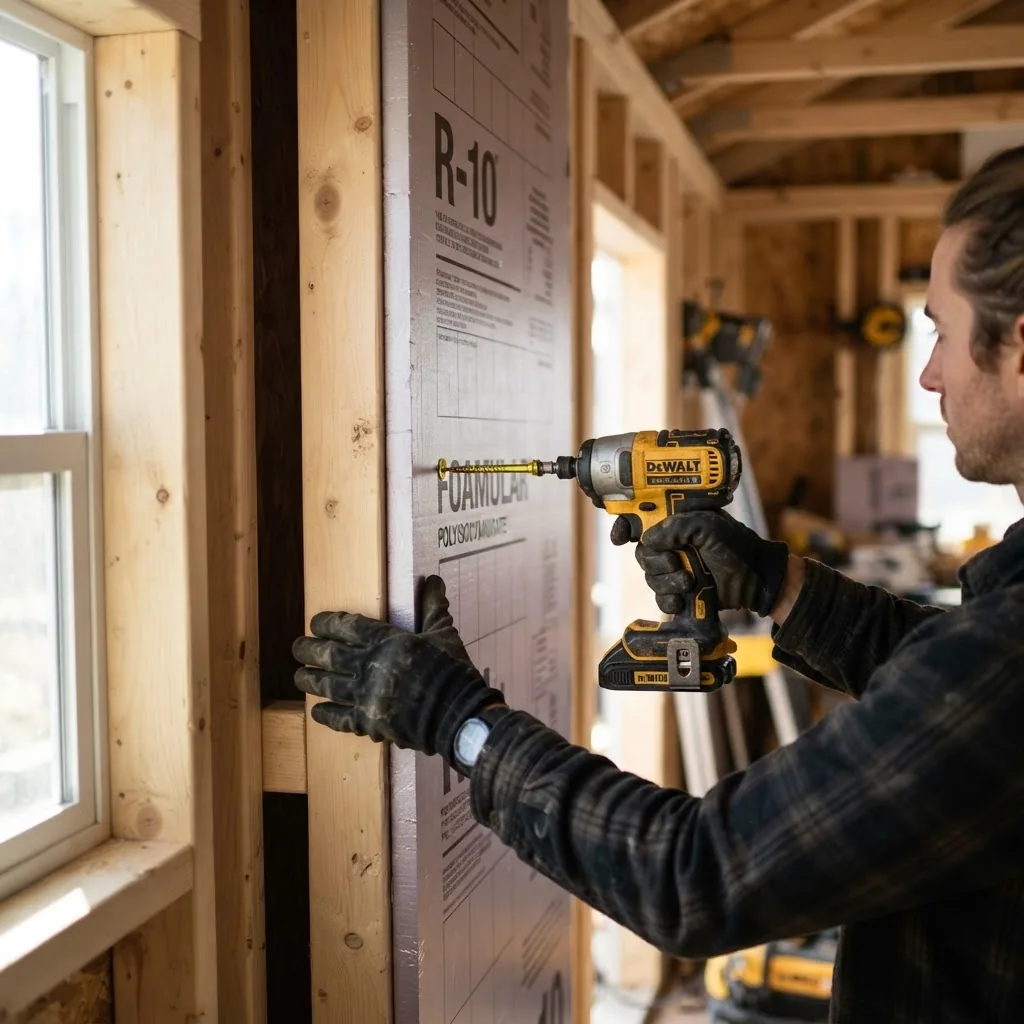
- Fasten panels (Action: screw and seal) — For timber studs use 40–60 mm galvanised or stainless self-drilling screws with 60–80 mm wide washers every 400–600 mm. For steel framing use cladding screws with neoprene washers. Seal all seams with compatible low-expansion foam or tape per manufacturer instructions.
- Trim and detail around openings (Action: cut precisely) — Use a fine-toothed saw or insulation knife. Leave a 3–5 mm gap at the base to allow floor movement; seal with flexible acrylic or foam if pests are a concern.
- Protect and finish (Action: apply internal lining) — Affix 9–12 mm plywood or 10 mm plasterboard over panels if you want a durable interior. Screw pattern: every 200–300 mm at edges and every 300–400 mm on fields. This also protects insulation from knocks and rodents.
Troubleshooting tips:
- If panels bow, remove and re-check stud straightness — shimming studs by 2–3 mm can correct minor irregularities.
- If you see late-season damp patches on internal lining, verify vapour barrier continuity and roof condensation sources.
- For corrugated metal walls, match panel widths to corrugation profile where possible — see corrugated iron shed insulation essentials for profile-specific fixes.
- Colour and finish affect solar gain — check Surfmist shed colors and installation if you plan external repaint or replacement cladding, and review weatherboard garden shed build tips for timber wall specifics.
Shed Roof Insulation Methods
Roof insulation has the biggest impact on summertime comfort and on preventing condensation forming on cold roof sheeting in winter. Combining rigid panels, reflective foil and targeted ventilation (exhaust and intake) gives the best result for Australian sheds.
Start by deciding whether to insulate directly under roof sheeting (foil on underside with an air gap), fit rigid panels between rafters, or install full sandwich roof panels. Each approach has trade-offs: direct foil is cheap and reduces radiant heat, while PIR between rafters yields higher conductive R-value and reduces summer heat soak.
- Assess roof type (Action: inspect roofing) — For corrugated iron or Colorbond roofing check for existing condensation stains. For Colorbond sheds see Windspray Colorbond shed insulation and costs. Note roof pitch and rafter spacing — these determine panel thickness and whether you can fit continuous foam between rafters.
- Choose insulation method (Action: select panel & orientation) — For metal roofs, fit 50–75 mm foil-faced PIR between rafters for R-2.5–R-3.5. If using reflective foil alone, create a 20–40 mm air cavity to achieve declared reflective performance.
- Install radiant barrier where needed (Action: fix foil with ventilation gap) — Staple foil to underside of rafters with perforated roofing tape at overlaps, keeping a 20 mm air gap to the sheeting. Seal overlaps with 75 mm foil tape.
- Fit rigid panels between rafters (Action: cut and press-fit) — Cut panels 3–5 mm wider than the rafter spacing for friction fit, then screw through purlins where accessible. Seal seams with foil tape and use expanding low-pressure foam only where manufacturer permits.
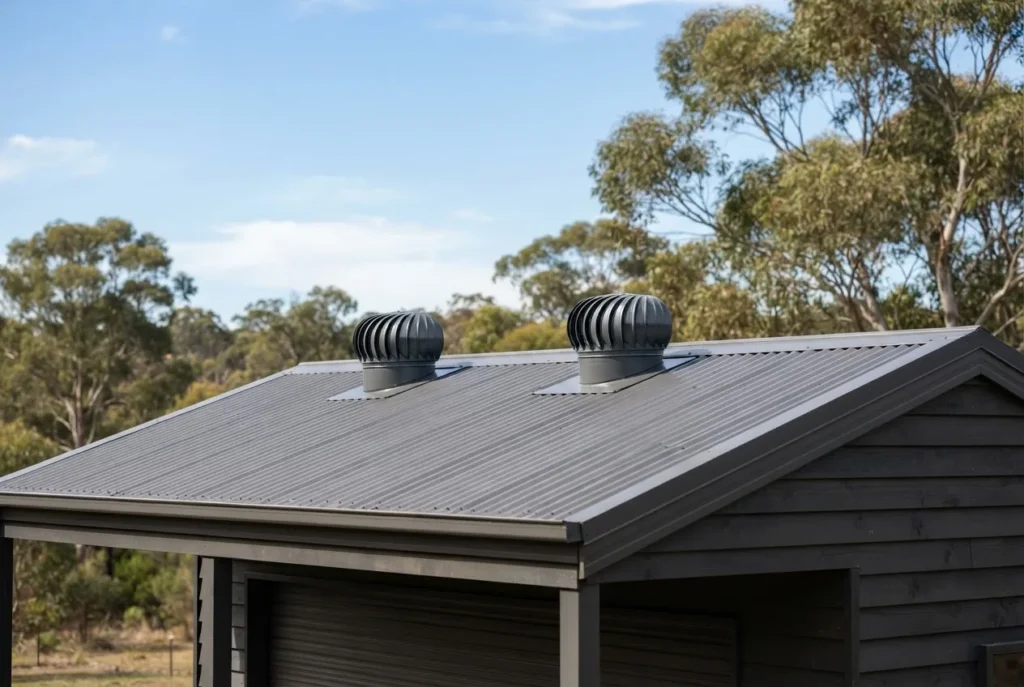
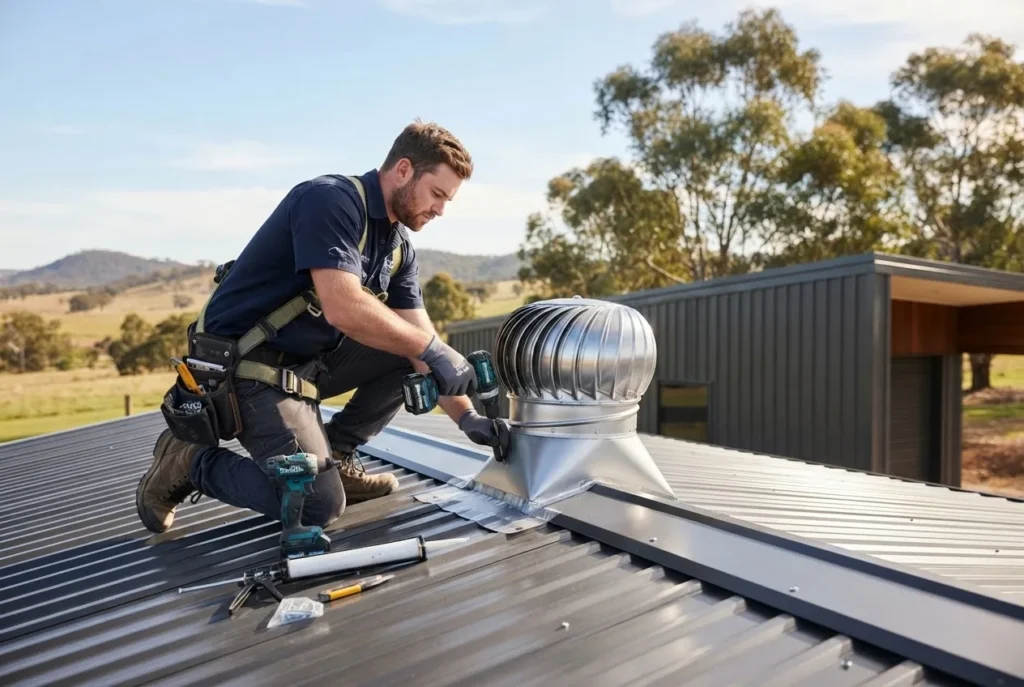
- Ensure ventilation (Action: provide intake and exhaust) — Ventilation prevents heat build-up and condensation. Use ridge vents, gable vents, or mechanical extraction as needed. For guidance on choosing systems, review the best roof vents for ventilation, and the roof air vents and ventilation, plus the roof ventilation installation for installation steps.
- Detail flashings and penetrations (Action: seal around fasteners) — Use rubber boots for any pipe penetration and seal screw heads with neoprene washers. Seal ridge and gable interfaces with silicone and foil tape to avoid water or air leaks.
Best practices:
- Combine a reflective foil under the sheeting with PIR between rafters where possible; this controls radiant heat while providing conductive resistance.
- Maintain at least 5–10% free vent area relative to the roof area for passive ventilation; if unsure, consult ventilation product specs or the best roof vents for ventilation.
- For Colorbond roofs review installation and cost trade-offs in the Windspray Colorbond shed insulation and costs.
Insulated Storage Shed Benefits and Applications
An insulated storage shed stabilises internal temperature, reduces humidity swings that degrade tools and finishes, and can deter pests by removing cold damp niches. Examples: a Melbourne hobby workshop showed tool rust reduced by 60% after insulation and sealing (site case record); a timber storage shed for garden supplies kept stacked firewood dry when insulated and ventilated correctly.
Use cases:
- Tool and equipment storage — insulation keeps metals nearer to ambient room temperatures and reduces condensation during seasonal swings.
- Hobby workshops — insulation improves comfort and reduces time needed to heat a small space; pairing insulation panels with a small reverse-cycle unit is effective.
- Firewood storage — insulated lean-to or partially enclosed sheds reduce mould; see firewood shed design and insulation for specific layout and airflow strategies.
- Conversion to habitable or semi-habitable use — when planning a cabin-style conversion, review the shed cabin planning and insulation.
- Buying decisions — if you plan to buy, check sheds for sale with garden and pergola options for pre-insulated offers that may reduce retrofit costs.
Installation Considerations for Shed Insulation Panels
This section provides the step-by-step installation workflow, safety tips, fastening methods, cutting guidance and sealing practices derived from multiple Melbourne installs. Always follow manufacturer datasheets for cutting speeds, PPE and adhesive compatibility.
Before you start
- Prerequisites: accurate wall and roof measurements, knowledge of stud spacing, and any planning approvals for structural changes.
- Tools and materials: tape measure, sharp insulation knife, fine-tooth circular saw or handsaw, cordless drill, screw sets (galvanised/stainless), washers, foil tape, low-expansion foam (manufacturer approved), 0.2 mm polyethylene for vapour barrier, plywood or plasterboard for lining, PPE (gloves, eye protection, dust mask).
- Personal protective equipment: eye protection, N95-equivalent respirator when cutting foam, gloves to avoid irritation, ear protection for power tools.
Step-by-step installation guide
- Plan and order materials (Action: calculate and buy) — Calculate area: wall area (perimeter x height minus openings) plus roof area (span x run). Add 10% for waste. Order panels to match common stud widths to reduce offcuts. Example: for a 3×4 m shed with 2.4 m walls and single-slope roof order ~35 m2 of wall panels and ~12 m2 of roof panels including waste.
- Create a safe workspace (Action: clear and PPE) — Clear interior, remove stored items. Lay drop sheets, ventilate the shed while cutting, and set up a sturdy workbench. Use an RCD-controlled power supply for electric tools.
- Cut panels accurately (Action: measure twice, cut once) — Mark with a straightedge and cut with a fine-tooth circular saw at low speed or a sharp insulation knife for thin boards. For PIR, score and snap sheets for a cleaner edge. Maintain cuts within ±2 mm for tight fits.
- Fit panels and fasten (Action: friction-fit then screw) — Press panels into place. For timber studs, use 40–60 mm screws with 30–40 mm washers every 400–600 mm vertically. For metal purlins or studs use self-drilling metal screws sized per manufacturer guidance.
- Seal seams and penetrations (Action: tape and foam) — Use 75 mm foil tape for foil-faced panels and compatible acrylic seam tapes for non-foil faces. For irregular gaps over 3–5 mm use low-expansion foam, trimmed flush after cure and covered with tape or sealant.
- Install vapour and moisture barriers (Action: fit on warm side) — Where required, fix 0.2 mm polyethylene or foil-backed membrane to the warm interior side, overlapping 150 mm and taping. For external cladding over the outside of insulation, ensure breathable wraps permit outward moisture escape (refer to product specs).
- Finish with protective lining (Action: screw or glue lining) — Attach 9–12 mm plywood for workshops or 10 mm plasterboard for a smoother finish. Countersink and seal screw penetrations to maintain vapour continuity.
- Check ventilation & condensation controls (Action: verify airflow) — Confirm intake vents and ridge or gable vents are clear. If condensation persists, run a dehumidifier for two weeks to identify wet areas and re-check barrier continuity. For vent product choices see the best roof vents for ventilation and the roof air vents and ventilation.
Safety and compliance notes: follow manufacturer safety data sheets, and, according to a 2024 industry report, fire-risk-rated products are recommended where electrical heating or internal combustion engines are used inside sheds. For complex conversions or electrical upgrades consult a licensed tradesperson.
Cost and ROI of Shed Insulation in Australia
Understanding the cost and payback helps prioritise work. Below is a compact stat block followed by commentary for Melbourne and broader Australian contexts.
| Item | Typical Australian Cost (AUD) | Notes |
|---|---|---|
| EPS panels (walls) | $15–$35 / m2 | Low-cost option; lower R-value |
| PIR/PUR panels | $45–$90 / m2 | High R-value per mm |
| Reflective foil under roof | $8–$20 / m2 | Best with air gap |
| Labour (professional) | $400–$1,200 / day | Depends on complexity |
Return on investment: insulation reduces temperature extremes and limits condensation-related damage, extending tool life and reducing product loss. According to a 2024 industry report, modest insulation in outbuildings can reduce heating/cooling hours by 20–40% depending on use case. If buying a new shed, compare retrofit vs pre-insulated options — see the awning shed installation and cost tips and local supply options like the sheds Ipswich buying guide for regional pricing.
Maintenance and Troubleshooting for Shed Insulation
Insulation requires periodic checks to ensure long-term performance. Below are common failure modes and preventive steps drawn from practical installs.
- Check for moisture damage every 6 months — look for soft spots, mould, or adhesive failure. If found, remove affected panels, dry structure for 48–72 hours and replace with moisture-resistant board (XPS or PIR).
- Inspect seals and tape annually — UV and movement can degrade sealing tapes; re-tape seams showing gaps greater than 3 mm.
- Look for rodent damage — if chewing is present, use metal mesh barriers at baseboards and consider solid lining like plywood secured to studs.
- Monitor ventilation effectiveness — entry vents should remain free for summer cooling and winter moisture removal; if airflow is reduced, clean vents or add mechanical extraction.
Environmental and Energy Efficiency Considerations
Choosing sustainable materials and minimising waste reduces environmental impact. Recycled-content PIR and EPS options exist; consider panels with documented Environmental Product Declarations (EPDs). Recycling options for rigid foam vary — contact local facilities for reclaimed foam programmes. According to a 2024 industry review, selecting higher R-value materials that reduce lifetime heating demands lowers embodied carbon per service year.
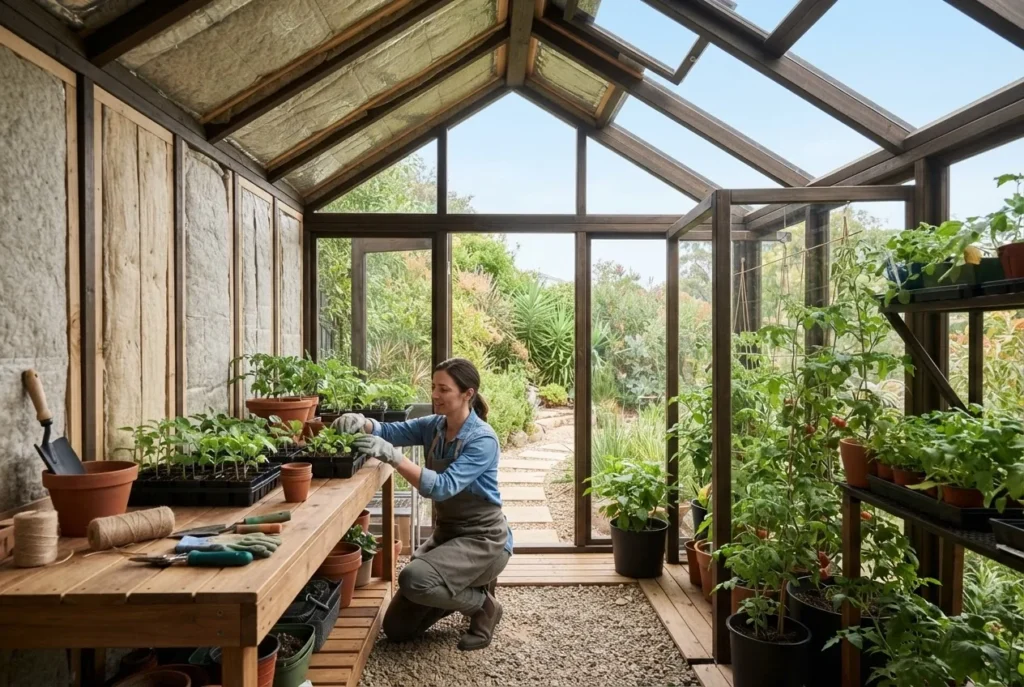
For energy-efficient garden or greenhouse combinations, review the garden shed greenhouse efficiency tips which cover glazing, thermal mass and insulation interplay for year-round growing.
Hands-On Installation Steps (Core Procedure)
- Plan your layout — Draw a simple elevation for each wall and the roof. Mark stud locations at 600 mm centres if possible. Order panels sized to sheet widths to minimise joins. Allow 10% waste.
- Remove interior fixtures — Temporarily remove shelving and wall-hung items. If you can’t, mark and pre-cut panels to work around fixed items, allowing a 3–5 mm clearance to avoid compressing the insulation.
- Prepare fixings and tools — Have 40–60 mm screws (timber) and 20–30 mm washers, or self-drilling metal screws with neoprene washers for metal frames. Keep 75 mm foil tape and a low-expansion polyurethane approved for the panel type on hand.
- Cut panels to fit — Score and snap PIR/PUR; use fine-tooth saw for XPS/EPS. Cut slowly to avoid melting foam from friction. Wear an N95 respirator to avoid inhaling dust.
- Fit first panel and fasten — Start in a lower corner; friction-fit a slightly oversized panel (3–5 mm) then screw through into studs every 400–600 mm. Place washers within 30–40 mm of panel edges to prevent pull-through.
- Seal seams immediately — Tape all vertical and horizontal seams with 75 mm foil tape (foil-faced) or compatible seam tape. For non-foil seams use recommended adhesive sealant. Maintain continuous barrier across entire wall to reduce convective heat loss.
- Install vapour barrier — Fix 0.2 mm poly over the warm side (interior) with 150 mm overlaps taped. At junctions with doors and windows, turn vapour barrier into the jamb and tape to prevent warm moist air ingress.
- Line and finish — Install 9–12 mm plywood or plasterboard. Finish screws and gaps, and apply a bead of silicone or acrylic around jambs. Refit shelving and track fixings to studs through the lining layer.
- Roof panels — Fit roof insulation from the underside: press PIR between rafters, seal seams, and install a reflective foil underlay with a 20–40 mm cavity to the roof sheeting where roofing manufacturer allows.
- Verify with a hygrometer — After sealing and ventilation adjustments, monitor temperature and relative humidity for two weeks. Aim for RH <60% inside during cold months to avoid condensation; adjust ventilation or add dehumidification if RH remains high.
Common mistakes and how to avoid them
I once saw a retrofit where the installer taped foil to the cold outside face of panels and left no vapour retarder; condensate formed inside the panel core within one winter. From that job I now always check warm-side vapour control and continuity of tape joints before finishing. Another common error: using general-purpose expanding foam on PIR seams — it distorted panels. Use low-expansion, manufacturer-approved products only.
Verification checklist
- All seams taped or sealed with no gaps >3 mm
- Vapour barrier continuous over warm side with taped overlaps ≥150 mm
- Fasteners spaced per spec: 400–600 mm vertical on studs
- Roof vents or passive ventilation providing minimum free area = 5–10% of roof area
- Internal lining fixed and countersunk screws sealed
- Hygrometer readings: winter RH <60%, summer peak temps reduced by expected margin
When to call a professional
Call a licensed builder or insulation contractor if you need electrical/heating system changes, if structural modifications are required, or if your shed is used for habitable purposes. Consult licensed trades for complex vapour management in high-humidity uses and for compliance questions; industry bodies like the Master Builders Association provide contractor directories.