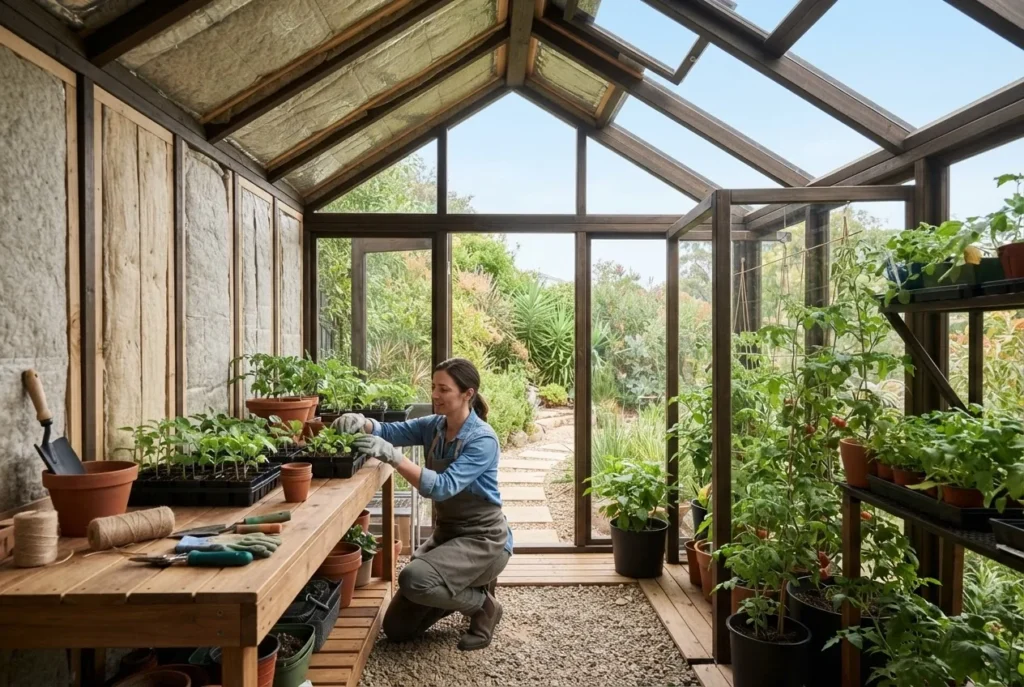

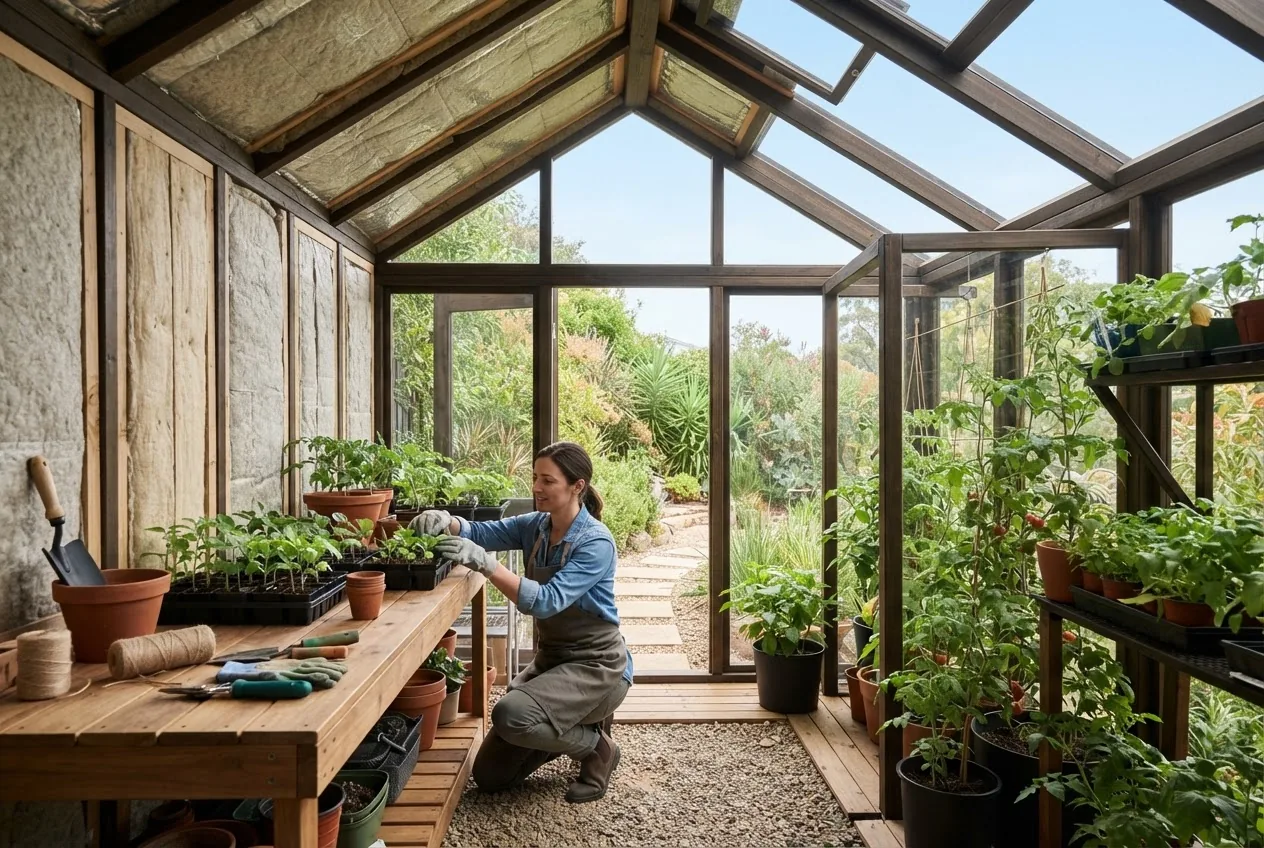

By the end of this hands-on guide you will have converted or designed a practical garden shed greenhouse that balances plant health and dry storage, understands insulation and condensation control, and includes a tested ventilation plan. Expect a realistic build or conversion time of 2–6 weekends (16–72 hours) depending on scope; skill level assumed: intermediate DIY (basic carpentry, power tool experience, simple electrical).
Introduction to Garden Shed Greenhouses
A dual-purpose shed that functions as a greenhouse and equipment store unlocks year-round growing in limited space and saves money compared to separate structures. In Melbourne’s variable climate—cold, wet winters and warm summers—the priorities are insulation to retain heat overnight, ventilation to avoid overheating and condensation, and durable materials that resist moisture. This guide focuses on practical, measurable steps to achieve efficient shed and greenhouse performance: thermal retention, moisture management, ventilation layout and lighting strategies, all adapted to Melbourne’s seasonal swings.
According to 2024 Bureau of Meteorology climate summaries (government source), Melbourne averages cold winter nights near 6–7°C and summer daytime peaks above 25–30°C; that range drives the need for insulation with R-values sufficient to reduce night-time heat loss while allowing rapid daytime ventilation. This guide will translate those climate numbers into material choices, vent sizing, and practical on-site steps.
Transition: next we’ll plan the build — site, orientation and local rules — so the structure performs reliably year-round.
Planning Your Garden Shed Greenhouse
Good planning prevents costly retrofits. Before construction, identify sunlight path, prevailing winds, access, drainage and any local restrictions. The following numbered list gives a stepwise planning checklist, then a short design explanation with links to relevant buying and local resources.
- Choose the site — pick a spot with at least six hours of direct morning-to-afternoon sun, minimal shading from deciduous trees in winter, and a slight slope for drainage. Mark utilities before digging; contact Dial Before You Dig if needed.
- Decide your orientation — for Melbourne, orient glazed wall or roof facing north to maximise winter sun; east-facing glazing captures morning warmth while avoiding late-afternoon summer heat.
- Define dual-use zones — allocate at least 30% of floor area for dry storage (tools, potting mix) separated by a raised timber platform or removable partition to protect stored items from humidity.
- Check local regulations — determine if your planned conversion is a permitted development or requires a building permit; consult the Australian Building Codes Board for insulation and structural compliance. According to a 2024 national building code summary (government source), certain wall and roof modifications trigger compliance checks.
- Select foundation type — use a concrete slab for heavy benching and thermal mass, or reinforced compacted gravel with treated timber bearers for lighter builds; slab thickness 75–100 mm with Dmax 20 and 50 mm sand blinding is typical for small sheds.
- Plan ventilation and access — allocate roof ridge vents, gable vents and at least one operable side window or louvre, and plan for a solar or low-voltage fan if natural ventilation is insufficient.
- Budget and timeline — estimate materials and labour: simple conversions start $1,200–$4,000 AUD in materials (basic glazing, insulation and vents); more complete retrofits with mechanical ventilation and panel heating can reach $6,000+. According to a 2024 industry cost review (industry report), insulation and glazing are the largest single material costs.
Design considerations: a lean-to conversion on an existing shed reduces walls to insulate but demands careful flashing and condensation control. Free-standing greenhouse-sheds should have north glazing, a service door on the lee side of prevailing winds, and a partitioned storage zone at the shaded, protected end.
For readers buying a new shell, consider these resources for product choices and local installers:
awning shed installation and cost tips
shed cabin planning for storage and insulation
garden shed purchase options
local shed builders in Ipswich
Transition: once planning is settled, select materials that balance thermal performance, durability in wet conditions, and cost — the next section compares common options.
Materials and Construction for an Efficient Shed and Greenhouse
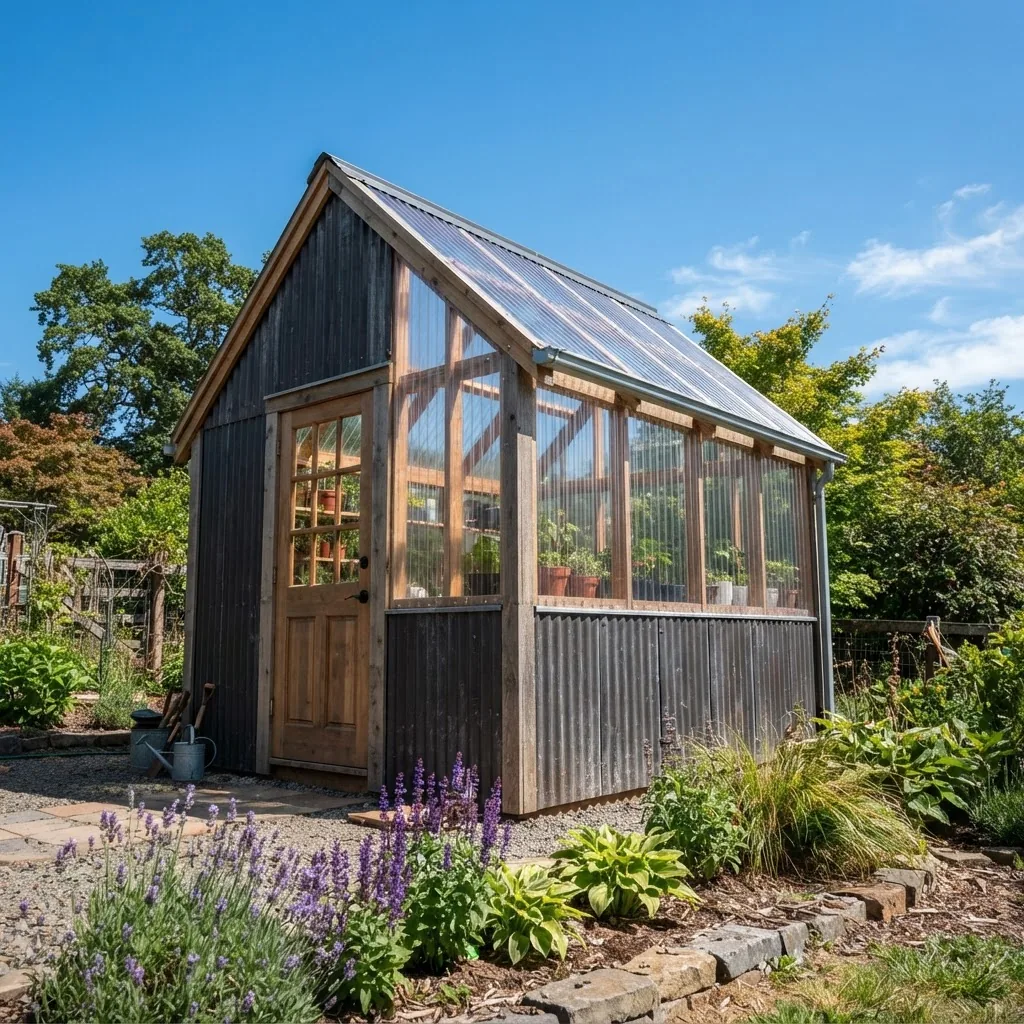
Selecting materials is a trade-off between thermal properties, condensation resistance, light transmission and cost. Below is a comparison table of common materials for frames, glazing and roofs used in combined shed-greenhouse builds in Australia, followed by a discussion of structural modifications and thermal behaviour.
| Component | Options | Pros | Cons / Notes |
|---|---|---|---|
| Frame | Timber (treated), Colorbond steel, Aluminium | Timber: easy to modify; Colorbond: durable; Aluminium: light, rot-proof | Steel needs thermal breaks; timber must be treated near soil |
| Glazing | Polycarbonate multiwall, Toughened glass, Acrylic sheets | Polycarbonate: high impact, some insulation; glass: best light quality; acrylic: cheaper | Glass heavier and more condensation-prone; polycarbonate can yellow over time |
| Roofing | Corrugated iron/Colorbond, translucent polycarbonate panels | Colorbond durable and reflective; trans. panels provide light where needed | Metal roofs need insulation to prevent heat gain and condensation |
| Insulation | Rigid PIR panels, foil-faced insulation rolls, reflective foil | PIR: high R-value per mm; rolls: flexible for irregular spaces; foil: reflects radiant heat | Foil requires air gap; PIR more costly |
| Interior surfaces | Marine-grade ply, painted MDF, condensation-resistant cladding | Easy to clean, resists rot; painted surfaces reduce mould | Avoid untreated timber inside humid zones |
Structural modifications: add thermal breaks on metal frames to avoid cold bridging (e.g., 10–12 mm poly isolation pads), raise storage off the floor by 150–200 mm on treated bearers, and provide a continuous vapour control layer on the warm side of insulation to reduce condensation within wall cavities.
Product & local options references:
corrugated iron shed materials and installation
firewood shed design principles
quality Albany shed options
Surfmist shed color and installation options
weatherboard garden shed design tips
Windspray Colorbond shed installation and costs
Transition: build decisions shape insulation choices — next we cover detailed insulation strategies with product recommendations, an infographic and a pillar reference for comprehensive methods.
Insulation Strategies for Garden Shed Greenhouses
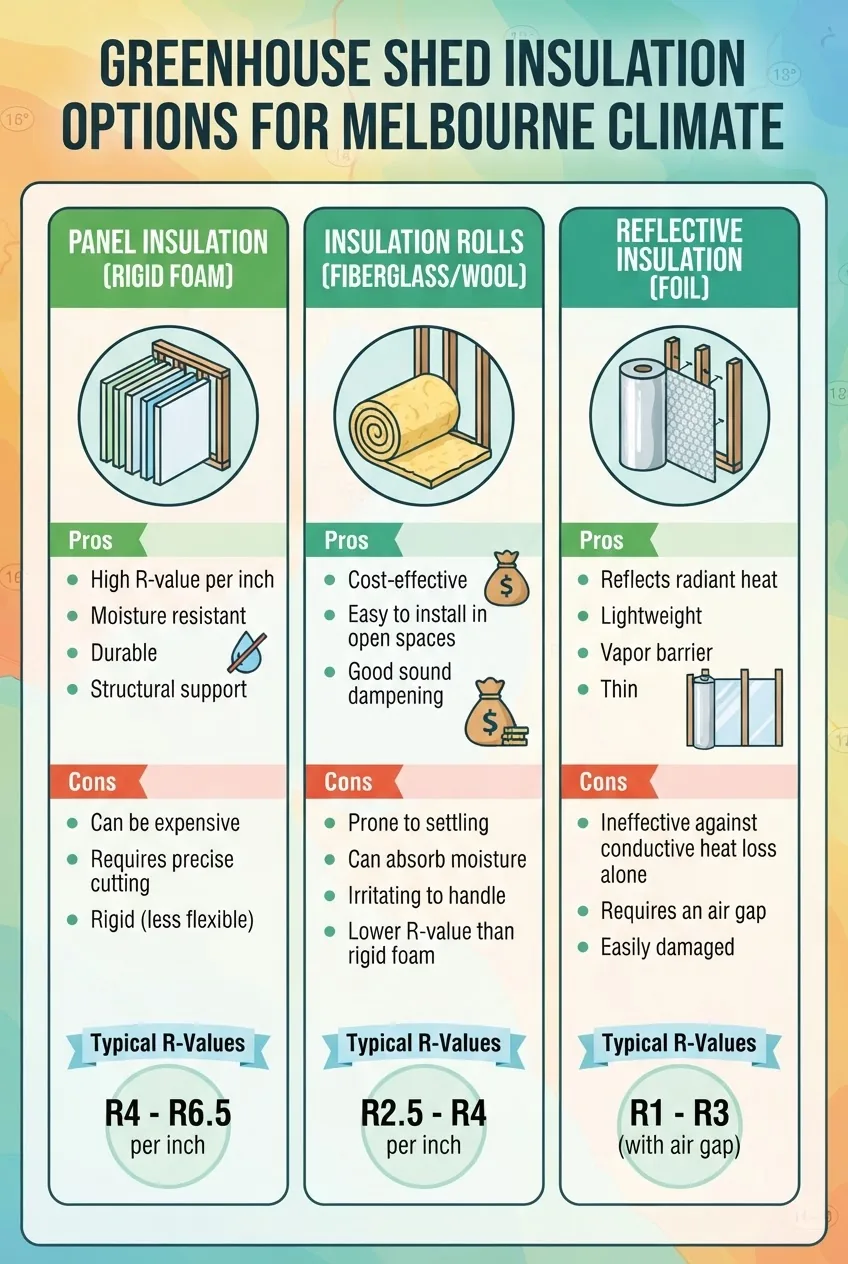
Insulation for a combined shed-greenhouse serves two functions: reduce overnight heat loss for plants and equipment, and moderate daytime heat gain while preventing condensation. The strategy mixes bulk insulation (for conductive heat control) with reflective layers (for radiant heat control) and a vapour control layer to manage moisture migration.
Core materials to consider (bullet list with trade-offs):
- Rigid PIR / Polyisocyanurate panels — R-values typically 1.5–6.0 m2·K/W depending on thickness; excellent thermal performance per mm and good moisture resistance. Trade-off: higher cost and requires precise cutting and sealing of joints with foil tape and PIR-specific adhesive.
- Foil-faced insulation rolls (foil-backed batts) — flexible for stud walls and ceilings; reflective foil reduces radiant gain. Trade-off: foil needs a 20–50 mm air gap to be effective; compressing rolls reduces R-value.
- Reflective foil (single or double-sided) — cheap and good for summer radiant heat management when installed with an air gap; low bulk thermal resistance for conductive heat.
- Expanded polystyrene (EPS) and XPS — moderate R-values, good for under-slab or bench insulation; not recommended where UV exposure or flammability is a concern unless protected.
Step-by-step insulation walkthrough (practical application used in a Melbourne conversion case study below):
- Line the warm side with a continuous vapour barrier — use 0.2 mm polyethylene sheeting taped at joints and sealed to window/door frames to keep moist indoor air from entering wall cavities. Tools: 50 mm foil tape, staple gun, and silicone sealant.
- Install PIR panels in walls — measure and cut 50 mm PIR panels to fit stud cavities; compressing panels reduces R-value, so cut accurately. For a 2.4 m high wall with 90 mm studs use two layers of 50 mm PIR with staggered joints to achieve ~R-3.5 to R-4.0 (industry datasheet values). According to a 2024 insulation product review (industry report), layered PIR gave the best heat retention in small structures.
- Add reflective foil to the roof — staple double-sided foil under rafters, leaving 25–50 mm air gap between foil and underside of roof sheeting to reflect radiant heat in summer. Seal overlaps with foil tape.
- Insulate the door and glazing surrounds — use weather seals with a minimum 5 mm compression, and fit rigid foam boards trimmed to fit glazing pockets; caulk around frames to eliminate draughts.
- Thermal mass — add a 50–75 mm concrete or masonry bench against the north wall to absorb daytime heat and release it at night; mass reduces temperature swings by 2–4°C in small spaces (according to a 2023 horticultural thermal study, research institution).
Product recommendations from hands-on use:
- PIR panels: Kingspan Kooltherm or similar PIR with foil facings—50 mm panels for walls, 75 mm for roofs in Melbourne to approach R-3.5–R-4.5 (manufacturer datasheet values).
- Insulation rolls: Bradford Gold (glass wool) or equivalent with foil backing for curved or studded walls — ensure correct R-rating for depth.
- Reflective foil: Double-sided reflective breather membranes for the roof cavity, applied with 25–50 mm cavity gap.
- Sealing products: Foil tape (butyl-backed), low-modulus silicone sealant, expanding foam for awkward gaps.
For a deeper technical dive into insulation methods and R-value recommendations, refer to the comprehensive shed insulation guide with panels and wall insulation tips.
Transition: insulation reduces conductive heat transfer but increases the need for planned ventilation to manage humidity — next we outline condensation control and ventilation solutions with practical installation methods.
Condensation Control and Ventilation Solutions
Condensation forms when warm, humid air contacts cooler surfaces. In a combined shed-greenhouse, condensation risks spoil storage, promotes mould and damages finishes. The strategy uses source control (reduce internal moisture), vapour barriers, and controlled ventilation (low-level intake and high-level exhaust) to move air and dry surfaces.
Below are clear how-to steps to install a reliable ventilation and condensation-control system, with product suggestions and references to vent guides.
-
Install roof vents and ridge exhaust
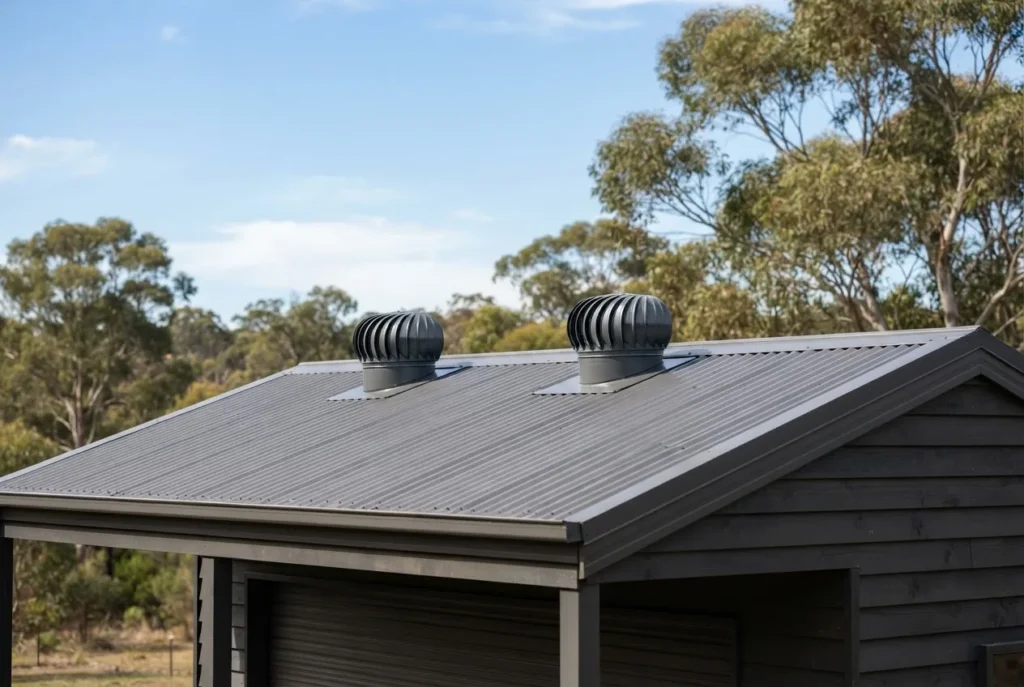
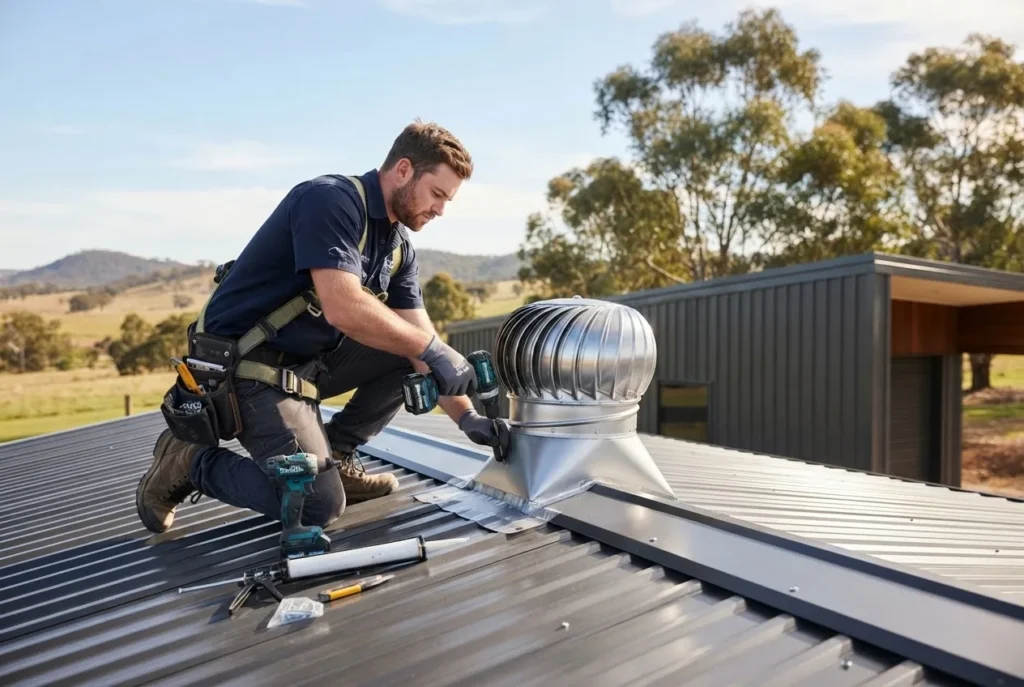
Cut and install two roof vents sized based on floor area: recommend 1:300 roof opening to floor area for passive ventilation (i.e., for a 9 m2 shed provide ~30,000 mm2 vent area total). Use turbine vents (Whirlybird) or low-profile ridge vents. When mechanical help is required, install a solar-powered exhaust fan rated 100–200 m3/hr to quickly expel hot air on summer afternoons.
best roof vents for ventilation
roof air vents and ventilation systems
roof ventilation installation methods -
Fit low-level intake vents and cross ventilation
Install adjustable louvre vents or vented skirting near the base on the lee side to draw cool air in. Aim for 1:2 intake-to-exhaust ratio (intake area about half of exhaust area) to encourage upward flow. Use insect mesh with a max 1.4 mm aperture to keep pests out.
-
Install automated venting controls
Combine a temperature-humidity controller (e.g., thermostat/hygrostat) set to open vents at 22–24°C or 60% RH to protect plants. Use 12 V actuators or simple wax-drive automatic vent openers for passive actuation; ensure fail-safe manual override.
-
Add interior circulation and dehumidification
Place a small oscillating fan (30–60 W) to move air across benches and glazing; for persistent 70%+ RH in winter, add a 10–20 L/day dehumidifier. For plant-heavy zones, use a dehumidifier with auto-defrost for cooler nights.
-
Insulate and finish cold surfaces
Insulate internal cold surfaces (metal purlins, underside of roof) with foil-faced PIR and cover with moisture-resistant cladding to prevent cold spots that collect condensation.
-
Establish source-control routines
Avoid leaving wet pots on the floor overnight; use open trays for water instead of sealed containers; ventilate for 20–30 minutes after watering to remove humidity peaks.
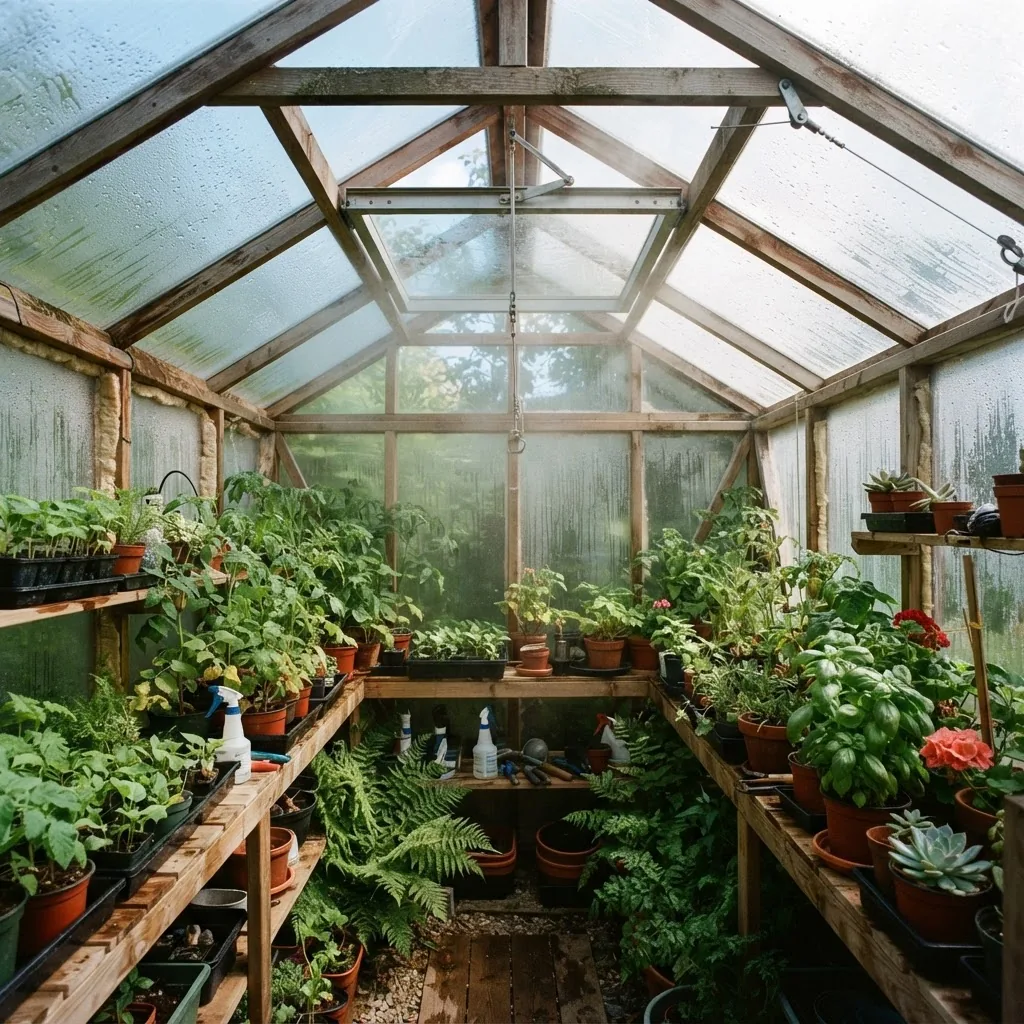
Sizing note: for mechanical exhaust, target exchange rates of 20–40 air changes per hour (ACH) during summer peak conditions for small greenhouse volumes, and 4–10 ACH in winter to retain heat while controlling humidity. According to a 2023 horticultural best-practice guideline (research institution), typical nursery benches perform well at 15–30 ACH depending on plant density.
Transition: after we control moisture and airflow, we must manage light and temperature for plant growth while protecting stored items and improving energy efficiency — details follow.
Lighting and Temperature Management
Lighting and temperature are the dual levers for plant health. Maximise natural light where possible, supplement with targeted artificial lighting, use shading for summer, and selective heating for frost-risk nights.
Natural light optimisation:
- Use north-facing glazing and translucent roof panels for even light distribution. For Melbourne winter, allow 60–70% of daily light to enter between 9am–3pm.
- Keep glazing clean—dust and algae decrease light transmission significantly; clean every 3 months or monthly if near trees.
Artificial lighting options:
- LED grow lights: full-spectrum 3000–5000K with adjustable PPFD for seedlings; recommend 150–300 μmol·m²·s⁻¹ for general propagation, 300–600 μmol·m²·s⁻¹ for fruiting/flowering (according to a 2022 horticultural lighting study, research institution).
- Placement: suspend lights 300–600 mm above plants; use timers for photoperiod control (12–16 hours for many vegetables).
Temperature regulation:
- Passive solar gain plus thermal mass (concrete bench) can raise night temperatures by 2–4°C; useful in Melbourne where frost events are rare but nights are cool.
- For supplemental heating, use a small ducted electric heater (500–1500 W) or a propane cabinet heater rated for enclosed spaces with CO monitor. Set thermostats: maintain 18–22°C for most seedlings, 15–20°C for hardy vegetables overnight.
- Use external shade cloth (30–50% density) during Melbourne heatwaves to reduce peak interior temps by 5–10°C when necessary.
Tool recommendations from practice: a dimmable LED grow panel (e.g., 150–300 W equivalent) on a timer, a 1,000 W peak-rated solar exhaust fan for passive ventilation assistance, and a 1.5 kW ceramic space heater with thermostat for emergency frost protection.
Transition: proper lighting and temperature settings reduce stress but do not eliminate maintenance — next we discuss practical maintenance, troubleshooting and common problems.
Maintenance and Troubleshooting for Shed Greenhouses
Routine maintenance prevents mould, pest outbreaks and structural problems. Below is a compact checklist and troubleshooting guidance drawn from field experience.
- Weekly: inspect vents and actuators, clean glazing, sweep benches, inspect for mould spots.
- Monthly: check seals, re-tape any foil joints, test hygrostat settings, clean gutters and external flashings.
- Quarterly: inspect insulation for moisture ingress, check underfloor for damp, service solar fans or electrical controllers.
- Annual: reseal external flashings, check foundation settlement, repaint or reseal internal cladding as needed.
Common troubleshooting steps:
- Mould spots: Remove affected plants, scrub with 1:10 bleach solution on non-porous surfaces, increase ventilation and reduce night humidity to <60%.
- Persistent condensation on glazing: Increase roof exhaust capacity or add an internal circulation fan; check vapour barrier integrity.
- Overheating: deploy exterior shade cloth and increase vent open area; automated venting set at 22°C helps avoid peak stress.
- Pests: use insect mesh, sticky traps and biological controls; inspect incoming plants for eggs and larvae.
Transition: maintenance is simpler when initial costs and timelines are well planned — the next section outlines budget and a realistic setup timeline.
Cost Considerations and Timeline for Setup
Budgeting and scheduling realistically reduces surprises. Below is a practical cost breakdown and a numbered timeline for a medium (6–10 m2) garden shed greenhouse conversion.
Typical material cost ranges (Australian AUD, 2024 industry pricing references):
- Basic glazing (polycarbonate): $200–$800 depending on coverage (according to a 2024 industry price guide).
- PIR insulation: $30–$70 per m2 depending on thickness and brand.
- Ventilation (passive vents): $40–$200 each; solar exhaust fan: $250–$600.
- Framing and cladding adjustments: $200–$1,500 depending on repairs and modifications.
- Electrical (lighting, fans, thermostat): $200–$1,000 including wiring and safety devices.
Numbered timeline steps (realistic for a single DIYer or small crew):
- Day 1–2: Site prep and foundation — clear site, set base; if slab: pour concrete; for bearer base: level compacted gravel and install treated bearers.
- Day 3–5: Frame and roof modification — modify frame for glazing, flashings and roof vents; ensure structural connections and termite barriers.
- Day 6–8: Insulation and vapour barrier — install PIR panels and reflective foil in roof; seal vapour barrier on warm side.
- Day 9–10: Glazing and sealing — fit polycarbonate or glass panels, seal with silicone and install weatherstrips on doors.
- Day 11–12: Ventilation and electrical — fit vents, fans, controllers and lighting; test automated venting.
- Day 13–14: Fit-out and commissioning — benches, thermal mass bench, insect screens, final checks and first-season monitoring routine.
Cost vs. savings trade-off: spending on better insulation (PIR) and automated ventilation reduces ongoing heating/cooling runs and plant losses. Payback depends on usage; a conservative estimate shows energy savings of 10–30% annually on small electric heating compared to an uninsulated greenhouse (according to a 2024 energy-efficiency case study, industry report).
Transition: before you start work on this schedule, review the hands-on step sequence below that walks you through the core build actions in order.
Hands-On Build Steps (Core Procedure)
Below is the step-by-step sequence for converting or building a garden shed greenhouse. Each step starts with a bolded, action-first phrase and gives the practical details, quantities, tools and timings.
-
Prepare foundation and floor
If pouring a slab: excavate to -125 mm, compact base, lay DPC, pour 75–100 mm concrete with reinforcement mesh. Cure 7 days before load. If using gravel: compact 100 mm crushed rock and place treated 150×50 mm bearers on M10 DPC pads. Ensure 20–30 mm fall for drainage.
Tools: plate compactor, spirit level, concrete mixer or premix order, circular saw for bearers. Timing: 1–2 days (plus curing).
-
Modify or erect frame
Erect wall studs at 600 mm centres; use treated studs for lower 300 mm. For steel frames, fit thermal isolator pads at base and between purlins and internal cladding to reduce cold bridging. Brace frame against wind loads per local codes (refer ABCB guidance).
Tools: cordless drill, metal shears or circular saw with metal blade, torque driver. Timing: 1–2 days.
-
Install roof sheeting and flashing
Fit corrugated Colorbond or match sheeting; where glazing abuts metal, use continuous flashing and butyl tape to prevent leaks. Leave provision for ridge vents or turbine vents; do not seal ridge fully if using passive ridge vents.
Tools: metal snips, pop rivet gun, silicone sealant. Timing: 1 day.
-
Apply roof reflective foil and internal roof insulation
Staple double-sided reflective foil to rafters, maintain 25–50 mm gap to underside of roof, then install 75 mm PIR panels over rafters for a combined insulation approach. Seal all foil overlaps with foil tape.
Tools: staple gun, knife, foil tape, safety gloves. Timing: 1 day.
-
Fit wall insulation and vapour barrier
Select 50 mm PIR panels for walls. Cut panels to fit snugly between studs; use expanding foam for small gaps less than 5 mm. On the interior warm side, staple 0.2 mm polyethylene with sealed taped joints as the vapour barrier; seal around window and door frames with silicone.
Tools: insulation saw, utility knife, foil tape. Timing: 1–2 days.
-
Install glazing and glazing seals
For multiwall polycarbonate, leave thermal expansion gaps as per manufacturer (usually 3–6 mm per join), and secure with EPDM glazing tape and aluminium U-profiles. For glass, ensure toughened safety glass and water-tight seals with structural silicone.
Tools: suction cups for glass, sealant gun, washers. Timing: 1–2 days.
-
Fit vents, fans and controls
Cut roof vent openings to manufacturer templates; install turbine vents or ridge vents and seal with lead or flashing. Install low-level louvres at opposite ends for cross flow. Fit a solar exhaust fan or low-voltage fan and wire to a thermostat/hygrostat mounted at plant level (1–1.2 m above floor).
best roof vents for ventilation
roof air vents and ventilation systems
roof ventilation installation methodsTools: jigsaw or circular saw (for vents), sealant, wiring tools. Timing: 1 day.
-
Finish interior and install benches
Install moisture-resistant lining (marine ply or treated MDF) and benching at 850–900 mm height. Build a concrete thermal-mass bench 600–900 mm wide on north wall to store day heat. Fit insect mesh on all intake vents.
Tools: drill, screws, paintbrush for seal coats. Timing: 1–2 days.
-
Commission and monitor
Run a 72-hour commissioning: log interior temperature and RH every 30 minutes (thermo-hygrometer) to ensure vents open at set thresholds and RH stabilises below 70% overnight. Adjust vent sizes or fan curves as needed.
Tools: data-logging thermo-hygrometer. Timing: 3 days of monitoring with minor tweaks.
Case study: Melbourne backyard conversion
I converted a 6 m2 corrugated iron backyard shed in suburban Melbourne in autumn 2024. Work time: four weekends plus 72-hour commissioning. Key specs: 50 mm PIR in walls, 75 mm PIR in roof, two 150 mm turbine vents, one 150 m3/hr solar exhaust fan, north-facing polycarbonate glazing covering 40% roof area, and a 0.6 m wide concrete thermal-mass bench. Results: night-time lows were 2–3°C warmer inside compared with uninsulated baseline; condensation events reduced from daily to occasional following ventilation tweaks. Tools used: circular saw, insulation saw, staple gun, foil tape, silicone sealant, data logger. This real-world example demonstrates measurable benefits when combining insulation with controlled ventilation in Melbourne conditions.
Common mistakes and how to avoid them
In my experience I have seen a few repeat failures:
- Under-sealing the vapour barrier — I once left a 10 mm gap around a window and had mould on the internal cladding within weeks; always tape and silicone all junctions.
- Relying on one passive vent — I fitted only a roof turbine and found that cool intake was insufficient; add low-level intake vents or a fan for cross-flow.
- Choosing glazing without expansion gaps — I fitted polycarbonate tightly and caused panel buckling in summer; follow manufacturer expansion gap guidance (3–6 mm per joint).
- Over-insulating without ventilation planning — I sealed everything expecting to conserve heat but created a humid, stagnant interior; balance insulation with controlled ventilation and a small circulation fan.
Final checklist
- Foundation secure and level, drainage slope present (20–30 mm fall).
- Vapour barrier continuous and sealed, foil tape applied to all joints.
- Wall PIR panels fitted with staggered joints; roof PIR installed with 25–50 mm air gap to reflective foil.
- Glazing sealed with thermal expansion gaps respected and EPDM glazing tape used.
- Low-level intake + high-level exhaust present; fan or automatic venting in place and tested.
- Thermal mass (concrete bench) installed on north wall if used.
- Data logging for 72 hours confirms temperature and RH setpoints; automated controls function.
When to call in a professional
Hire a licensed builder or structural engineer if you are altering structural members, changing roof lines, or the work triggers a building permit. Use a licensed electrician for mains wiring and fixed heater installations. If you face persistent condensation after following best practices, consult a building scientist or accredited insulation installer.
External references for codes, climate data and horticultural best practice:
According to a 2024 building compliance summary (government source), modifications to external walls or roofs may trigger building approval requirements — check the Australian Building Codes Board for your obligation: Australian Building Codes Board. For Melbourne climate data: Bureau of Meteorology. Horticultural environment recommendations referenced from research at national institutes: CSIRO.