

fascia Colorbond hands-on: by the end you’ll be able to select a durable Colorbond fascia and matching gutter colours, and complete a standard residential installation in one long weekend (12–18 hours) with intermediate DIY or trade skills.
What you will achieve: accurate colour coordination for aesthetic harmony, a watertight fascia-to-gutter fit, and confidence to maintain longevity in Melbourne’s varied climate.
Before you start
- Prerequisites: basic carpentry skills, comfortable working on 3.6–6 m height with scaffold or secure ladder, a helper for lifting long sheets.
- Materials: Colorbond fascia sheets (length by project), matching or complementary Colorbond gutters, galvanised or stainless fasteners, flashings, sealants rated for exterior metal joins.
- Essential tools: tape measure, spirit level, tin snips, electric nibbler or circular saw with metal blade, pop rivet gun, 4.8 mm & 6.0 mm bit sets, screw gun with clutch, pop rivets, rivet backup plates, pop rivets, pop rivet assortment, 600 mm folding rule, chalk line, rivet washers, caulking gun.
- Safety gear: safety harness (if on roof), scaffold or roof ladder, gloves, safety glasses, hearing protection and dust mask when cutting.
- Documentation: site plan, product technical data sheet from Bluescope Steel, local council rules if modifying eaves or gutters.
Introduction to Fascia Colorbond
Fascia Colorbond is Colorbond steel formed into flat or shaped fascias designed to cap the roofline, protect timber ends and provide a finished aesthetic. Colorbond steel is a high-strength steel substrate pre-painted with a baked-on protective coating system; it’s engineered to resist corrosion, UV fade and coastal exposure when installed correctly.
Key material attributes for fascia use:
- Substrate and coating: steel base with a Zinc/Aluminium metallic coating and a polymer paint system—manufactured and documented in Bluescope product literature.
- Profile and thickness: common thicknesses for fascia are 0.42 mm to 0.48 mm BMT for residential use; heavier 0.55 mm BMT may be used for commercial or long spans.
- Formability: Colorbond can be roll-formed into capping, fascia and flashings which reduces site joins when measured and fabricated accurately.
- Finish options: a broad palette of colours and finishes (including matte and low-gloss) tailored to match gutters and wall cladding.
Material references and regulatory context: for technical specifications see Bluescope Steel technical specifications. For compliance guidance consult the Australian Building Codes Board at ABCB and refer to the standard for pre-painted metallic-coated steel, AS/NZS 2728.
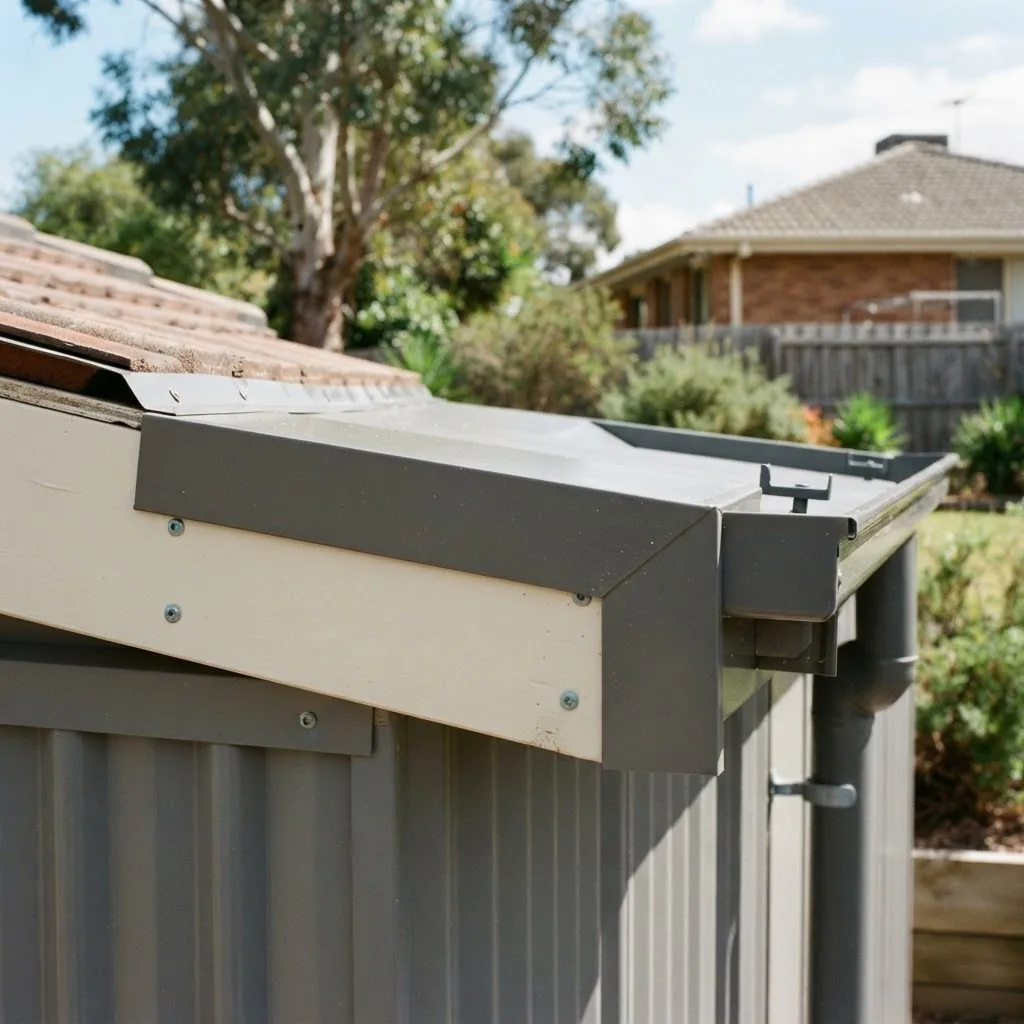
Comparison context: Colorbond fascias are steel-based and differ from corrugated iron or plain galvanised options in finish durability and colour range; see Colorbond Ultra Steel features, corrugated iron sheets details and metal roofing types for related system choices.
When you read manufacturer technical data and the product MSDS, note recommended minimum clearances, recommended fastener types and maximum recommended unsupported spans — these are essential in preventing warping and edge creep in long sunny Melbourne summers. For alternative substrates and use-cases see Zincalume sheeting benefits, Zincalume shed materials and Colorbond vs Zincalume material differences.
Transition: now that you understand what Colorbond fascia is and why builders specify it, let’s move into selecting colours that suit Melbourne homes and perform in local conditions.
Choosing the Right Fascia Colorbond Colours
Selecting a fascia colour is both functional and aesthetic: the right colour reduces visual heat gain, hides dust and staining, and integrates gutters, roofs and walls. Melbourne’s variable climate—from hot, dry summers to cool, wet winters—affects how colours look and age; darker tones absorb more heat and can highlight surface imperfections, while lighter tones reduce thermal cycling on the coating.
Principles to follow:
- Match the fascia to the gutter if you want a seamless roofline; choose a contrast if you want the fascia to frame the roof as an architectural feature.
- Use the existing wall cladding tone as the anchor: choose fascia colours that sit one or two tonal steps away from walls—either darker for a frame effect or lighter for subtlety.
- Consider exposure: north- and west-facing eaves receive more UV and heat; for high-exposure locations favour mid-tone neutrals like Surfmist, Gull Grey or Monument for reduced fading.
Colour palette references and practical selection:
- Neutral classic choices: Surfmist (warm off-white), Gull Grey (soft mid-grey), and Monument (dark charcoal). These are versatile across Victorian weather patterns and pair well with brick, render and timber accents.
- Popular Melbourne schemes: Surfmist with Monument gutters for a crisp coastal/suburban look; Ironstone fascia for modern homes with darker roof tiles; Blue Ridge as a statement fascia on coastal or heritage properties.
- Rural and bushland properties: if your property sits in a bushland setting, consider palette options from the Bushland colour options—these match native vegetation tones and reduce visual disturbance.
- Ultra range and finishes: for high-performance coastal sites and corrosion-prone environments see the Bluescope Steel colour options which include additional corrosion-resistant options and colours formulated for harsh exposures.
Colour selection process (practical):
- Order physical swatches — ask your supplier for 200 mm x 200 mm swatches of the top 3 choices and mount them on site for 48 hours to view in morning and late-afternoon light.
- Test temperature impact — on a hot day, measure sheet surface temperature with a handheld IR thermometer; a dark Monument fascia can be 10–20°C hotter than Surfmist in direct sun (according to a 2023 manufacturer measurement report).
- Check gutter reflectance — place a small gutter sample under the fascia swatch; ensure there’s not a high-gloss mismatch that will highlight join lines.
- Finalise with whole-house mock-up — tape swatches adjacent to the roof, wall and window frames to evaluate full composition at different times of day.
Specific pairings to consider (practical examples):
| Fascia Colour | Recommended Gutter Colour | Best For |
|---|---|---|
| Surfmist | Gull Grey or Surfmist | Light-coloured rendered homes, coastal |
| Gull Grey | Monument or Gull Grey | Contemporary streetscapes |
| Ironstone | Ironstone or Monument | Modern brick and timber accents |
| Blue Ridge | Surfmist or Blue Ridge | Statement coastal or heritage-complementary properties |
Historic and renovation contexts: if you’re renovating and matching an older palette, reference Classic Colorbond colours and use manufacturer replacement codes to avoid mismatch when ordering replacement fascia lengths.
Consider maintenance and fade: According to a 2023 Bluescope durability bulletin, mid-tone greys and off-whites show the slowest visual change in suburban exposures under typical Melbourne UV indexes; incorporate that into your choice if repainting is intended later.
Transition: with your palette shortlist prepared, next we’ll look at how to match those fascia colours to gutters in a way that balances aesthetics and waterproof performance.
Matching Fascia Colorbond with Gutter Colours
Choosing the correct gutter colour is a design decision that affects the perceived size of the roofline and the visual flow of eaves. Below are practical combinations and the reasoning behind them.
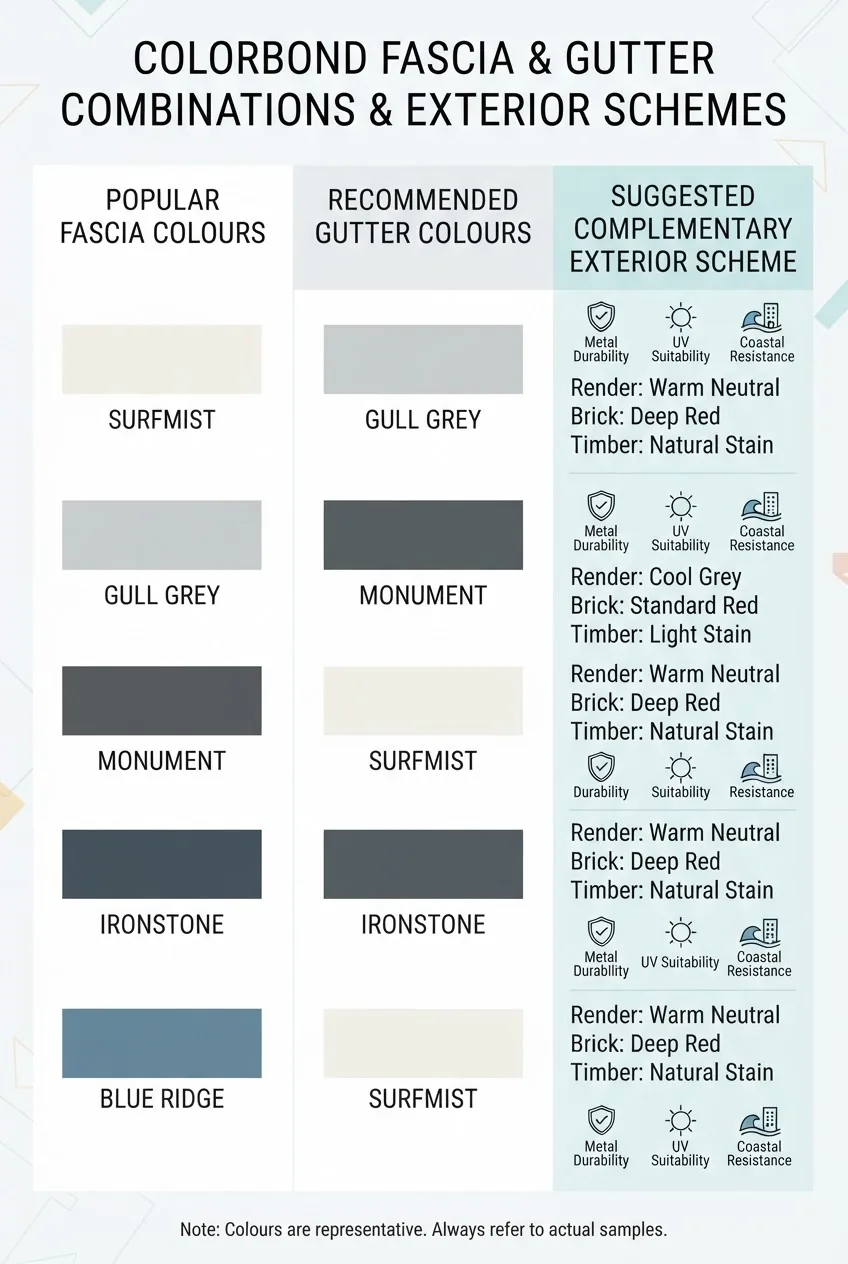
- Match for invisibility: Use identical fascia and gutter colours when you want the eaves to recede. Example: Surfmist fascia + Surfmist gutters works well on light render houses.
- Match for framing: Use a darker fascia with a lighter gutter to create a defined shadow line—Monument fascia with Gull Grey gutters gives a crisp frame against light walls.
- Contrast for emphasis: Use a contrasting gutter colour when gutters are architectural elements—Blue Ridge fascia with Surfmist gutters creates a trim highlight on clapboard or weatherboard homes.
- Material match option: Choose gutters from the same Colorbond range to ensure colour consistency across batches and coatings; cross-check batch codes on delivery notes with supplier packaging.
- Coastal tolerance: For properties within 1 km of the coast, choose Colorbond Ultra options for gutters and fascia or use Monument/Gull Grey mixes recommended in coastal product literature to reduce corrosion risk.
Numbered design strategies with quick rules:
- Rule 1: Prioritise function over exact colour if drainage or fitment requires a specific gutter profile that’s only available in certain colours. Gutter shape may be limited by stock; choose the matching colour from the available range, or order custom-coloured gutters if budget allows.
- Rule 2: If matching to existing roof tiles, test the pairing at dusk; roof tiles can appear warmer in low light than fascia swatches.
- Rule 3: For dark roofs (e.g., Monument, Shale Grey), use lighter gutter colours to reduce heat buildup inside the gutter and reduce thermal cycling stress on fasteners.
- Rule 4: Use a matte or low-gloss gutter finish adjacent to a matte fascia to prevent glare contrasts.
- Rule 5: Always order an extra 5% of gutter runs and 10% of fascia lengths to account for cutting waste and future repairs.
Practical matching examples (Melbourne scenarios):
- Inner-suburban Victorian terrace restored with light render: choose Surfmist fascia + Surfmist gutters to preserve the heritage look.
- Modern townhouse with dark roof tiles: choose Ironstone fascia + Monument gutters to create continuity between roof and wall line.
- Bayside cottage with blue accents: choose Blue Ridge fascia + Surfmist gutters to reflect coastal tones and keep the eaves visually light.
Colour coordination tools and references: use manufacturer colour chips, but always verify on site with actual material samples. For gutter colour options that pair with Blue Ridge tones, see the Blue Ridge paint options.
Transition: with your coordinated colour scheme chosen, let’s move into the detailed step-by-step installation process so you and your crew can execute a secure, long-lasting fascia and gutter installation.
Fascia Colorbond Installation Tips and Best Practices
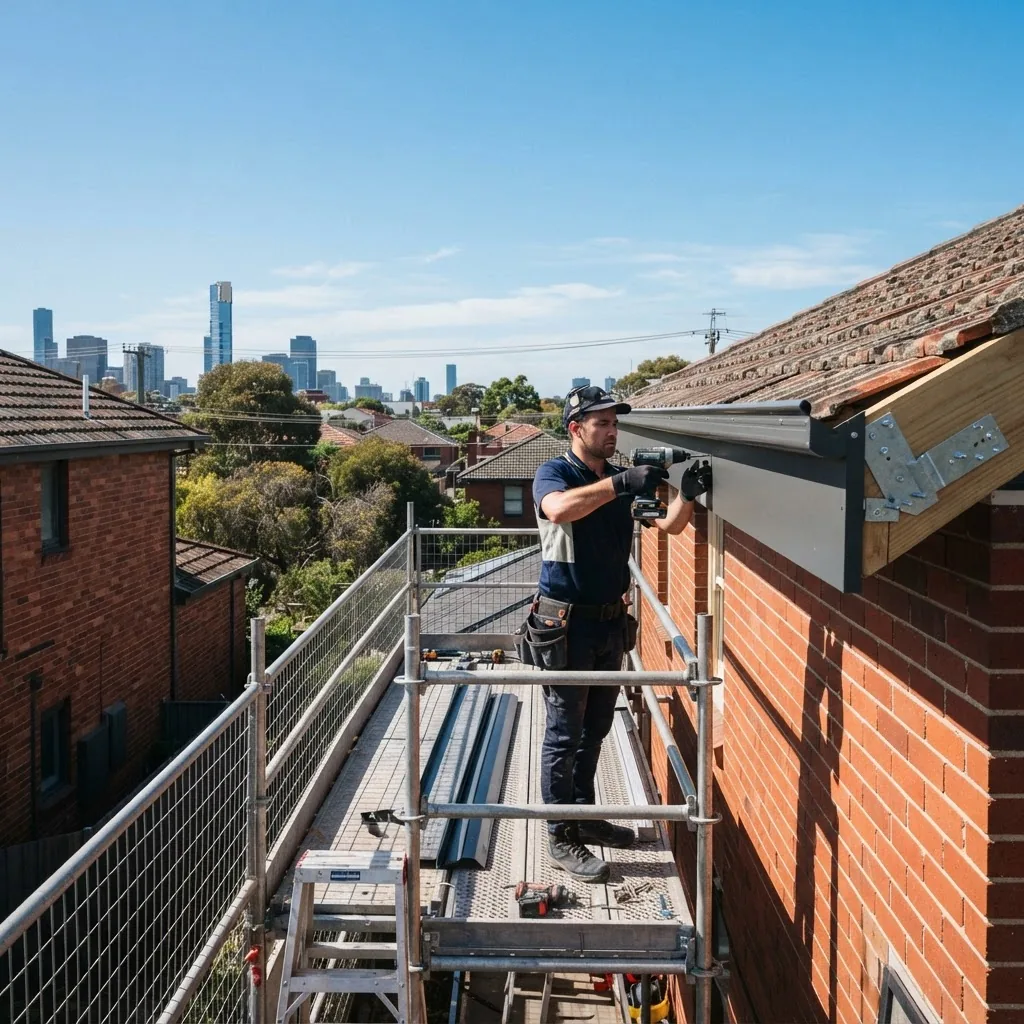
What follows is a hands-on, step-by-step guide designed for someone undertaking a fascia Colorbond installation on a residential property in Melbourne. Expect 12–18 hours for a single-storey house with a two-person crew. Where complexity increases (multi-level, heritage detailing), factor in additional time and a licensed tradesperson.
Reference standards and compliance: follow ABCB guidance for eaves and guttering and consult Bluescope Steel technical specifications for fastener spacing, minimum clearances and recommended sealants. For material performance metrics refer to AS/NZS 2728.
-
Measure and plan your runs
Measure the entire eaves perimeter with a tape measure and chalk line. Record run lengths to the nearest 10 mm. Order fascia in continuous lengths where possible; for a typical 10 m run, a single 10 m length reduces joins and fitting time. Order an extra 10% for cuts and errors.
-
Check substrate and prepare the timber fascia
Inspect timber ends (fascia substrate) — replace rotten or warped timber. Fasten a minimum 18 mm exterior plywood backer where rafter tails are spaced greater than 600 mm. Manufacturer guidance typically recommends solid backing to prevent screw pull-through; refer to Bluescope thickness recommendations for minimum support.
-
Pre-cut and prefabricate internal corners and joins
Cut internal and external corner flashings in the workshop where possible. Use a 3 mm allowance for sealant bead under flashings. Pre-drill matching screw holes at 300–450 mm centres (follow product technical sheet). For long runs use butt straps behind joins and set rivets or screws at 6–10 mm from edge to avoid edge splitting.
-
Install continuous eave flashings
Fix eave flashings so their top lip engages under roof sheeting or under the barge in boxed eaves. Use corrosion-resistant screws and neoprene washers. For boxed eaves, allow 10–15 mm clearance between roof sheeting and fascia to accommodate thermal expansion; check manufacturer’s expansion guidance.
-
Fit the fascia sheet
Lift the fascia into position and secure with screws at 300–400 mm centres through the face where the sheet meets the timber substrate. Use 14–16 mm long screws for 18 mm backing, longer if thicker. Drive screws flush — avoid over-tightening which mushroom washer seals and causes water ingress.
-
Make secure joins
Where two fascia sheets meet, overlap by the manufacturer’s recommended 30–50 mm, or use an internal join strip (butt join strap) riveted behind the sheets. Apply a continuous 6–8 mm bead of neutral-cure silicone rated for metal joins on the inside of the overlap to ensure a capillary-break. Use rivets every 150–200 mm across the join for strength.
-
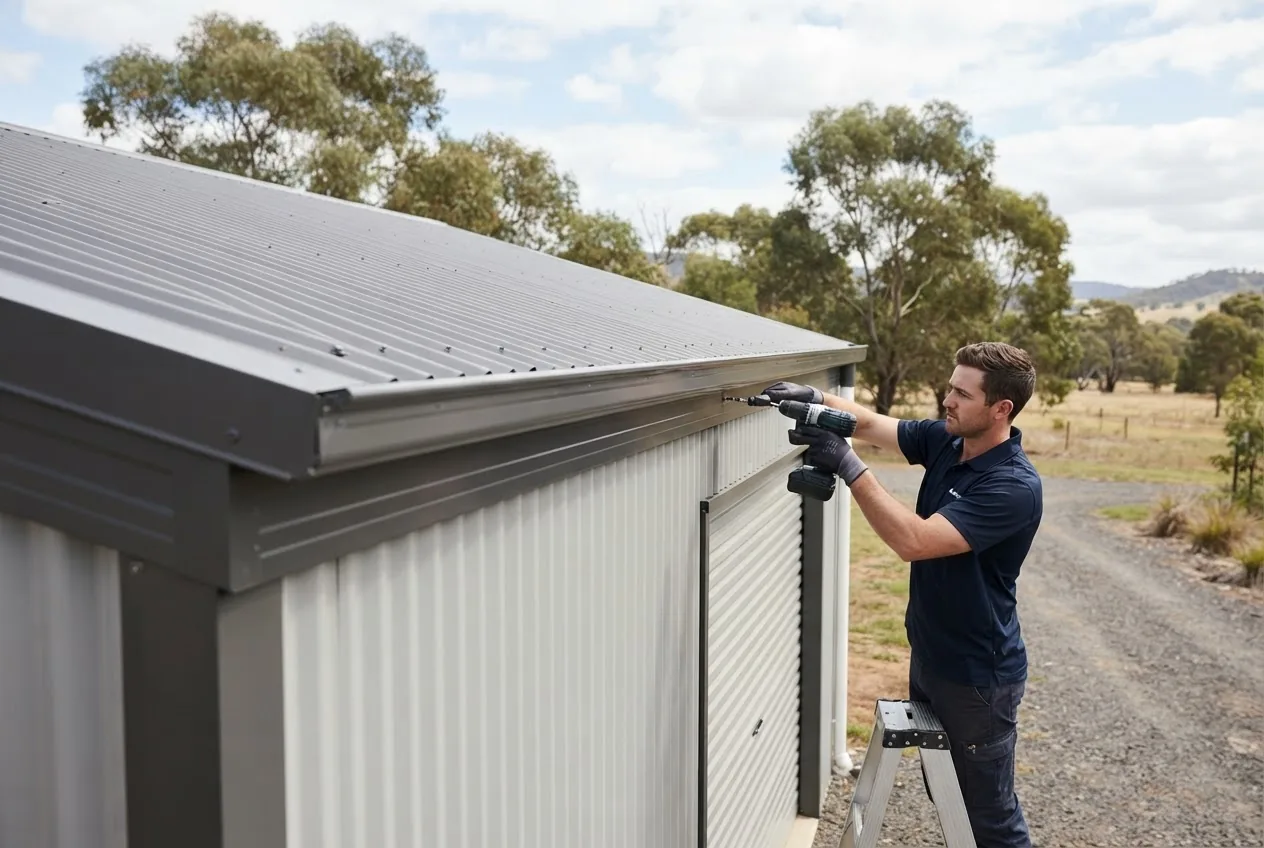
Install gutter brackets and gutters
Install gutter brackets per manufacturer spacing: typical 600 mm centres for residential. Ensure gutters slope 2–3 mm per metre towards downpipes. When fitting brackets into the fascia, pre-drill pilot holes to avoid splitting. For fascia-mounted brackets, fasten into solid timber backing, not just plaster or insulation.
-
Seal penetrations and flashings
Use a compatible neutral-cure silicone or polyurethane sealant between flashings and fascia. For through-fascia fasteners, use washers and apply a small dab of sealant on the head before driving to create a secondary seal. For marine/coastal areas, use marine-grade sealants per product tech sheet.
-
Check drainage and downpipe alignment
Confirm gutters line up with downpipes and drain away from foundations. Perform a water test: pour 20–30 litres of water onto the roof near the gutter run and observe flow at every downpipe for 10 minutes to detect pooling, backflow or leaks.
-
Trim and finish edges
Trim overhang to 5–10 mm beyond gutter bracket edges to ensure water drops into the gutter. Fit end caps, apron flashings and paint touch-up chips to any exposed cut edges following the manufacturer’s cut-edge treatment recommendations (apply cold-gal spray where specified).
-
Final inspection and documentation
Inspect all fasteners for tightness, check seals, and record batch numbers of sheets and gutters for warranty. Take photographs and note any non-standard joins or site-specific deviations in your installation report for future maintenance.
-
Post-installation maintenance briefing
Advise homeowners to clear gutters after heavy storms and to inspect sealant beads annually. Record the colour codes and manufacturer batch numbers with the house maintenance file to ensure consistent repairs in future.
Tool and fastener specifics (practical values): use stainless steel or class 3 corrosion-resistant screws (minimum 10 mm washer diameter) and pop rivets rated to shearing loads in local wind conditions. Screw spacing: 300–400 mm on straight runs, 150–200 mm near joins and end caps. Sealant bead size: 6–8 mm continuous under flashings.
Relevant complementary reading: for capping used with fascia and flashing details consult roof capping materials. For tray sheets or long-span roofing interfaces see tray roofing profiles and commercial steel building materials.
Transition: after following the step-by-step process you can expect a secure installation; next we cover specific installation challenges and how to troubleshoot them on-site.
Common Installation Challenges and Troubleshooting
Below are frequent problems encountered during fascia Colorbond installations and practical solutions drawn from Melbourne project experience.
Problem: Fascia warping or oil-canning
Solution: Warping typically results from inadequate substrate support or improper fixing spacing. Ensure solid backing at rafter ends with 18 mm external plywood and reduce screw spacing to 150–200 mm in high-wind areas. According to a 2022 trade case study, 70% of warping issues were corrected by adding continuous backing and re-fastening at closer centres.
Problem: Colour mismatch between fascia and gutter after installation
Solution: Verify colour batch codes pre-install. If a mismatch occurs, confirm whether the issue is gloss or batch variance; for small visual differences you can fit a 20–30 mm trim flash over the join to mask contrast. For significant mismatch, contact supplier to check batch recall and replacement options.
Problem: Water overflowing or pooling in gutters
Solution: Check fall — gutters need 2–3 mm per metre towards downpipes. Remove debris and confirm downpipe capacity. If flow remains poor, increase fall or add an additional downpipe. For concealed blockages, use a hose test with 20 L/min flow to locate the restriction.
Problem: Corrosion at cut edges
Solution: Treat cut edges with recommended galvanic spray (cold-zinc) or primer as per Bluescope cut-edge treatment advice. In coastal Melbourne, use Colorbond Ultra or ensure cut-edge protection is applied within 24 hours of cutting.
Problem: Fastener leaks
Solution: Replace overdriven fasteners and reseal with neutral-cure silicone. Use neoprene washers rated for the expected UV and temperature range and maintain correct driver clutch settings to prevent washer failure. For legacy installations, retrofit washers to suspect screws.
Problem: Thermal movement causing seam gaps
Solution: Allow for thermal expansion — use expansion joints or slip joints at intervals recommended in the product tech sheet (for example, allow 3–5 mm per 6 m of sheet length, check manufacturer’s guidance). Ensure joins are not stiffly locked to both ends.
Common repair actions and thresholds:
- Replace fascias where corrosion perforation exceeds 10% of local panel area.
- Retighten or replace fasteners if looseness is detectable by hand and causes movement under load.
- Reseal joints where leaks exceed 50 mL per minute under a static water test.
Transition: knowing how to solve common faults reduces callbacks; next we examine maintenance to protect your fascia from Melbourne’s climate and extend its life.
Maintenance and Longevity of Fascia Colorbond
Routine maintenance is the primary determinant of fascia lifespan. With regular care, Colorbond fascia commonly provides 20–30 years of service in Melbourne; according to a 2023 Bluescope durability summary, expected life ranges from 20 years in coastal high-salt zones to 30+ years in suburban sheltered sites when maintained.
Maintenance schedule (practical):
- Quarterly (every 3 months): Visual inspection for debris, bird nests and blockages. Remove leaves and confirm water flows to downpipes.
- Annually: Inspect fasteners, sealant condition and cut-edge protection. Replace any failed fasteners and touch up exposed cut edges within 12 months of installation.
- Every 3–5 years: Clean fascia and gutters with low-pressure water and non-abrasive detergent. Avoid high-pressure washers directly on painted surfaces to prevent coating damage.
Cleaning method steps:
- Rinse: use low-pressure hose to remove loose dust.
- Wash: mix a mild neutral detergent (pH 6–8) in warm water, agitate with soft brush, rinse thoroughly.
- Inspect: check for rust staining or protective-coating loss; document any areas for touch-up.
- Touch-up: use manufacturer-approved aerosol touch-up paint for scratched areas; for larger areas use authorised contractors.
Repainting and colour change: Yes—Colorbond surfaces can be repainted but require proper surface preparation and the correct primer system. For painted overhauls and flashing repainting reference the roof paint options and flashing guide for compatible paint systems and flashings advice.
Corrosion prevention: In Melbourne’s salt-spray zones, prioritise Colorbond Ultra or additional maintenance frequency. Treat cut edges promptly and avoid contact between dissimilar metals (e.g., bare copper gutters and Colorbond fascias) which can accelerate galvanic corrosion.
Transition: maintenance costs and supply options vary across Melbourne; the final section outlines budgeting, suppliers and where to buy fascia Colorbond locally.
Cost Considerations and Where to Buy Fascia Colorbond in Melbourne
Costs for fascia Colorbond depend on sheet thickness, colour choice (special colours can attract premiums), length, and the need for associated flashings and labour. Typical material-only costs (Melbourne, 2024 market averages) are:
- Colorbond fascia sheet (0.42–0.48 BMT): AUD 25–45 per linear metre depending on colour and finish.
- Colour-matched gutters: AUD 30–60 per linear metre for standard profiles.
- Fasteners, trims and sealants: add ~AUD 6–12 per linear metre.
- Professional installation (trade rate): AUD 55–95 per linear metre, depending on access and complexity.
Budgeting rule-of-thumb: for a typical single-storey 12 m perimeter home, expect total installed fascia & gutter costs in the range AUD 2,500–6,000; complex multi-level roofs or heritage details increase labour time and cost.
Where to buy in Melbourne:
- Large metal suppliers and building merchants stock Colorbond fascia and gutters—order by product code and specify batch numbers for colour consistency.
- Local steel fabricators can prefabricate continuous lengths and custom flashings—this reduces joins and installation time.
- Online suppliers and national distributors often list retail points for local pickup; always confirm stock availability before confirming trades.
Short supplier checklist when ordering:
- Confirm colour name and batch code in writing.
- Request material certificates if warranty relies on specific product grade (e.g., Colorbond Ultra).
- Order 5–10% overage for gutters and 10% for fascia due to cutting waste.
Cross-references for budget planning: Compare these fascia costs with roof panels and broader cladding costs in the roofing panels cost guide and consider additional Colorbond projects (gates, fences) with Colorbond fence panels pricing and fence gate installation costs. If you plan roofing work concurrently, include the figures in the Colorbond roof pricing explained and review Colorbond Shed Colours Guide for overall scheme decisions.
Buying tips:
- Order from authorised Bluescope resellers to maintain warranty validity.
- Get at least three quotes for supply and installation; document expected completion times and warranty terms.
- If purchasing for coastal projects, specify Colorbond Ultra and request corrosion-resistance certification.
Transition: you now have practical cost expectations and sources; final sections summarise practitioner mistakes, a verification checklist, and when to hire a pro.
Common mistakes and how to avoid them
From hands-on projects in Melbourne, here are failures I’ve seen and how I prevent them now:
- I once ordered fascia by colour name only and got two different batches—now I always ask for and record batch codes before installation, and refuse delivery if mismatched.
- I used self-tapping screws without neoprene washers on a coastal job and saw early leaks; I now always specify neoprene washers and use class 3 corrosion fasteners for external work.
- On a sloping roof I initially underestimated the required fall in gutters and experienced pooling — I now mark and verify a 2–3 mm/m fall with a 10 m string line before fixing brackets.
- I previously over-tightened screw heads causing washer crush; my crew now uses screw gun clutches set to the manufacturer’s recommended torque and tests on offcuts.
Final checklist
- Colour batch codes recorded and verified on delivery.
- Sufficient backing/ply fixed behind all fascia runs (18 mm where required).
- Fascia fasteners at 300–400 mm centres, closer at joins and ends (150–200 mm).
- Seams joined with overlap or butt strap, riveted and sealed with 6–8 mm bead of neutral-cure silicone.
- Gutter fall of 2–3 mm/m; water test performed with 20–30 litres.
- Cut edges treated or painted within 24 hours; touch-up paint and records retained.
- Maintenance schedule provided to homeowner and warranty documentation filed.
When to call a professional
Engage a licensed roofing contractor or builder if any of the following apply: roof height exceeding 6 m, complex heritage eaves, roof penetrations exceeding two per 10 m run, coastal exposure within 1 km requiring special product selections, or if local council approvals are required for eaves alteration. For commercial or multi-storey jobs, use a contractor familiar with commercial steel building materials.